The table saw sled has a number of advantages, but it’s bulky and not always needed to do smaller things.One might call it an overkill, for example, if all that’s needed is to cut a piece of stock into several smaller pieces.While I would never suggest that a sled is unnecessary, considering the miter gauge to be unnecessary would be just as faulty.The miter gauge is one of the most flexible tools that makes cutting angles simple, but it’s limited beyond that.Let’s add a miter arm that will give us some advanced abilities!
ATTENTION: These plans are yours to use…they are offered as a gift from me to you. You have every right to use them to make this project for yourself, but please, do not sell or give these plans away as your own! I make absolutely no money off of these so I would appreciate those who view these plans to abide by basic copyright laws.
watch all steps in this video before starting
Please use the material and tool list below as a guide to finding the products locally.
As an amazon associate I earn from qualifying purchases.
Step by step instructions
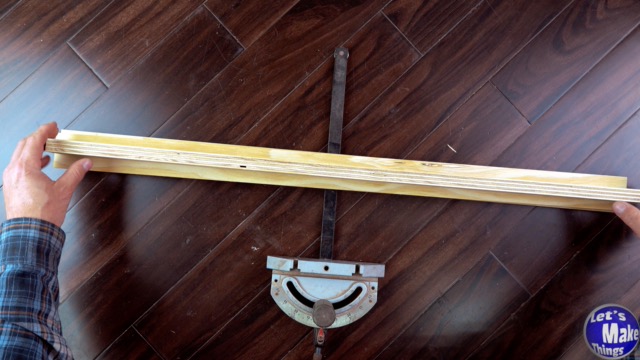
1-1. strip explanation
We’ll be using the plywood with the face side down, laminated together. This is the most stable way to use plywood.
Click image to see this step on youtube
1-2. Laminating the strips
I laminated the strips together with glue. I should have used clamps on the edges. I recommend using clamps to make sure that all 3 boards are straight as they’re being glued.
Click image to see this step on youtube
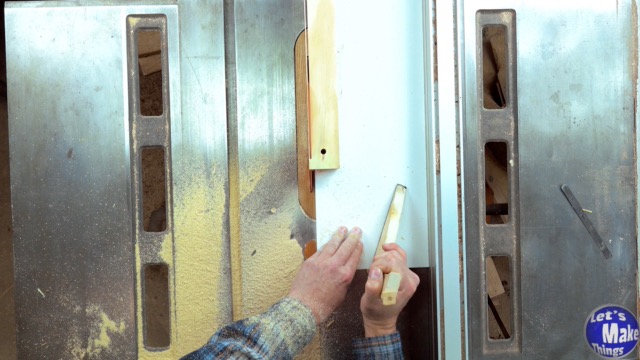
1-3. Squaring up the arm
Because our arm needs to be absolutely square (90˚) on all four sides, I attached the rough arm from 1-2 with double sided tape to a melamine board and squared up two surfaces. Then I detached it and ran it through again with the square edges.
Click image to see this step on youtube
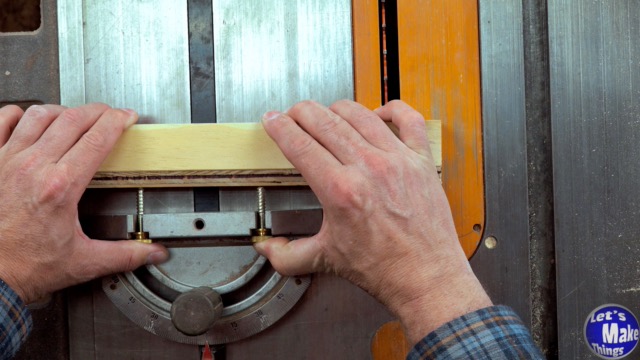
1-4. attaching the fence to the gauge
We’ll attach the gauge to the arm that we made, but it is absolutely critical that there isn’t any play in the miter gauge slot. The miter arm needs to slide back and forth without side to side movement. I found a couple options that I recommend watching…that video is here.
Click image to see this step on youtube
Tip Jar
If you enjoyed or found this useful, throw me a tip →
To support me with patreon, click here → Patreon
Click here to Subscribe to me on youtube → Youtube
If you found any errors on the page, please use my email below and contact me!