If we’re going to use our miter gauge with the newly created miter arm, we need a good stop block system to make repeated cutting easier.The table saw’s fence has this ability…the miter gauge shouldn’t be left out.Besides this, having a t-track on the top will allow us to add jigs in the future with a simple t-bolt and thumb knob…and who doesn’t love expandability?In this chapter, we’re going to add a much needed system to what we created in the past chapter…a really good stop block system!
ATTENTION: These plans are yours to use…they are offered as a gift from me to you. You have every right to use them to make this project for yourself, but please, do not sell or give these plans away as your own! I make absolutely no money off of these so I would appreciate those who view these plans to abide by basic copyright laws.
watch all steps in this video before starting
Please use the material and tool list below as a guide to finding the products locally.
As an amazon associate I earn from qualifying purchases.
Step by step instructions
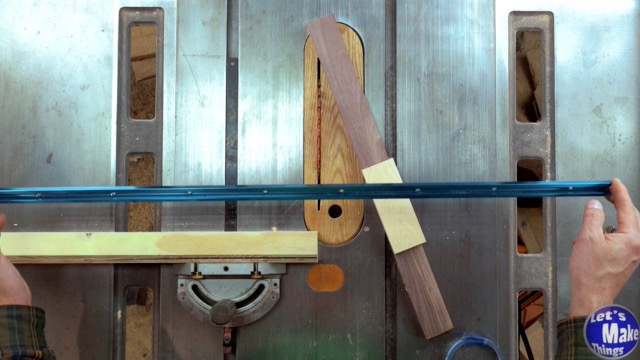
2-1. Stop block materials
To see the full list of materials, check out the materials panel above.
Click image to see this step on youtube
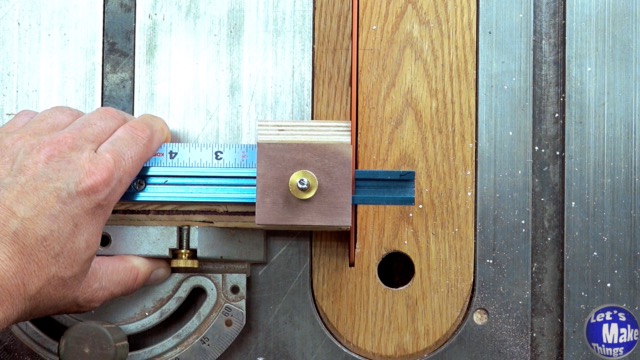
2-2. Profile block
The stop block will need to be able to slide on our track and it will also need to be spaced evenly so that it can sit flush with the front face of the arm. The tape I used was 17/32″ in width…but your spacing may be a bit so be sure to measure your arm exactly.
The t-track was 3/4’s of an inch on mine…so be sure to account for that as well. When you make your cuts, it should slide smoothly over the top without play.
Click image to see this step on youtube
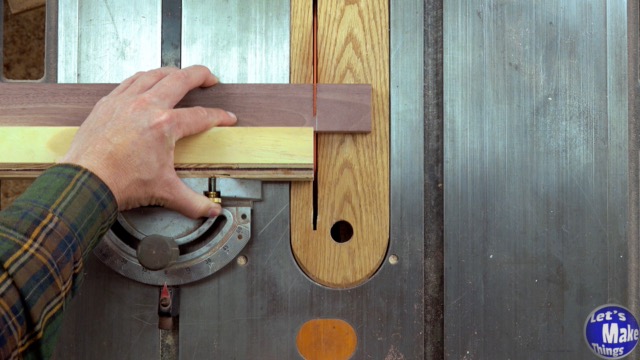
2-3. Attaching the T-track
I used a Self Centering Hinge Bit to center and drill each of the holes out on the top of my miter arm. The important part of this is to get the first hole drilled correctly, add a screw and move on, making sure that your stop block is flush to the front of the arm with each screw. That will give you an excellently spaced t-track that you’ll know is square in the future.
Click image to see this step on youtube
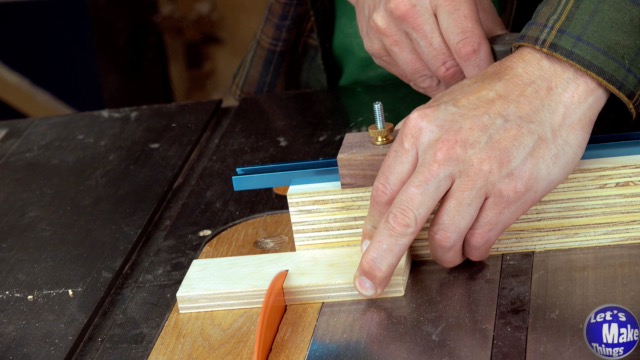
2-4. Finishing the stop block
We’ll add the hardwood/plywood piece to the from of our profile block we made in 2-2. The block needs to be cut to size so that it’s a hair away from the table top as it hangs from the profile block…and I added a small angle to the edge to allow for any sawdust that might build up and cause my piece to push away from the edge.
Finally, I butted the long grains of my hardwood to the front of the plywood face and used clamps to lock everything in place.
Click image to see this step on youtube
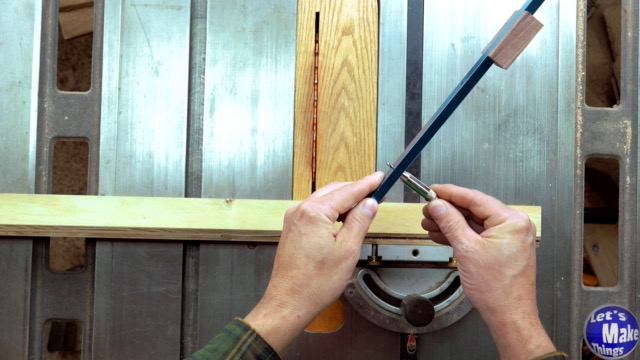
2-5. Adding the tape and cutting to size
Now it’s time to add the tape, but be extra careful that the tape sits right on the cut that was made to square up the arm. We want an exact zero at the edge.
The beauty of this stop block is that we can square up both the front and top of it by skimming the material at the end, next to the blade. If you used an aluminum t-track, you can also square up the edge of that.
Congratulations, you have a miter arm that cost very little to create!
Click image to see this step on youtube
Tip Jar
If you enjoyed or found this useful, throw me a tip →
To support me with patreon, click here → Patreon
Click here to Subscribe to me on youtube → Youtube
If you found any errors on the page, please use my email below and contact me!