Box joint jigs play a crucial role in woodworking for several reasons: They ensure tight-fitting joints, enhancing both structural integrity and aesthetic appeal. They’re quick and make creating a joint very simple. They also allow for the creation of joints of various sizes and configurations, fostering creativity and customization. They provide consistent and reliable results.
The problem with box joints is that they’re not as easy to correct if the joint is too tight or too loose, but in this project, we’re going to create a jig that overcomes that problem. Coupled with the miter arm, we have a few advantages that a normal box joint jig doesn’t have!
ATTENTION: These plans are yours to use…they are offered as a gift from me to you. You have every right to use them to make this project for yourself, but please, do not sell or give these plans away as your own! I make absolutely no money off of these so I would appreciate those who view these plans to abide by basic copyright laws.
watch all steps in this video before starting
Please use the material and tool list below as a guide to finding the products locally.
As an amazon associate I earn from qualifying purchases.
Step by step instructions
1. Important notes
This entire project connects to the miter arm, so if you have no interest in building the miter arm, it’s totally understandable. You can modify what I created with the miter arm to suit this project (and your needs) or you can go with my bitesize 173 method which only requires a miter gauge and a piece of stock. You can find that video here. There’s a follow up video that goes with that video here.
Click image to see this step on youtube
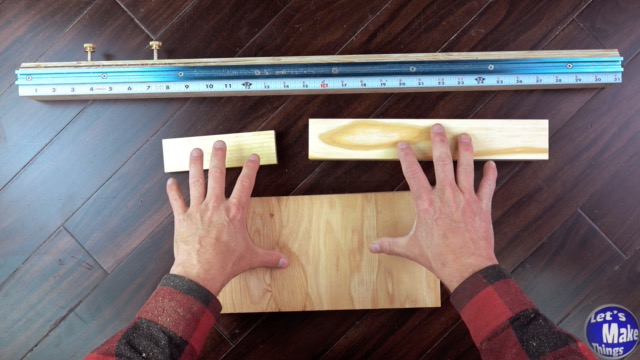
2. Improvising
We will be using some thick stock for this project (1 3/4″ x 2″ x 12″), which is not an easy buy unless you know a mill. To make my pine block, I used (2) 1 1/2″ x 2″ pieces of construction pine (from a 2×4), laminated together.
Click image to see this step on youtube
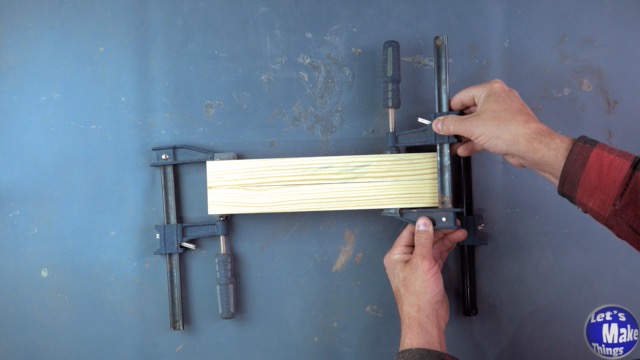
3. Adding channel for the t-track
Like the stop block, we’ll need to add a t-track slot that our jig will slide onto. My track is 3/8’s of an inch in thickness and 3/4 inches wide, your track might differ from mine slightly. All we need to do to finish this step is to cut the groove out.
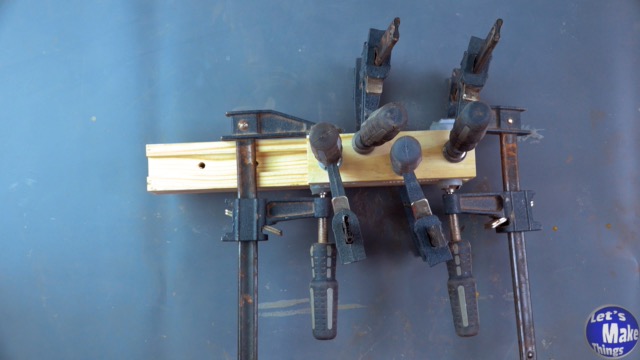
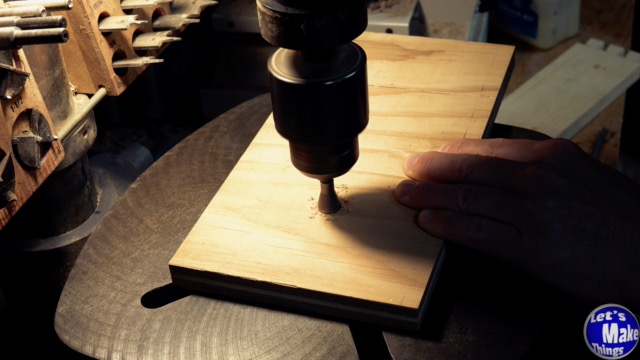
4. Jig body work
In this step we’ll add holes that will connect our t-bolts, to the jig, to the t-track. I chose to add two holes, you may choose to do just one. We’ll add the 6 inch bottom, which will act as a positive stop so that we know that our jig is connected in the right place on the miter bar, by using wood glue. I did use a 3/4″ thickness, but you can go down as low as a 1/4″ if you want.
To finish the jig off, I added two holes, 3 inches from either side of the jig, a quarter inches in diameter. Those holes will need to be countersunk for the 1/4″ machine screws. In the material listing, I mentioned buying the bolts locally. You don’t need stainless steel, and you certainly don’t need 15 machine screws in all. You can get a two for less than a couple bucks (I hope!).
Click image to see this step on youtube
Click image to see this step on youtube
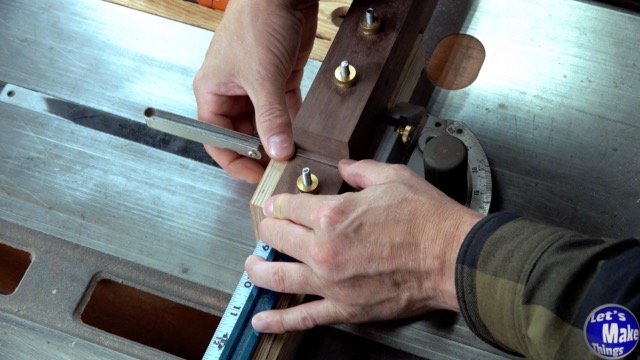
5. Building the fence
In this project, I used scrap 3/4″ plywood…and really bad plywood at that. You don’t need anything special. This stuff was painted white at one point and tossed on someone’s curb. Perfect for what I’m doing here.
You’ll need 3/4″ plywood that’s 6 inches by 12 inches. With a brad point bit that’s a 1/4″ in diameter, we’ll push it through the jig (that should be attached to the miter arm) to make our marks. Both holes will be drilled out and countersunk drilled for the machine screw heads.
Click image to see this step on youtube
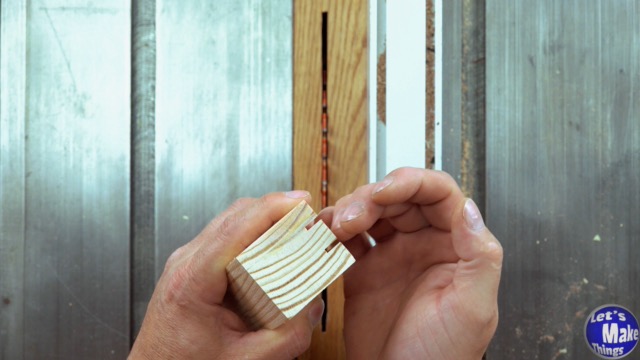
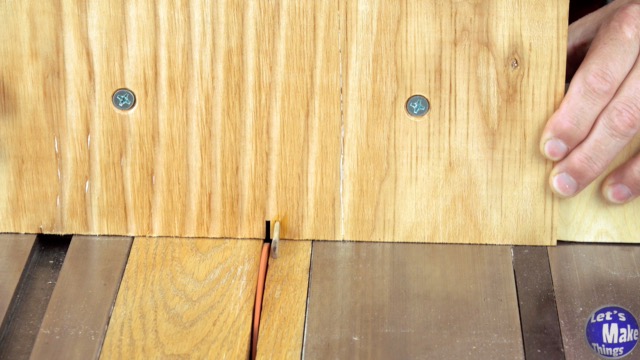
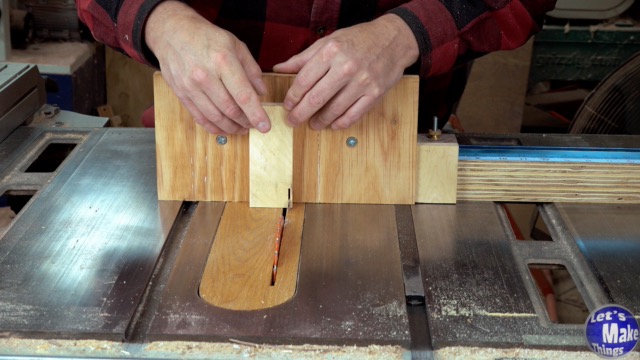
6. Keys and calibration
Depending on the thickness you plan on using for your box joints, you’ll need a strip of wood that’s that thickness. My blade is 3/32″ of an inch, so I cut a strip of wood that was 12″ long and about 3/8’s wide (3/32″ x 3/8″ by 12″). I cut a piece off that was about an inch and a half long and set it aside…this will be my box joint key.
Next I cut two more pieces from that stick and used them (the thickness) to calibrate my jig. The stop block was pressed up against the jig, locked in place, the jig was loosened and the pieces inserted next to the stop block (which was then locked). Then I ran my jig through the blade, added glue to the first piece that I set aside earlier, and inserted.
Click image to see this step on youtube
7.Basic operation
Please click on the image connected with this step to learn more.
Click image to see this step on youtube
8. Troubleshooting tips
Please click on the image connected with this step to learn more.
Click image to see this step on youtube
Tip Jar
If you enjoyed or found this useful, throw me a tip →
To support me with patreon, click here → Patreon
Click here to Subscribe to me on youtube → Youtube
If you found any errors on the page, please use my email below and contact me!
Box joint jigs play a crucial role in woodworking for several reasons: They ensure tight-fitting joints, enhancing both structural integrity and aesthetic appeal. They’re quick and make creating a joint very simple. They also allow for the creation of joints of various sizes and configurations, fostering creativity and customization. They provide consistent and reliable results.
The problem with box joints is that they’re not as easy to correct if the joint is too tight or too loose, but in this project, we’re going to create a jig that overcomes that problem. Coupled with the miter arm, we have a few advantages that a normal box joint jig doesn’t have!
ATTENTION: These plans are yours to use…they are offered as a gift from me to you. You have every right to use them to make this project for yourself, but please, do not sell or give these plans away as your own! I make absolutely no money off of these so I would appreciate those who view these plans to abide by basic copyright laws.
watch all steps in this video before starting
Please use the material and tool list below as a guide to finding the products locally.
As an amazon associate I earn from qualifying purchases.
Step by step instructions
1. Important notes
This entire project connects to the miter arm, so if you have no interest in building the miter arm, it’s totally understandable. You can modify what I created with the miter arm to suit this project (and your needs) or you can go with my bitesize 173 method which only requires a miter gauge and a piece of stock. You can find that video here. There’s a follow up video that goes with that video here.
Click image to see this step on youtube
2. Improvising
We will be using some thick stock for this project (1 3/4″ x 2″ x 12″), which is not an easy buy unless you know a mill. To make my pine block, I used (2) 1 1/2″ x 2″ pieces of construction pine (from a 2×4), laminated together.
Click image to see this step on youtube
3. Adding channel for the t-track
Like the stop block, we’ll need to add a t-track slot that our jig will slide onto. My track is 3/8’s of an inch in thickness and 3/4 inches wide, your track might differ from mine slightly. All we need to do to finish this step is to cut the groove out.
4. Jig body work
In this step we’ll add holes that will connect our t-bolts, to the jig, to the t-track. I chose to add two holes, you may choose to do just one. We’ll add the 6 inch bottom, which will act as a positive stop so that we know that our jig is connected in the right place on the miter bar, by using wood glue. I did use a 3/4″ thickness, but you can go down as low as a 1/4″ if you want.
To finish the jig off, I added two holes, 3 inches from either side of the jig, a quarter inches in diameter. Those holes will need to be countersunk for the 1/4″ machine screws. In the material listing, I mentioned buying the bolts locally. You don’t need stainless steel, and you certainly don’t need 15 machine screws in all. You can get a two for less than a couple bucks (I hope!).
Click image to see this step on youtube
Click image to see this step on youtube
5. Building the fence
In this project, I used scrap 3/4″ plywood…and really bad plywood at that. You don’t need anything special. This stuff was painted white at one point and tossed on someone’s curb. Perfect for what I’m doing here.
You’ll need 3/4″ plywood that’s 6 inches by 12 inches. With a brad point bit that’s a 1/4″ in diameter, we’ll push it through the jig (that should be attached to the miter arm) to make our marks. Both holes will be drilled out and countersunk drilled for the machine screw heads.
Click image to see this step on youtube
6. Keys and calibration
Depending on the thickness you plan on using for your box joints, you’ll need a strip of wood that’s that thickness. My blade is 3/32″ of an inch, so I cut a strip of wood that was 12″ long and about 3/8’s wide (3/32″ x 3/8″ by 12″). I cut a piece off that was about an inch and a half long and set it aside…this will be my box joint key.
Next I cut two more pieces from that stick and used them (the thickness) to calibrate my jig. The stop block was pressed up against the jig, locked in place, the jig was loosened and the pieces inserted next to the stop block (which was then locked). Then I ran my jig through the blade, added glue to the first piece that I set aside earlier, and inserted.
Click image to see this step on youtube
7.Basic operation
Please click on the image connected with this step to learn more.
Click image to see this step on youtube
8. Troubleshooting tips
Please click on the image connected with this step to learn more.
Click image to see this step on youtube
Tip Jar
If you enjoyed or found this useful, throw me a tip →
To support me with patreon, click here → Patreon
Click here to Subscribe to me on youtube → Youtube
If you found any errors on the page, please use my email below and contact me!