In this article, I’ll show you how to make a simple yet highly effective clamping aid for picture frames and small mitered projects. Inspired by an old woodworking book, I originally came across a technique using notched boards to hold frames together. While it worked well, it had a limitation—you’d need to cut new boards every time you changed frame sizes. So, I decided to come up with a more flexible, adjustable version that lets you use the same jig for any frame size.
This DIY clamping aid is built from a few pieces of plywood, a groove with t-track, and a couple of blocks to keep everything locked in place. It securely clamps each corner with only two clamps, holding the angles just right for a clean, tight fit every time. It’s a quick project, but it’s now my go-to solution for clamping frames without needing any expensive corner clamps. Perfect for anyone looking to save money and make use of scrap wood.
Follow along to see how it’s done, and add this practical tool to your woodworking setup!
ATTENTION: These plans are yours to use…they are offered as a gift from me to you. You have every right to use them to make this project for yourself, but please, do not sell or give these plans away as your own. I make absolutely no money off of these so I would appreciate those who view these plans to abide by basic copyright laws.
As an amazon associate I earn from qualifying purchases.
Step by step instructions
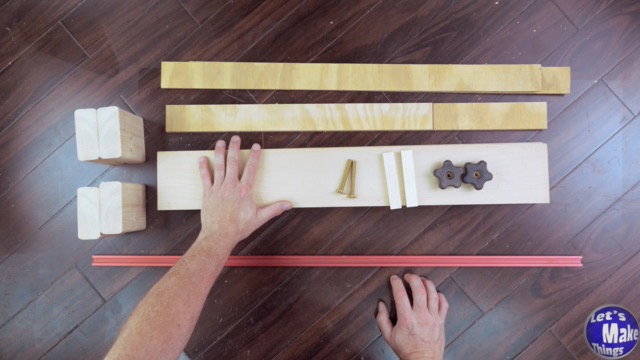
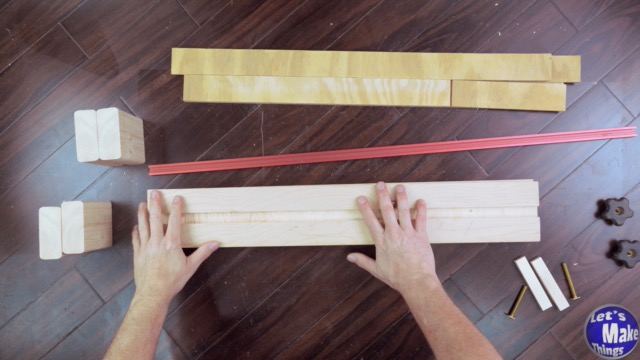
1. Materials
Materials are pretty straight forward. You could use a t-track in the middle of the plywood and it would work much more quickly than my method, but at twenty bucks for a pair of t-tracks, we can easily make our own with 1/4″ plywood. You will need t-bolts and knobs, whether your make the t-track or buy it.
Click image to see this step on youtube
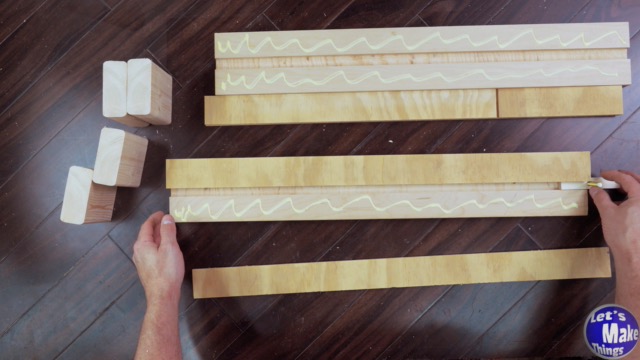
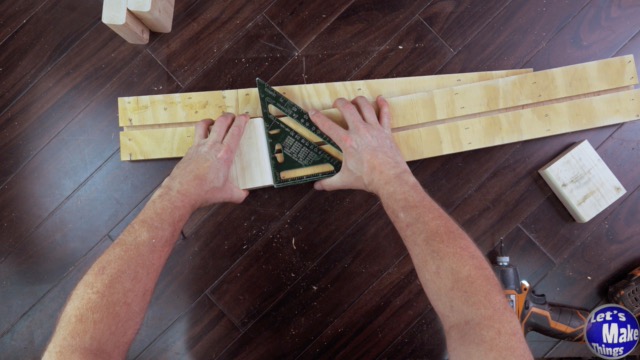
2. Plywood tracks
In this step we’ll make a track down the center by flipping our stock after each cut (first finding center with the blade). The depth needs to be slightly deeper than 3/8’s and slightly wider than t-tracks…or 3/4’s of an inch. If I were going to put an exact width and depth, I’d say 13/32″ deep and 13/16″ deep: we do want this to slide easily when we’re done.
Click image to see this step on youtube
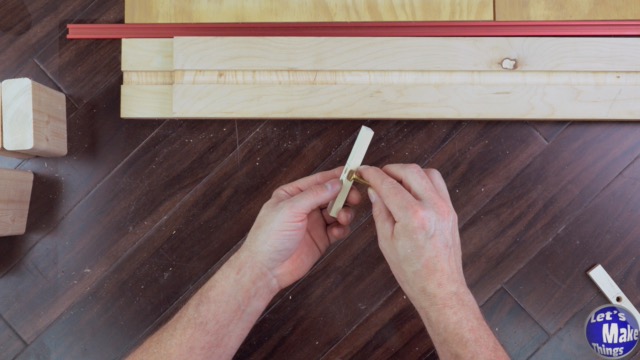
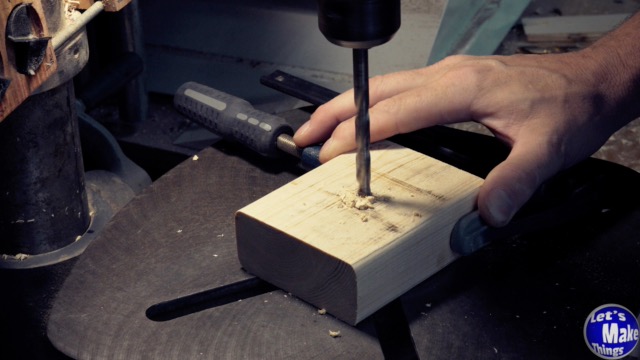
3. Locking blocks
The locking blocks needs to be 3/8’s of an inch in thickness and 3/4’s of an inch wide by at the most 4 inches long. If you find later that your piece is not sliding well in the track, a little sandpaper on either the width or the thickness will allow it to move better.
You’ll need to draw an X with the diagonals to find center and drill a hole out at the diameter of your bolts.
To account for the t-bolt head, I cut a gap at the top of the block to allow it to fit inside.
Click image to see this step on youtube
4. Homemade t-tracks
The tracks are simple. I used 1/4″ plywood sheathing, but you could use panel or even thick hardboard and it wouldn’t be a problem. I used glue and staples to quickly put it together but you could just use glue and clamp it down. Be sure to add the locking blocks and the bolts to space the boards, and then to remove the locking blocks so that they don’t get glued in.
Click image to see this step on youtube
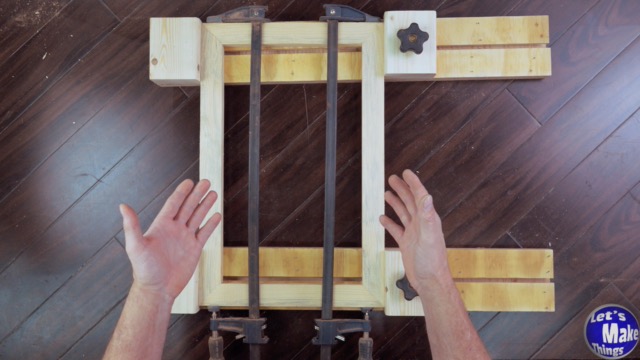
5. Static blocks
The static blocks are just 2×4 blocks cut to the width of the clamp aid. I screwed one screw in from the back and used a square to line it up to the rest of the track before adding 3 more screws.
Click image to see this step on youtube
6. Moveable blocks & wax
The moveable block is exactly the same as the static block except we’ll add a hole in the direct center of it by connecting our diagonals and drilling it to the diameter of your t-bolts.
I added wax to the track top to prevent gluing my frames to it. I would recommend adding it to both the static and moveable blocks as well.
Click image to see this step on youtube
7. Demonstration
Click the image to see the demonstration for this. I used painters tape in the demonstration when gluing up my frame and highly recommend doing it every time to prevent any glue squeeze out problems in the future.
Thanks for visiting the website!
Click image to see this step on youtube
Tip Jar
If you enjoyed or found this useful, throw me a tip →