Card scrapers work incredibly well…they just don’t feel like it while you’re using them. Between holding the angle, bending the blade, and pushing with your thumbs, it can quickly become uncomfortable.
This yoke scraper fixes that.
It holds the blade at the right angle, gives you a solid grip, and lets you push instead of fight the tool. The result is a smoother, more controlled cut without the strain.
Made from basic materials and simple hardware, this is a build anyone can tackle. Keep it as a straightforward scraper holder, or take it a step further by adding camber for an even cleaner finish.
ATTENTION: The below plans are yours to use…they are offered as a gift from me to you. You have every right to use them to make this project for yourself, but please, do not sell or give these plans away as your own. I make absolutely no money off of these so I would appreciate those who view these plans to abide by basic copyright laws.
As an amazon associate I earn from qualifying purchases.
Step by step instructions
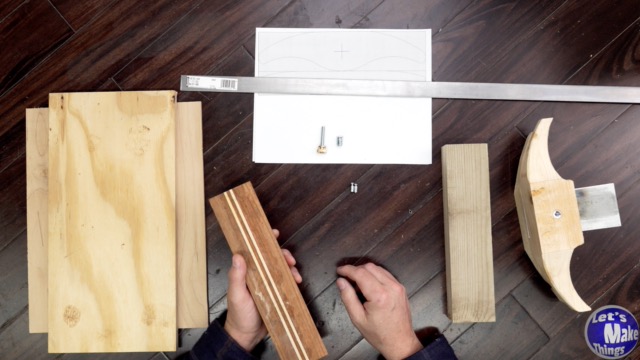
1. Materials
You can very easily make this project with a 2 x 4 but I encourage using nicer woods. It’ll make using it feel like a million bucks when you’re done.
Along with the main body, you can find all the other materials above, along with a pattern for the body. You should be able to get all of this locally.
I’ve also included a scraper purchase link that will work with this build in the tools needed and used section.
Click image to see this step on youtube
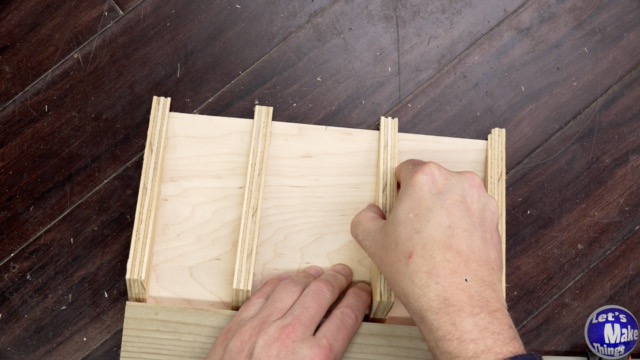
2. Sled for a sled
The first thing we need to build is a sled that will shape the underside as well as allow us to drill our screws in at 90˚’s.You’ll basically cut 4 angled pieces of wood that will slope the sled at about 18˚.Afterwards, use hot glue to attach it to a piece of plywood…along with a toe bar that will keep the yoke lined up on the angles.
Click image to see this step on youtube
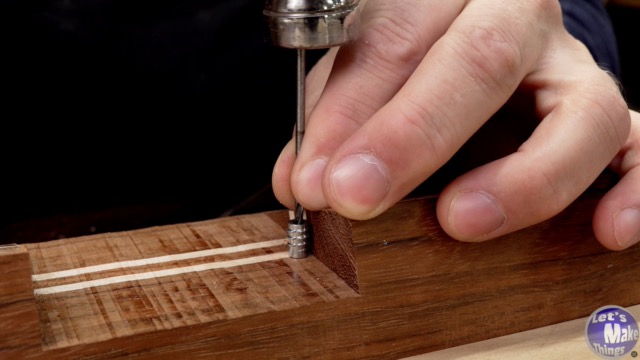
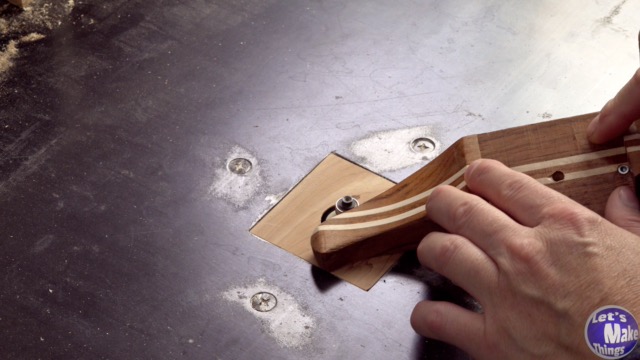
3. Cutting and threading the slope
With the sled complete, we’ll attach the main body using double sided tape.You’ll mark the stock from the center out to be the size of your scraper, plus the width of your threaded insert. Afterwards, you’ll need to add it to a table saw sled.The blade will reach up to the end of the block which will give you a perfectly carved out space for the scraper later on.And then it’s a matter of making several cuts.
Finally, by flipping the stock and placing it back on the sled so that the cut area is parallel to the table top, we can drill out each of the holes for our threaded inserts.
Click image to see this step on youtube
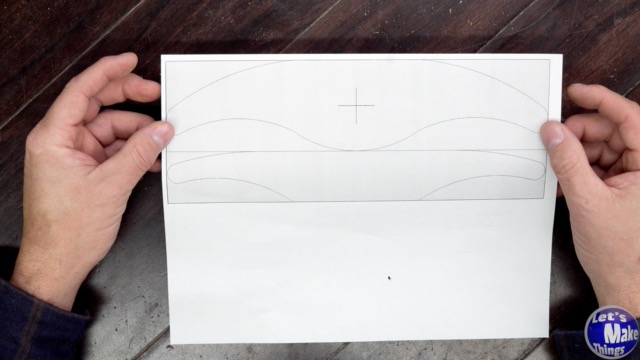
4. Pattern & Cutting
I created the pattern so that you only need to make a few cuts. The body folds in half and both sides fit on your block. You could any number of glue types to attach it but wood glue works just fine. I used a glue squeegee to cover the faces and then added the template.
You can find the template above.
Click image to see this step on youtube
5. Cleanup
In the included video I showed how I cleaned up my yoke. I used a belt sander, a router (with a corner round), a scraper and an random orbital sander. If you have files, those would work as well.
Click image to see this step on youtube
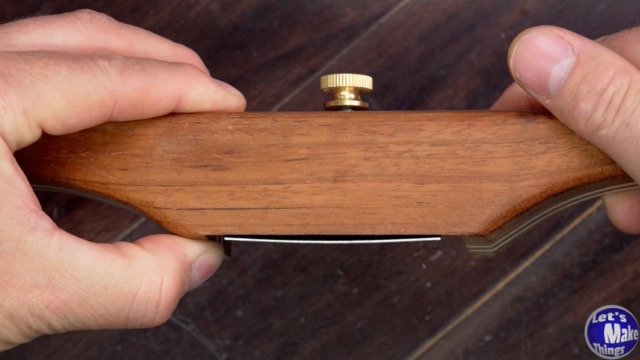
6.Why camber
Your yoke is pretty much finished. I used a couple #6 washers, grounded slightly on one edge, to hold the scraper down. Two #6 x 1/2″ screws were enough to work as the latches.
While this method will work, adding a bolt through the top will allow the blade to camber, or bend so that the corners don’t dig into the stock.
For more information, click on the attached image.
Click image to see this step on youtube
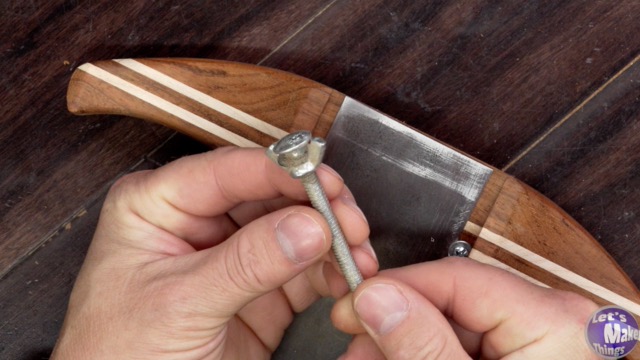
7.Camber screw
The camber screw can be a machine screw and a machine screw only. I wanted to use a knurled thumb knob as it gives the tool a glow. But if you don’t mind using a screw driver to camber the blade, you don’t need anything more than a 1/4″ x 1 3/4″ machine screw.
Pictured is an example of a wing nut that’s been epoxied onto a bolt, which is another option.
Click image to see this step on youtube
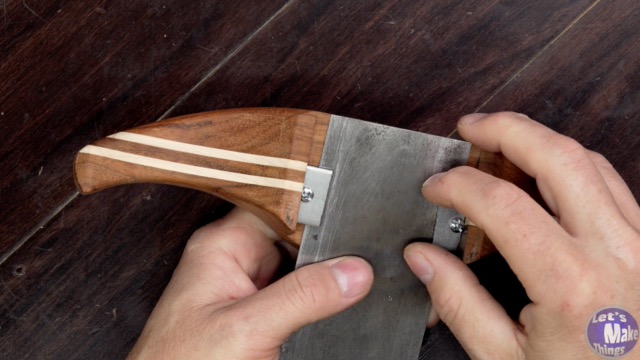
8.Screw braces
Because we are lifting the metal in the center, we need to balance the edges. To do this, I used a couple pieces of flat steel with a hole drilled in it on the edge, very similar to the #6 washer I talked about in step 6.
It’s worth noting that if you cut longer pieces, you can clamp narrower card scrapers inside of the yoke.
Click image to see this step on youtube
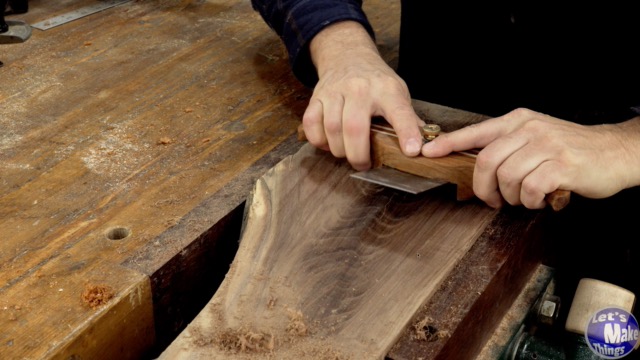
9.Using it
To use it, I place my index fingers on either side of the yoke and my thumbs on the back. I place it on the surface and push forward. It takes very little effort and takes the stress off of the hands that the plain steel puts on it.
Click the image to see the step in beautiful youtube vision.
Click image to see this step on youtube
Tip Jar
If you enjoyed or found this useful, throw me a tip →