
Nesting Finish Blocks
Finish projects without waiting for each side to dry. These are comparable to the rockler cones, but they’ll cost you pennies to make!
We’ll be covering everything in this video, on this webpage.
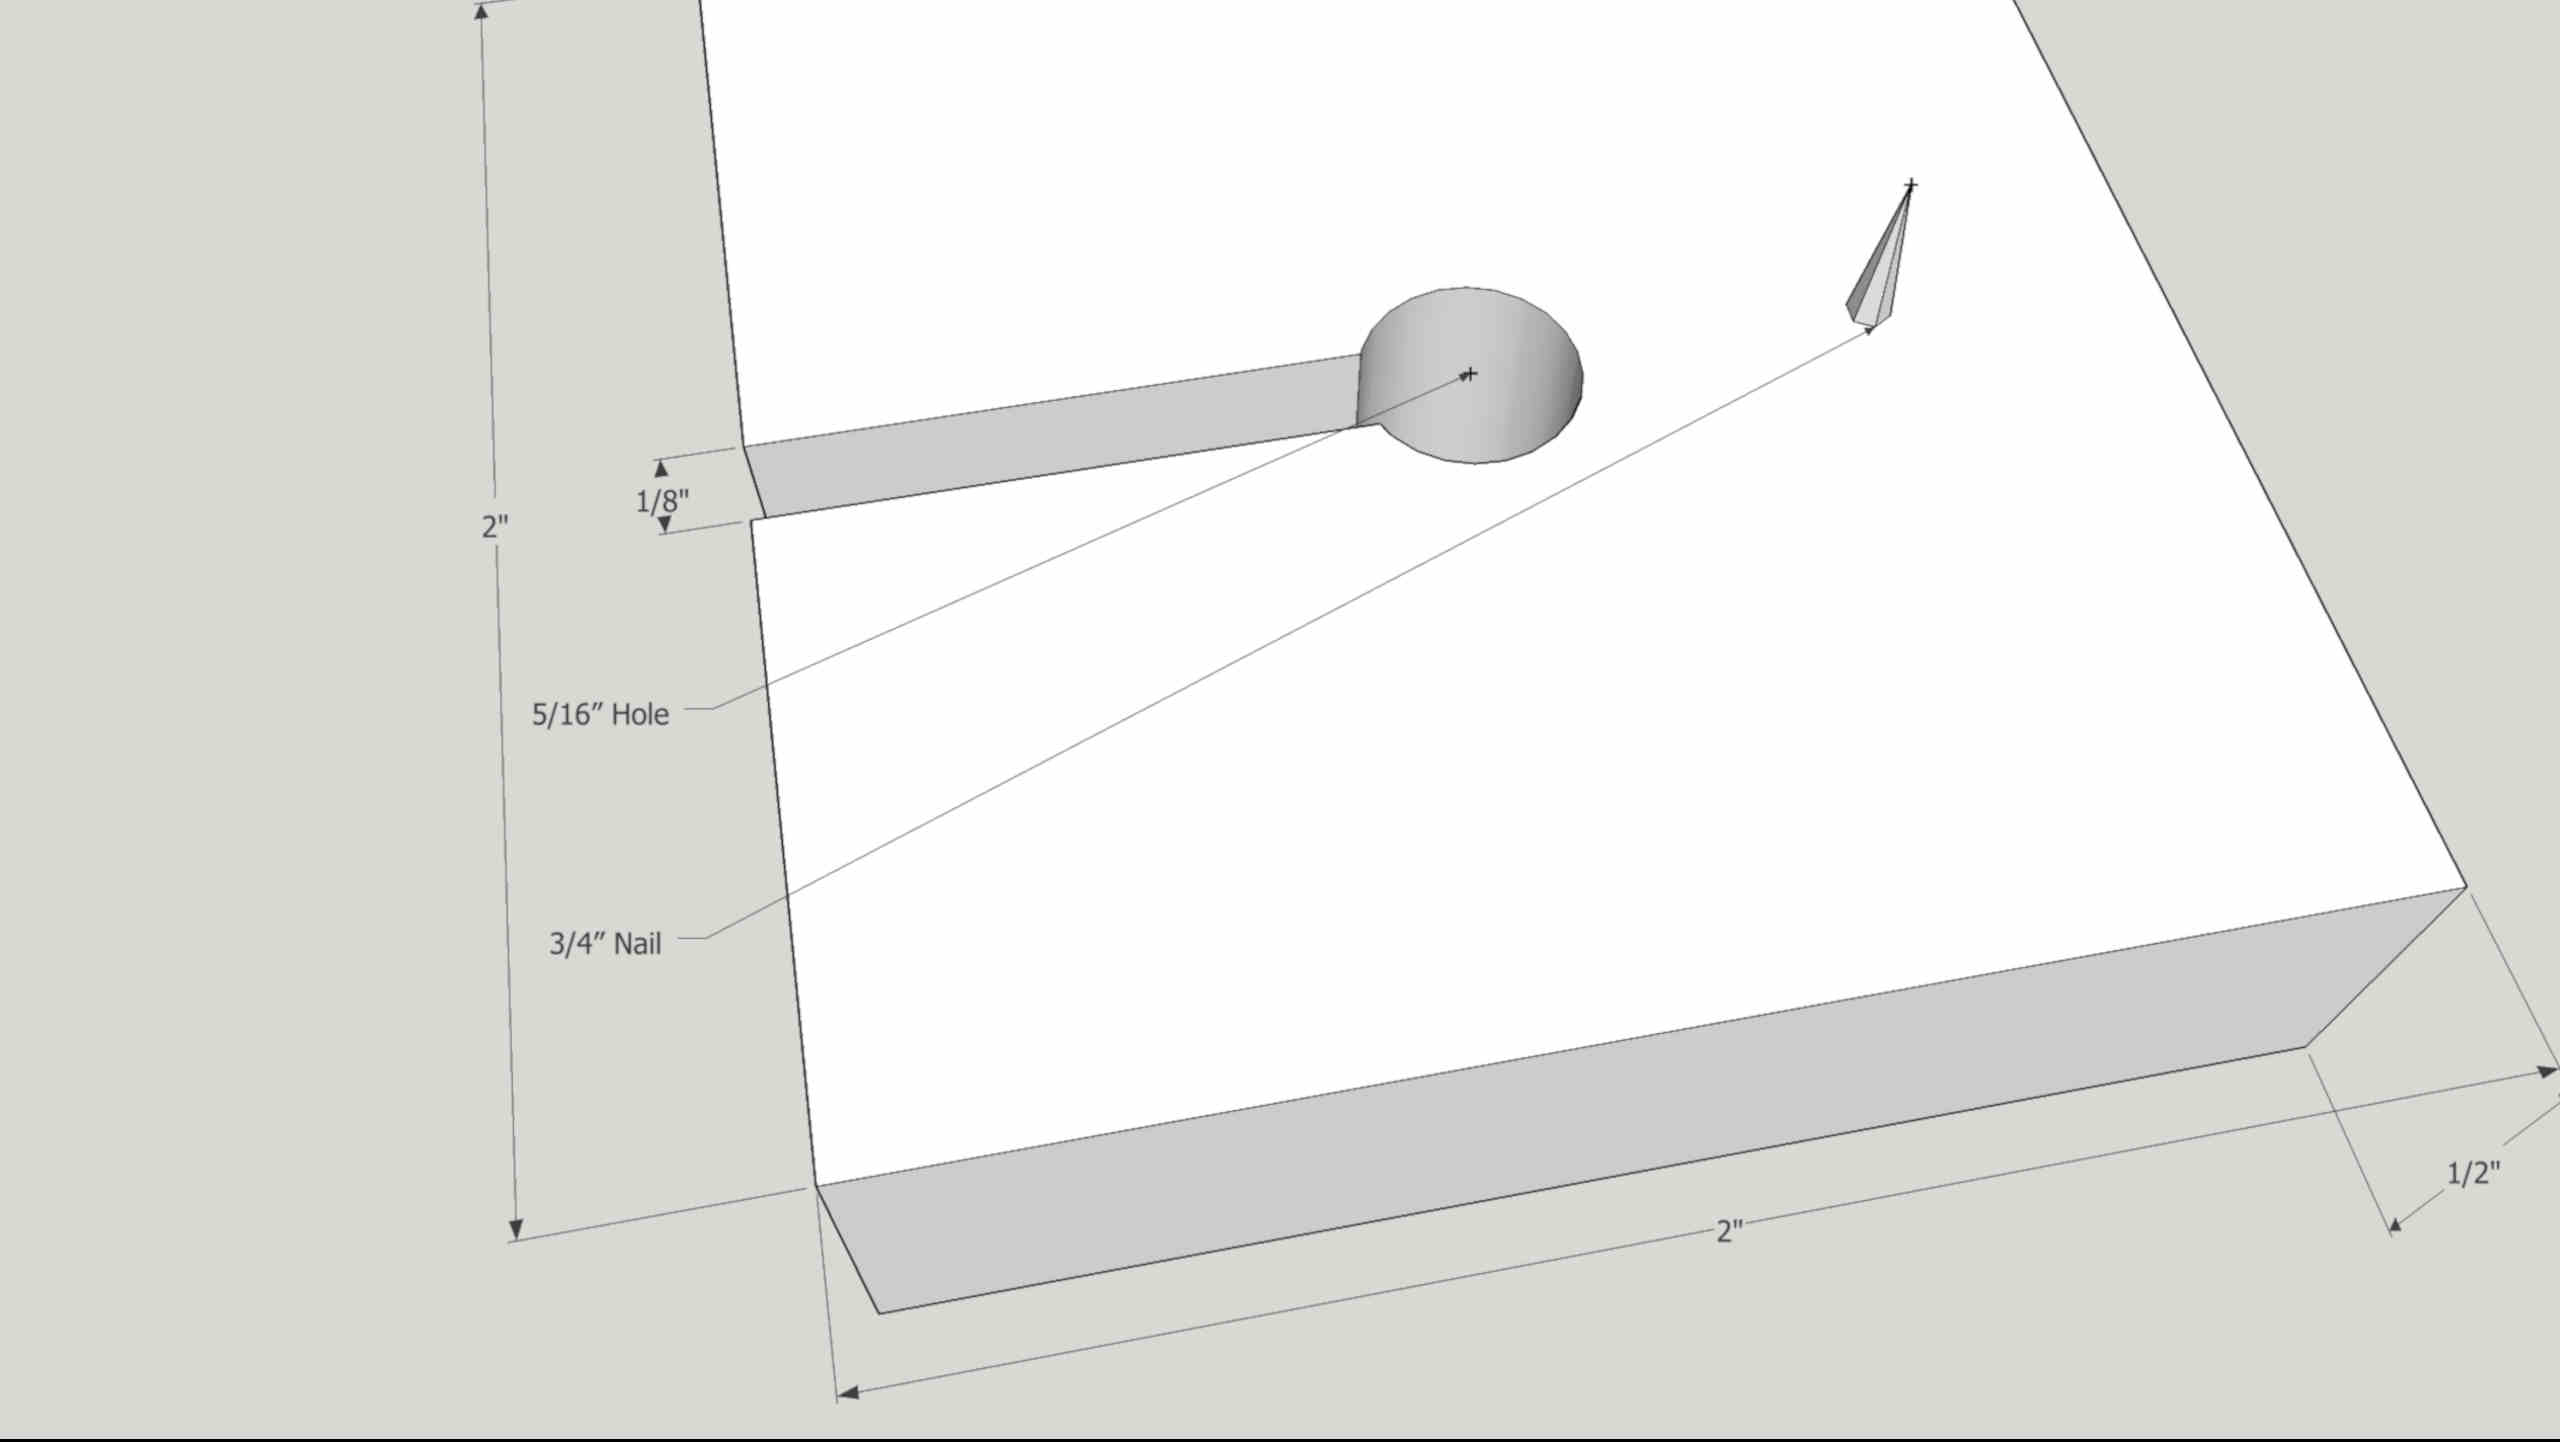
Dimensions
Though this is a pretty simple design, I know some people like to see the dimensions. I’ve made dimensions here.
Materials Needed:
1/2″ plywood Scraps
3/4″ Roofing Nails
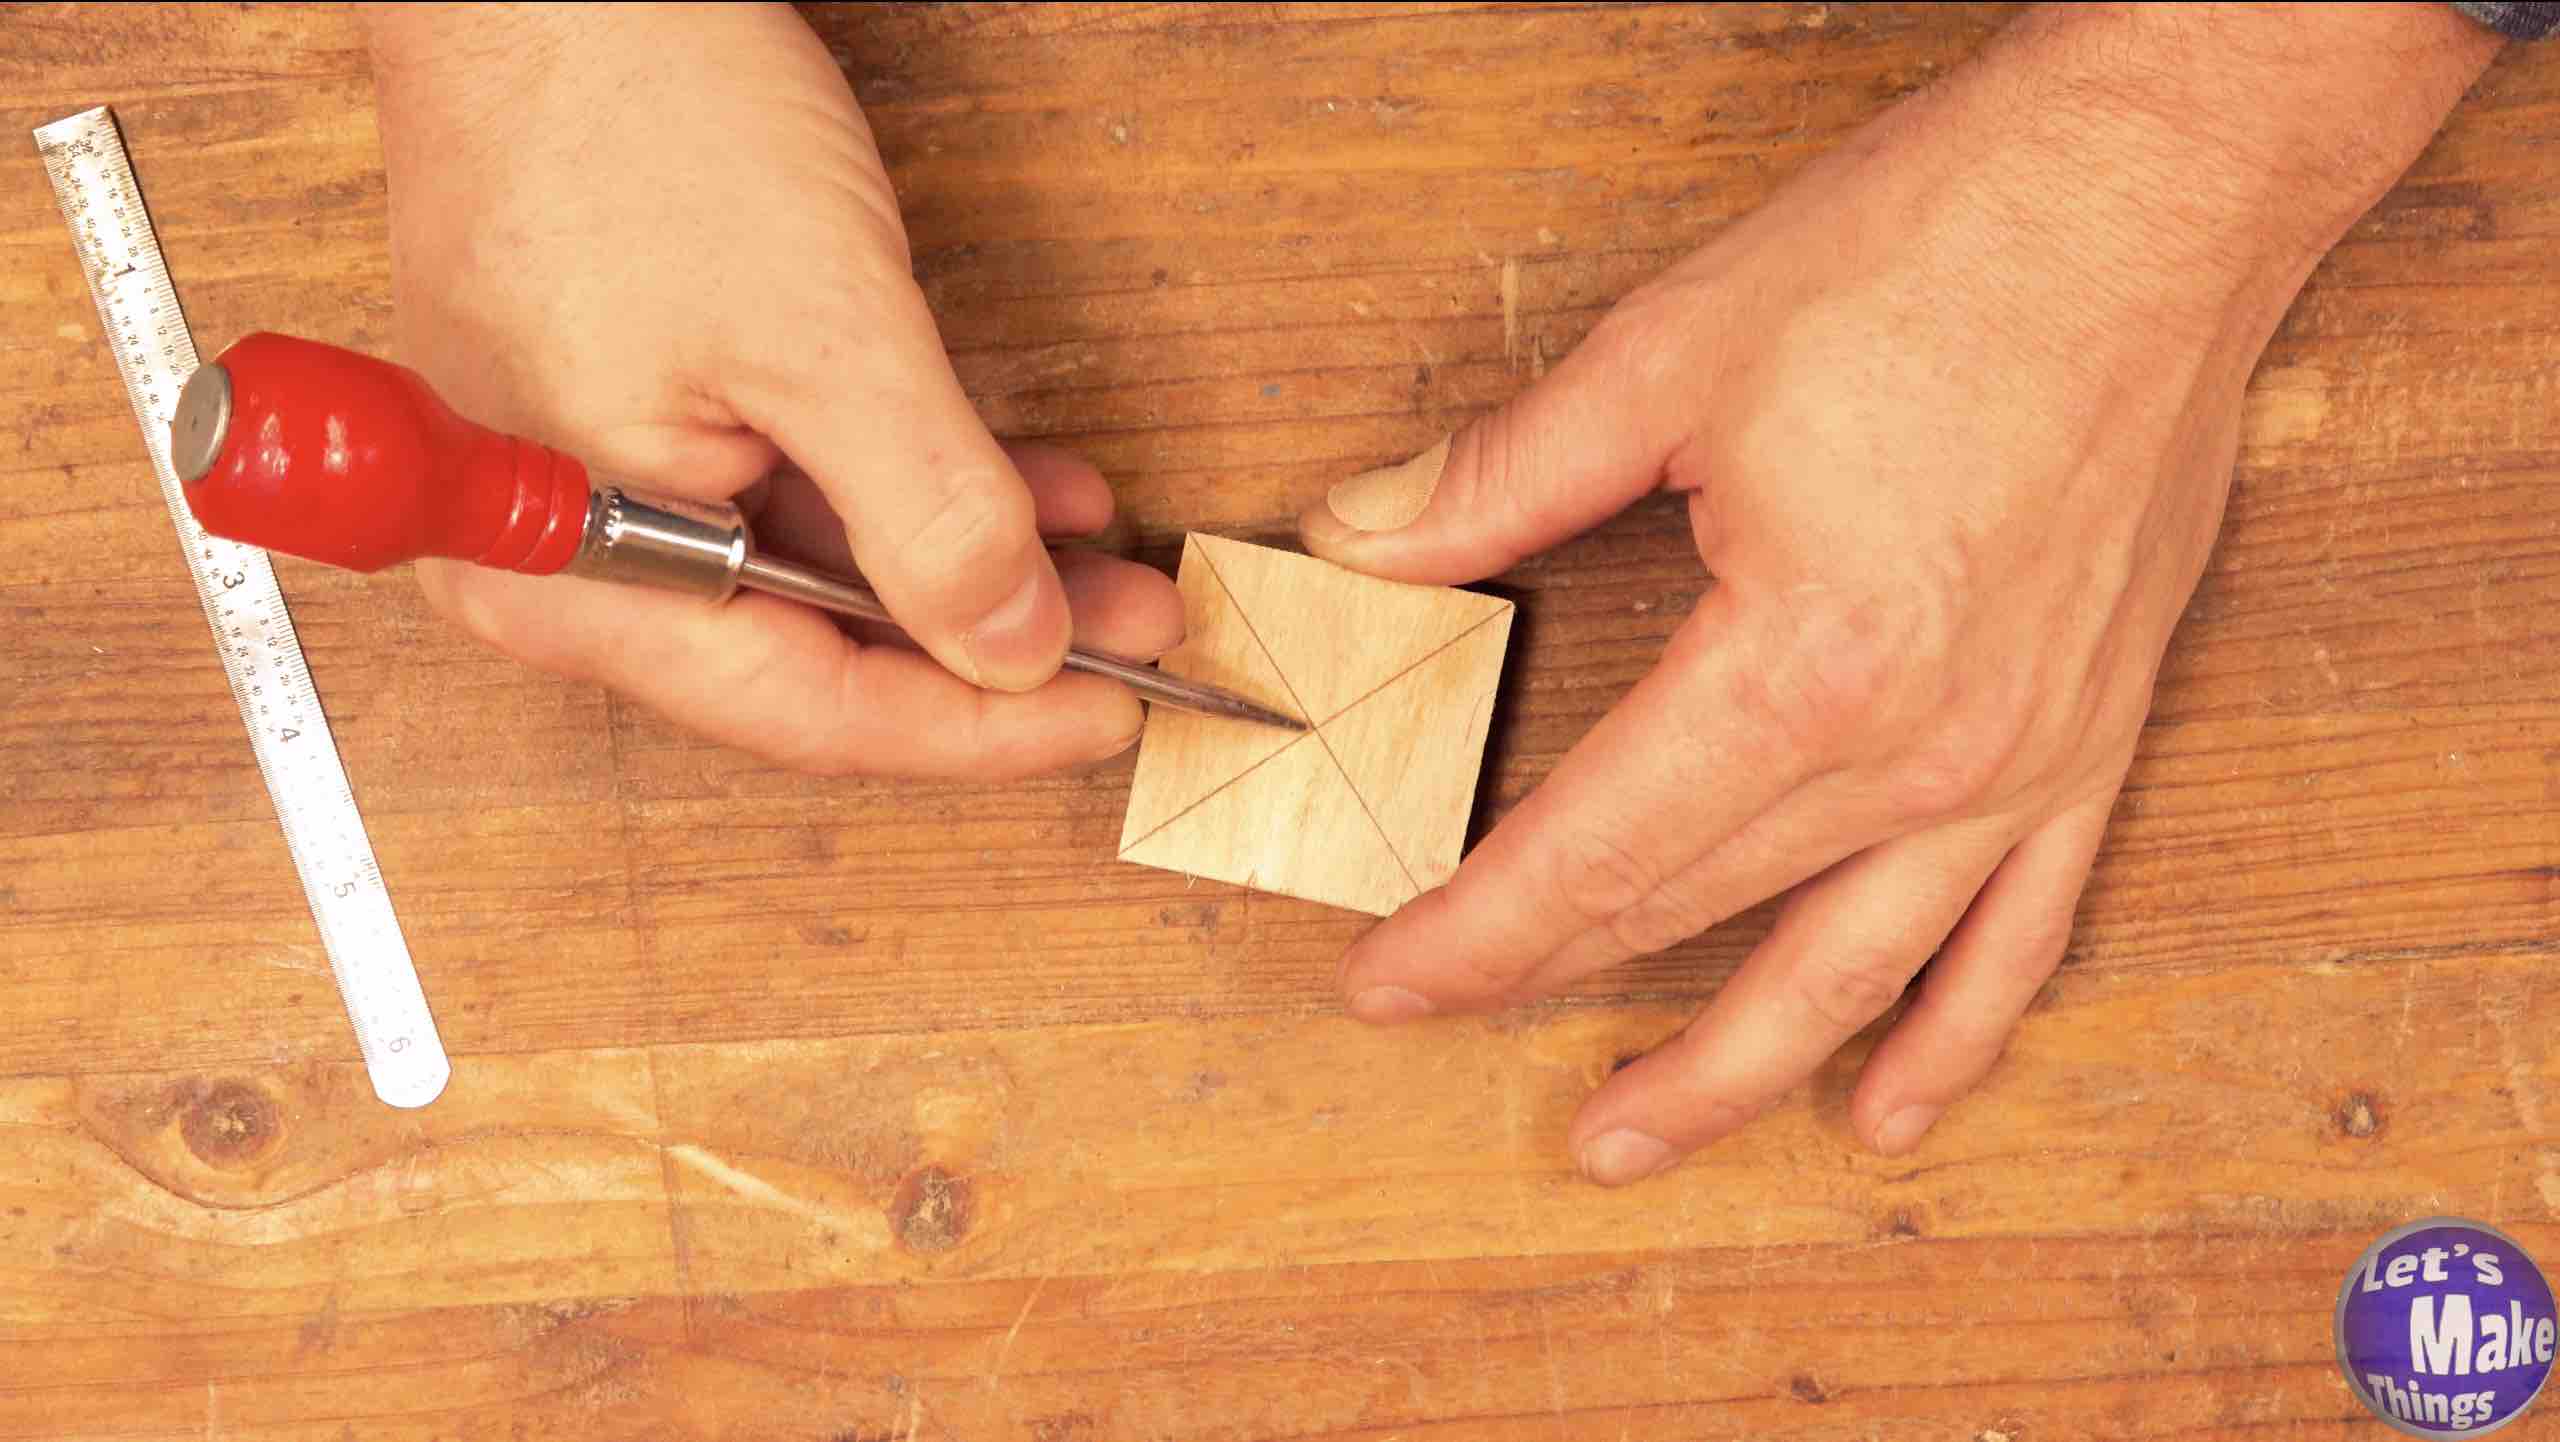
Step 1
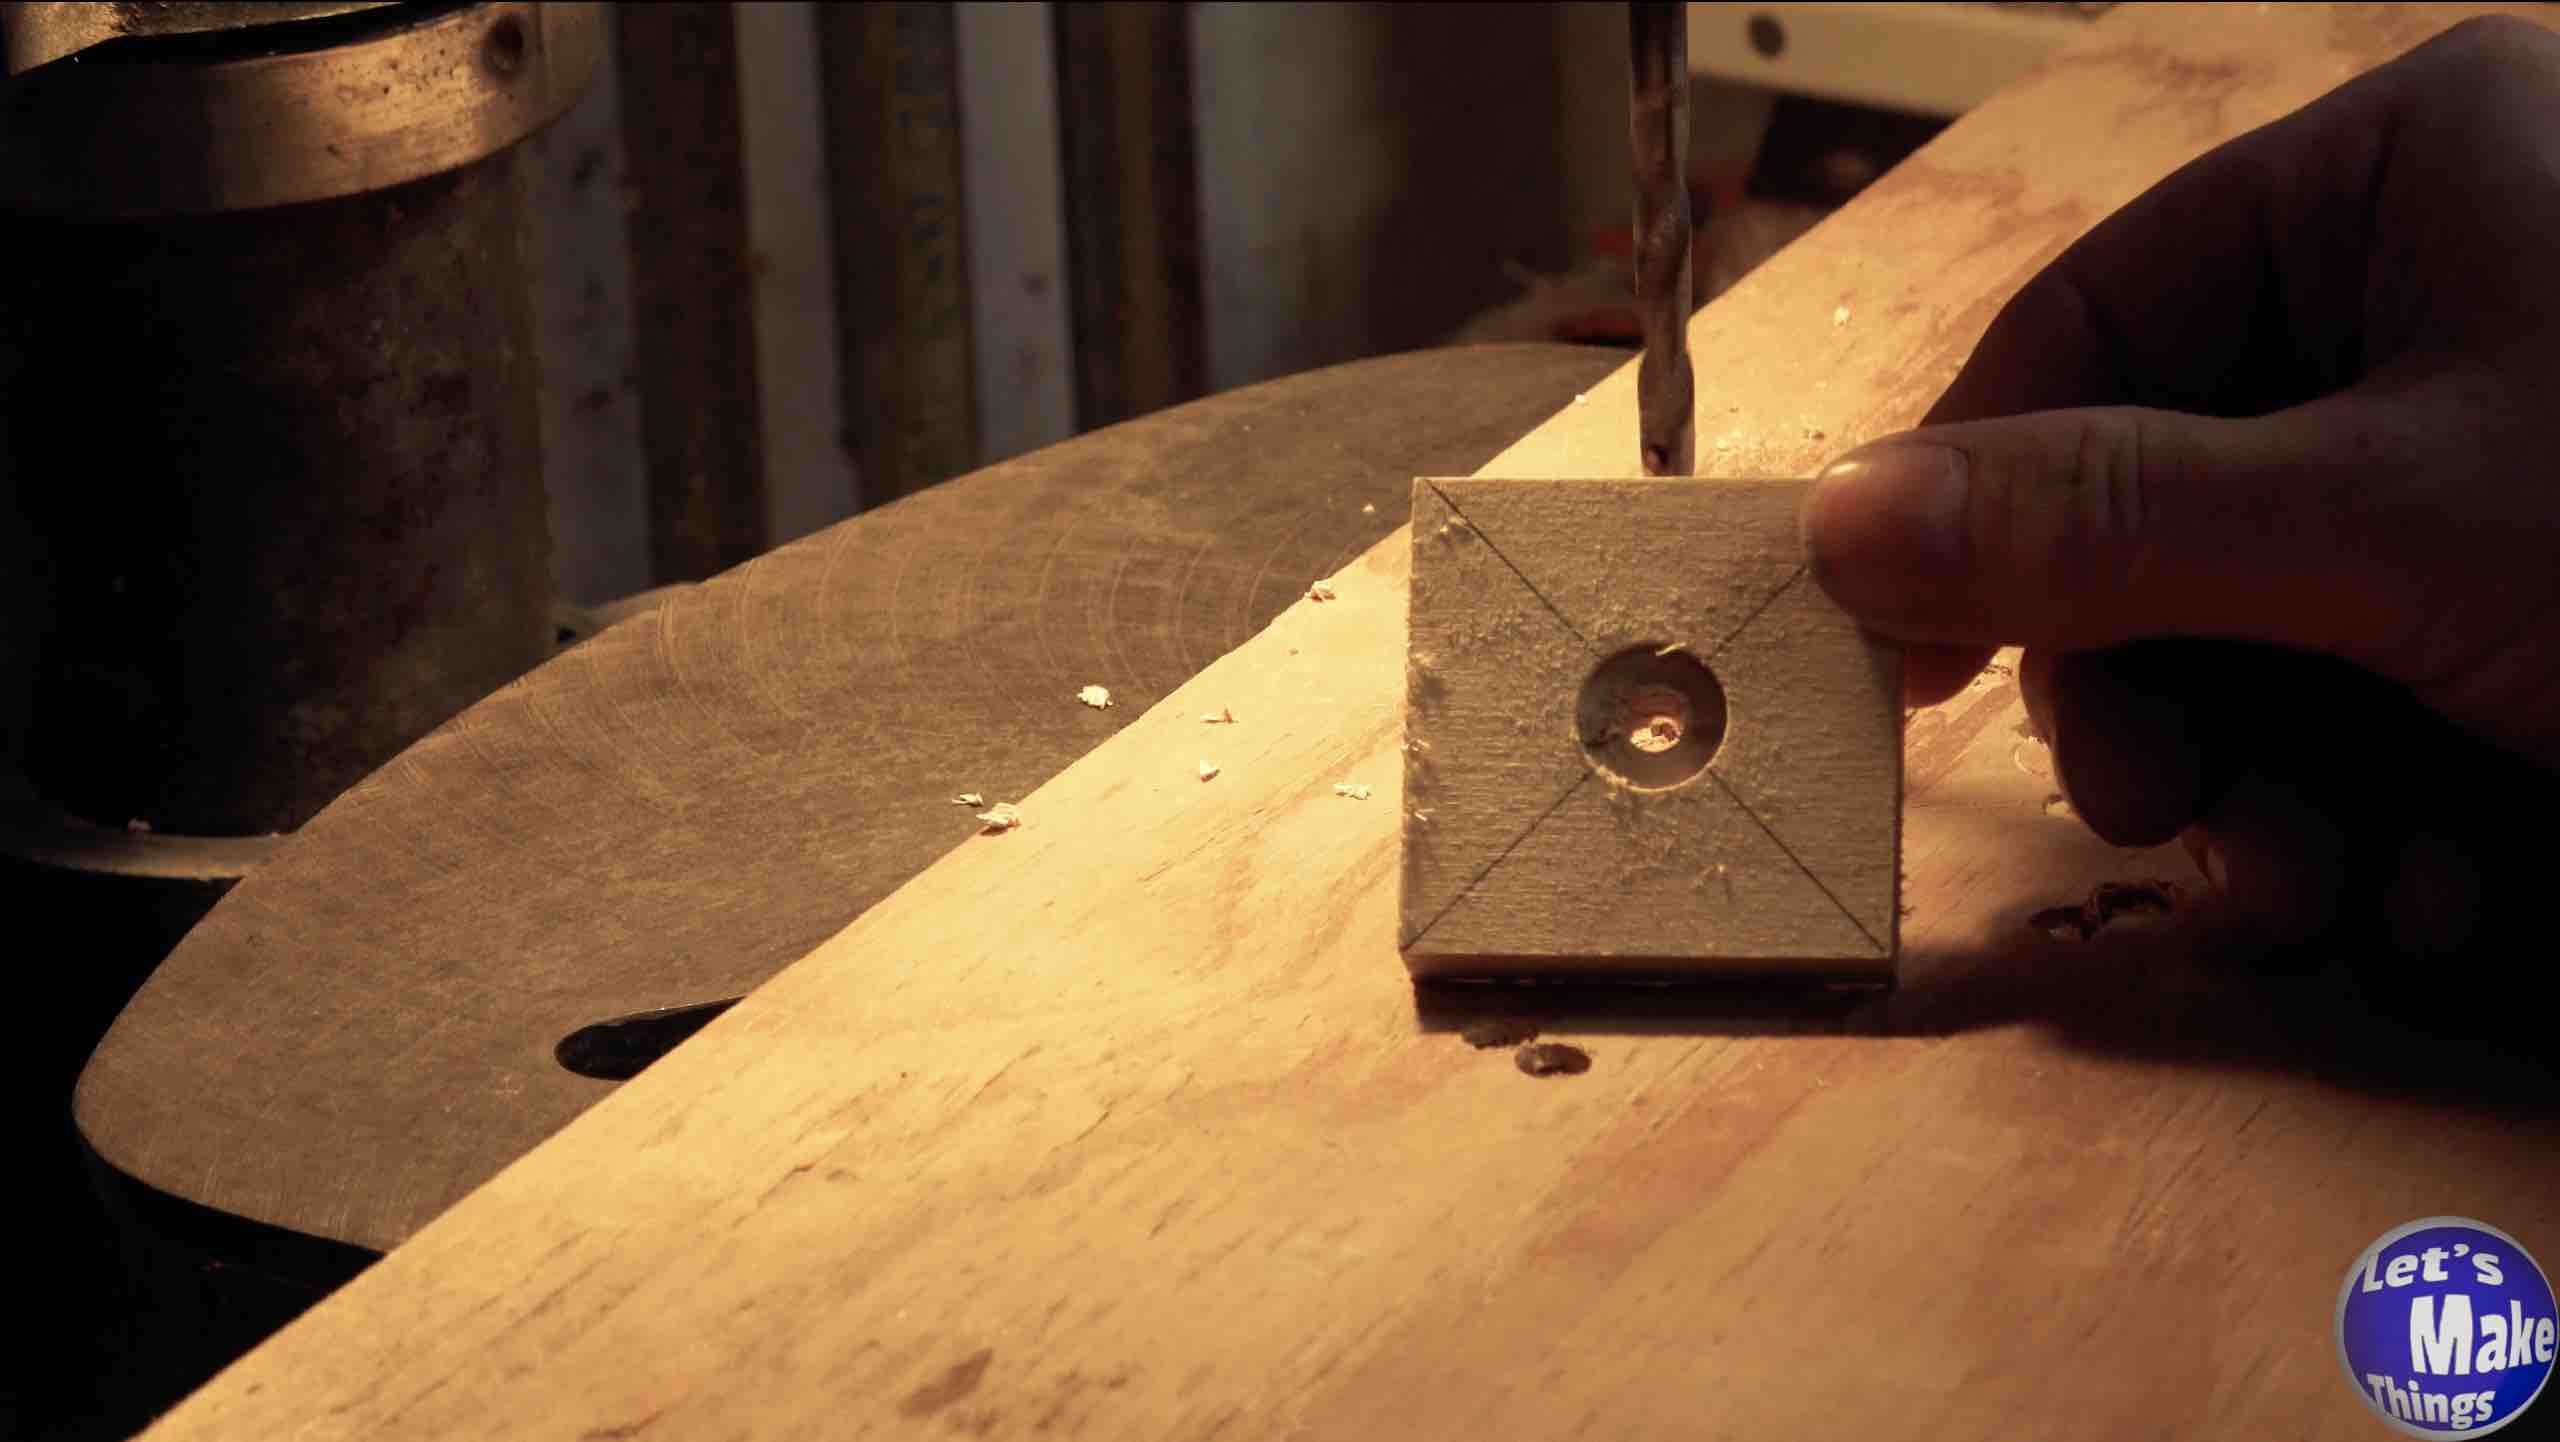
We’ll first start out by cutting a piece of 1/2″ scrap wood (I used plywood) into 2 inch by 2 inch squares. Then we’ll connect the corners, forming an “X”. We’ll use an awl on the center.
Note: Clicking the picture on the right shows this step in motion at youtube.
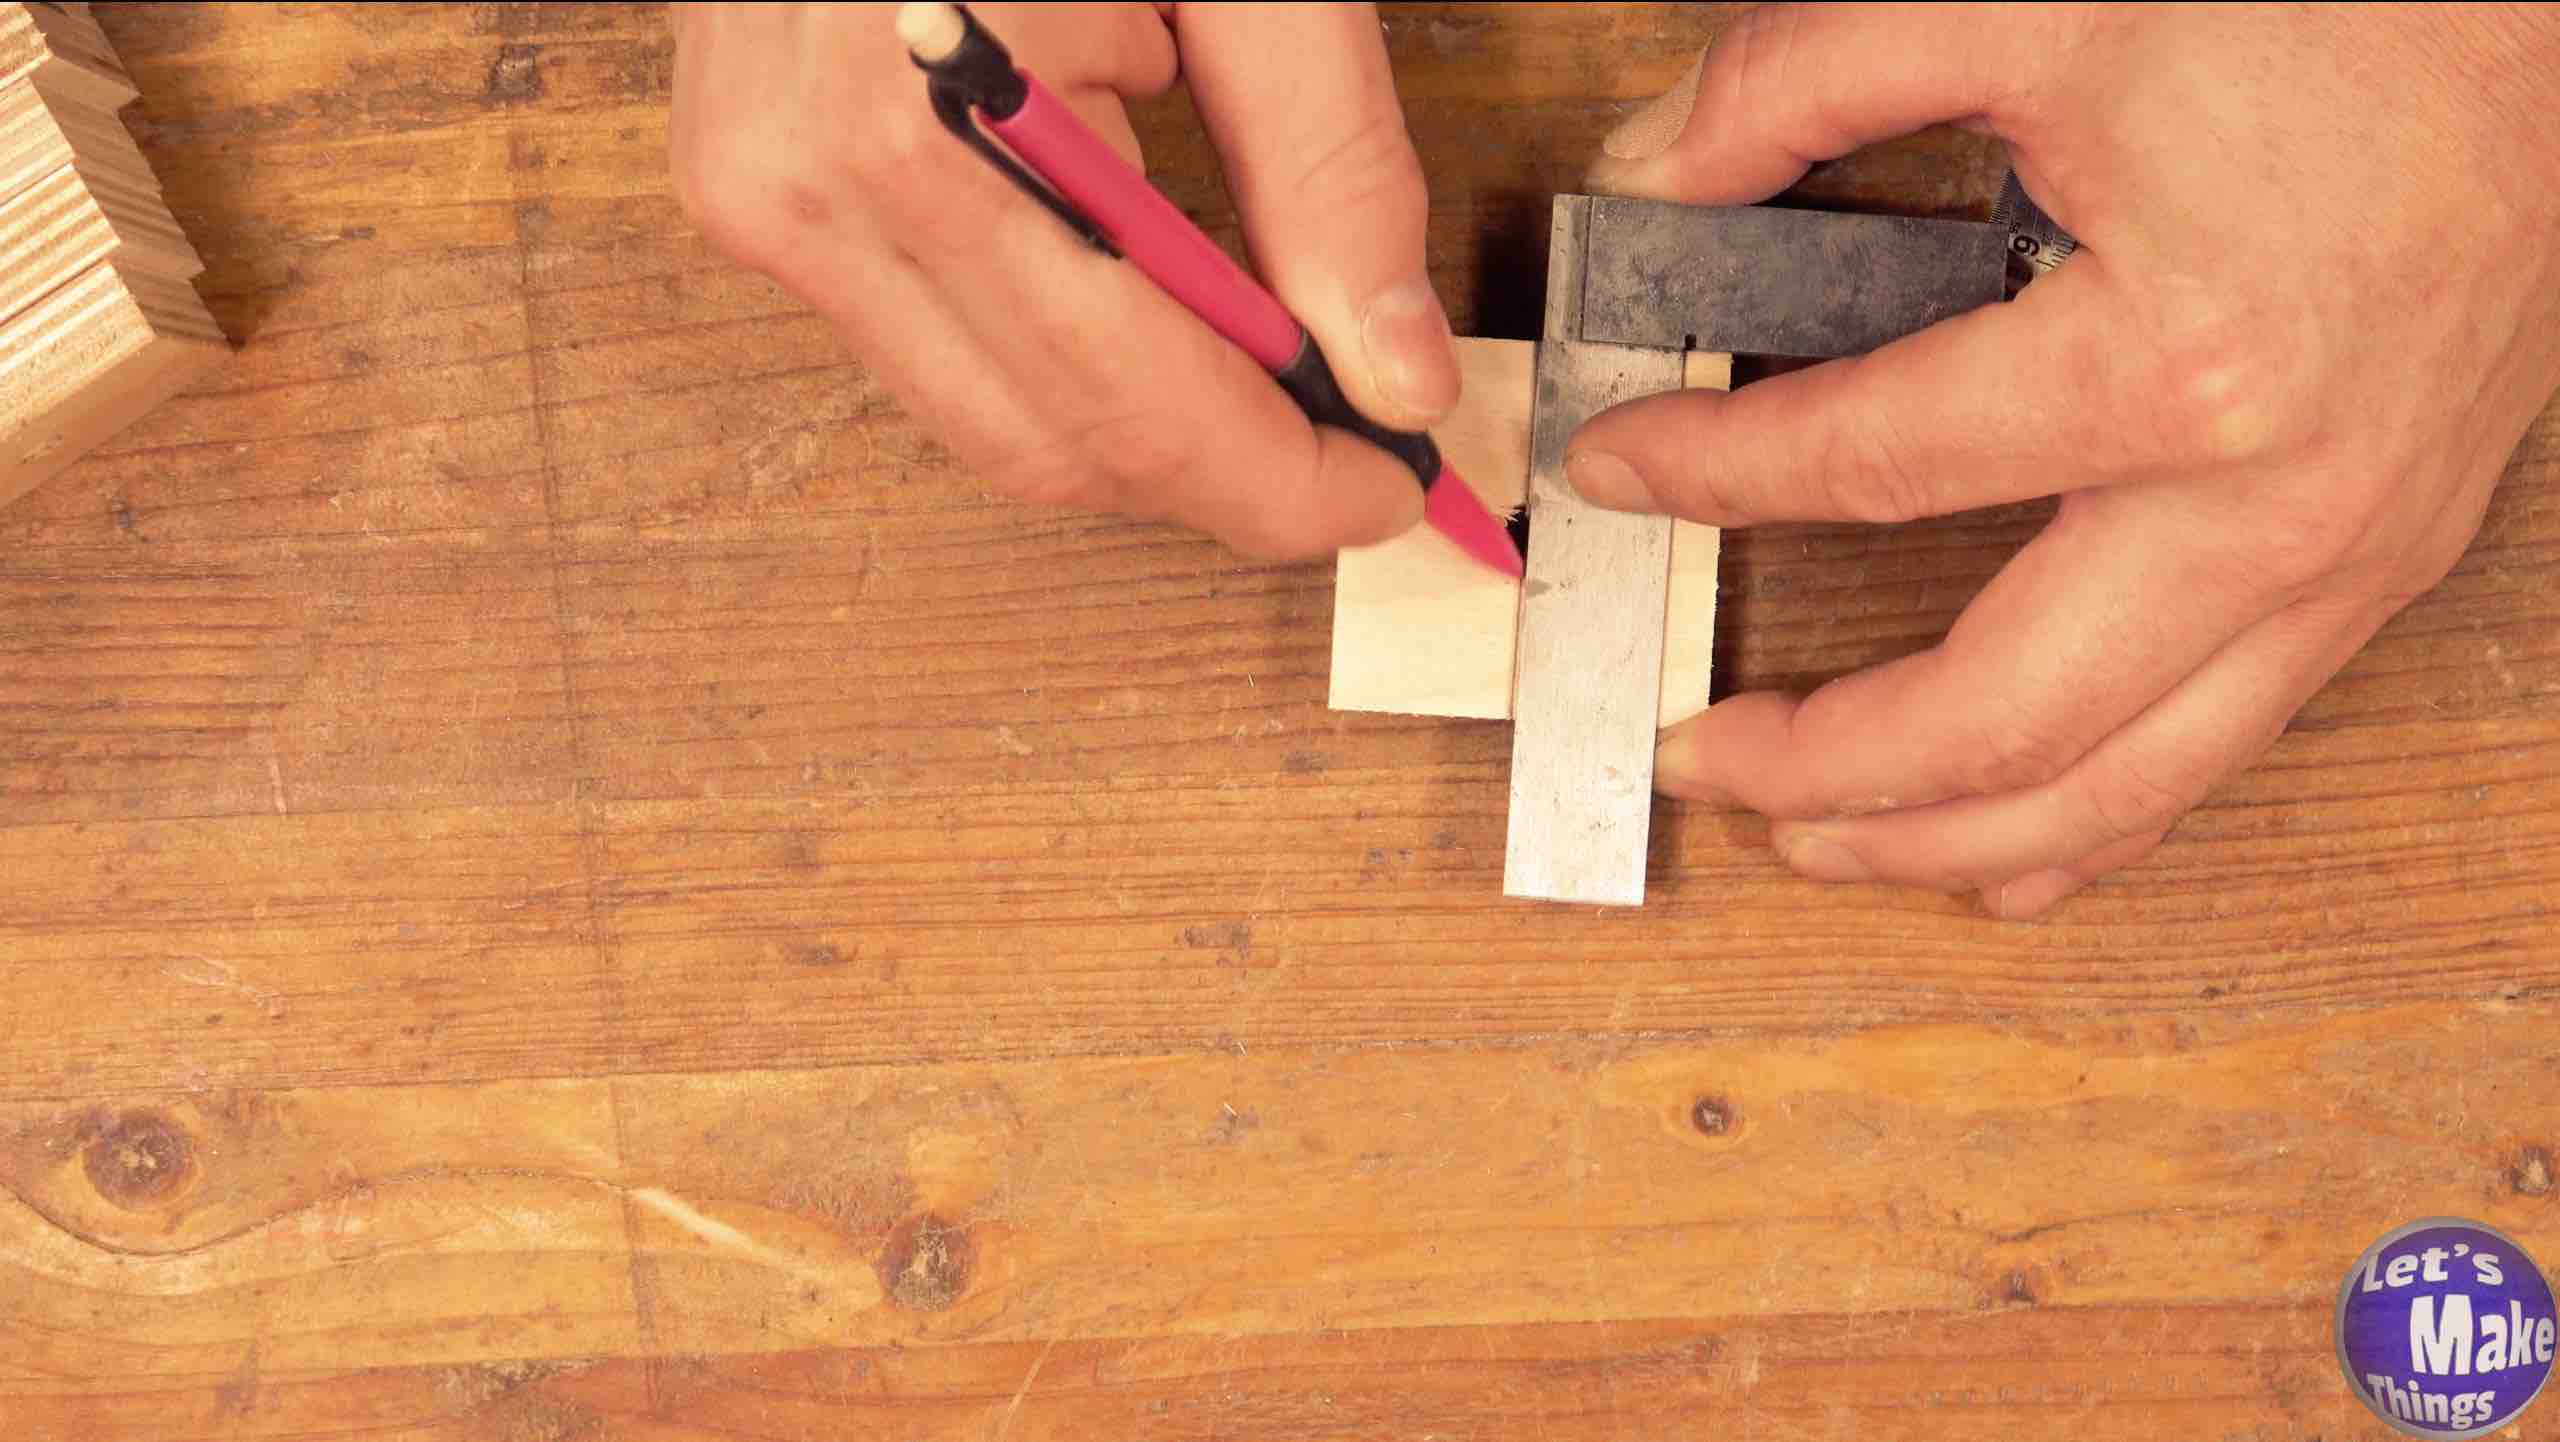
Step 2
We’ll use a 5/16″ brad point bit and drill the center out. With a ruler, we’ll find the half way mark on one side and use a square to draw a line across. Alternatively, you could find the center on the perpendicular side and draw a line across.
Note: Clicking the picture on the right shows this step in motion at youtube.
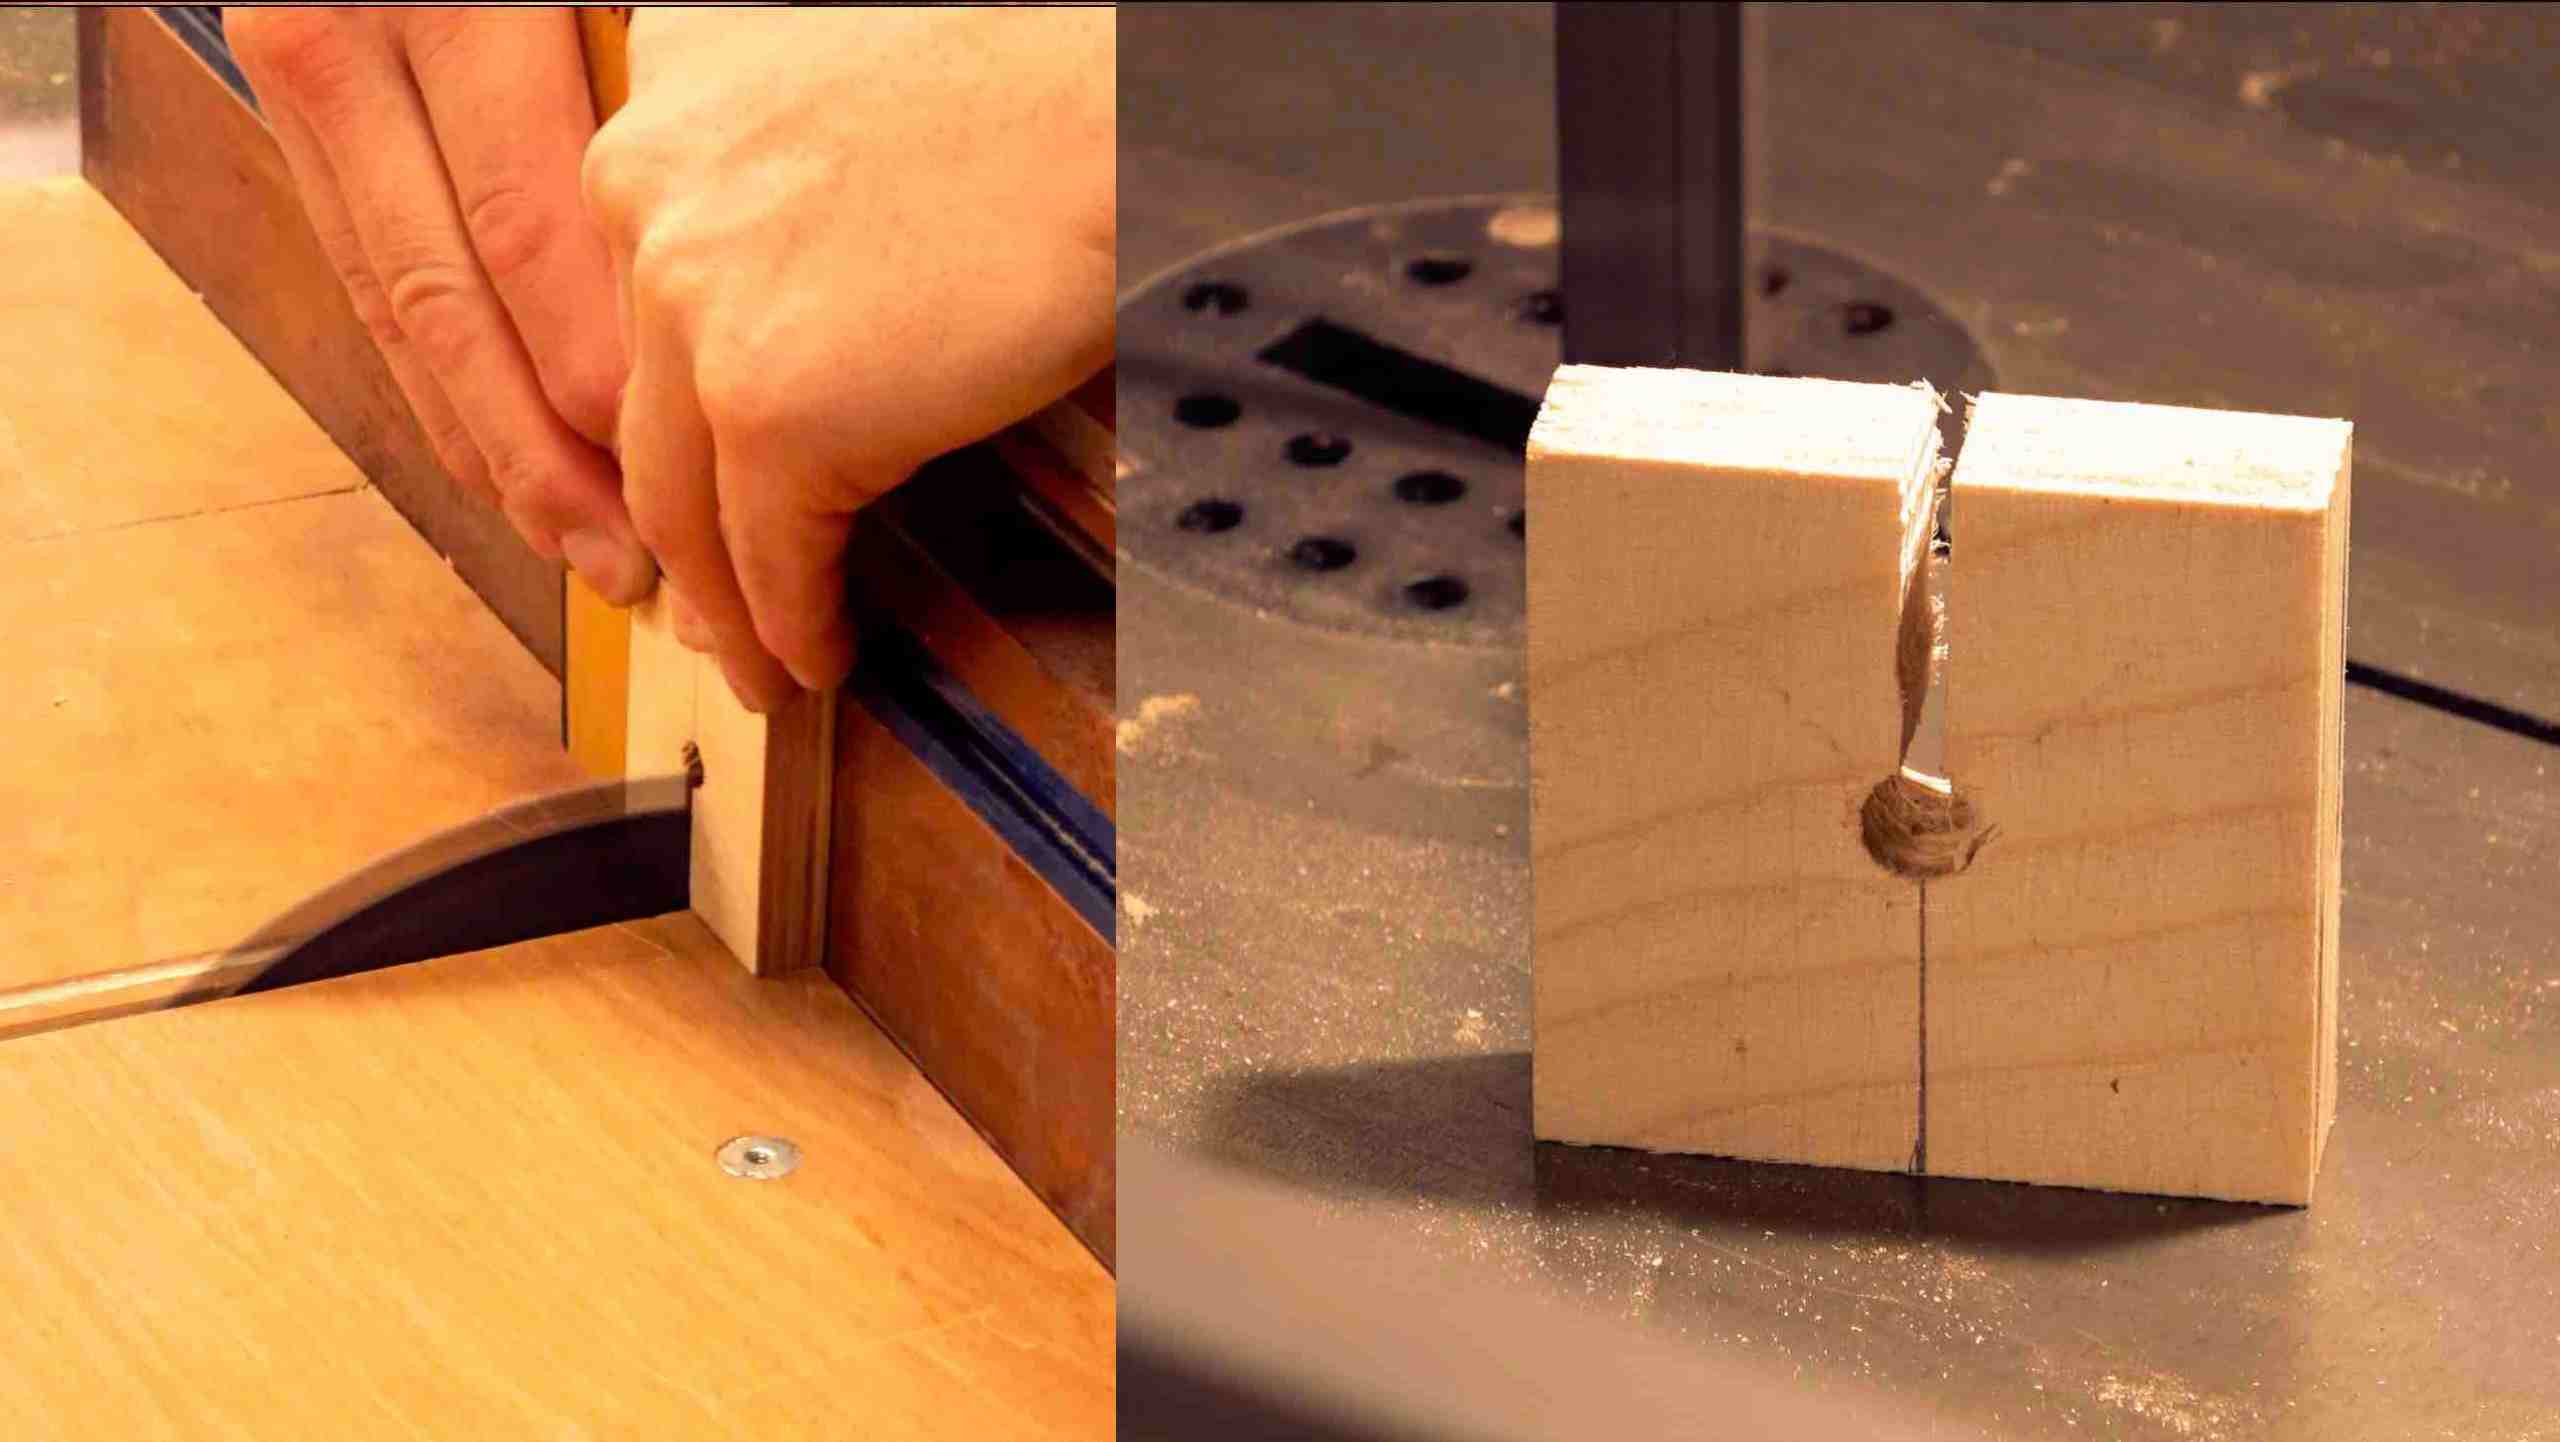
Step 3
Now we’ll need to cut out half the line you just drew. To do this on the table saw with a sled, place the block next to the blade and bring the blade upward so that the tooth cuts into the hole. With a bandsaw, you’ll just need to cut about an 1/8″ out on the one side.
Note: Clicking the picture on the right shows this step in motion at youtube.
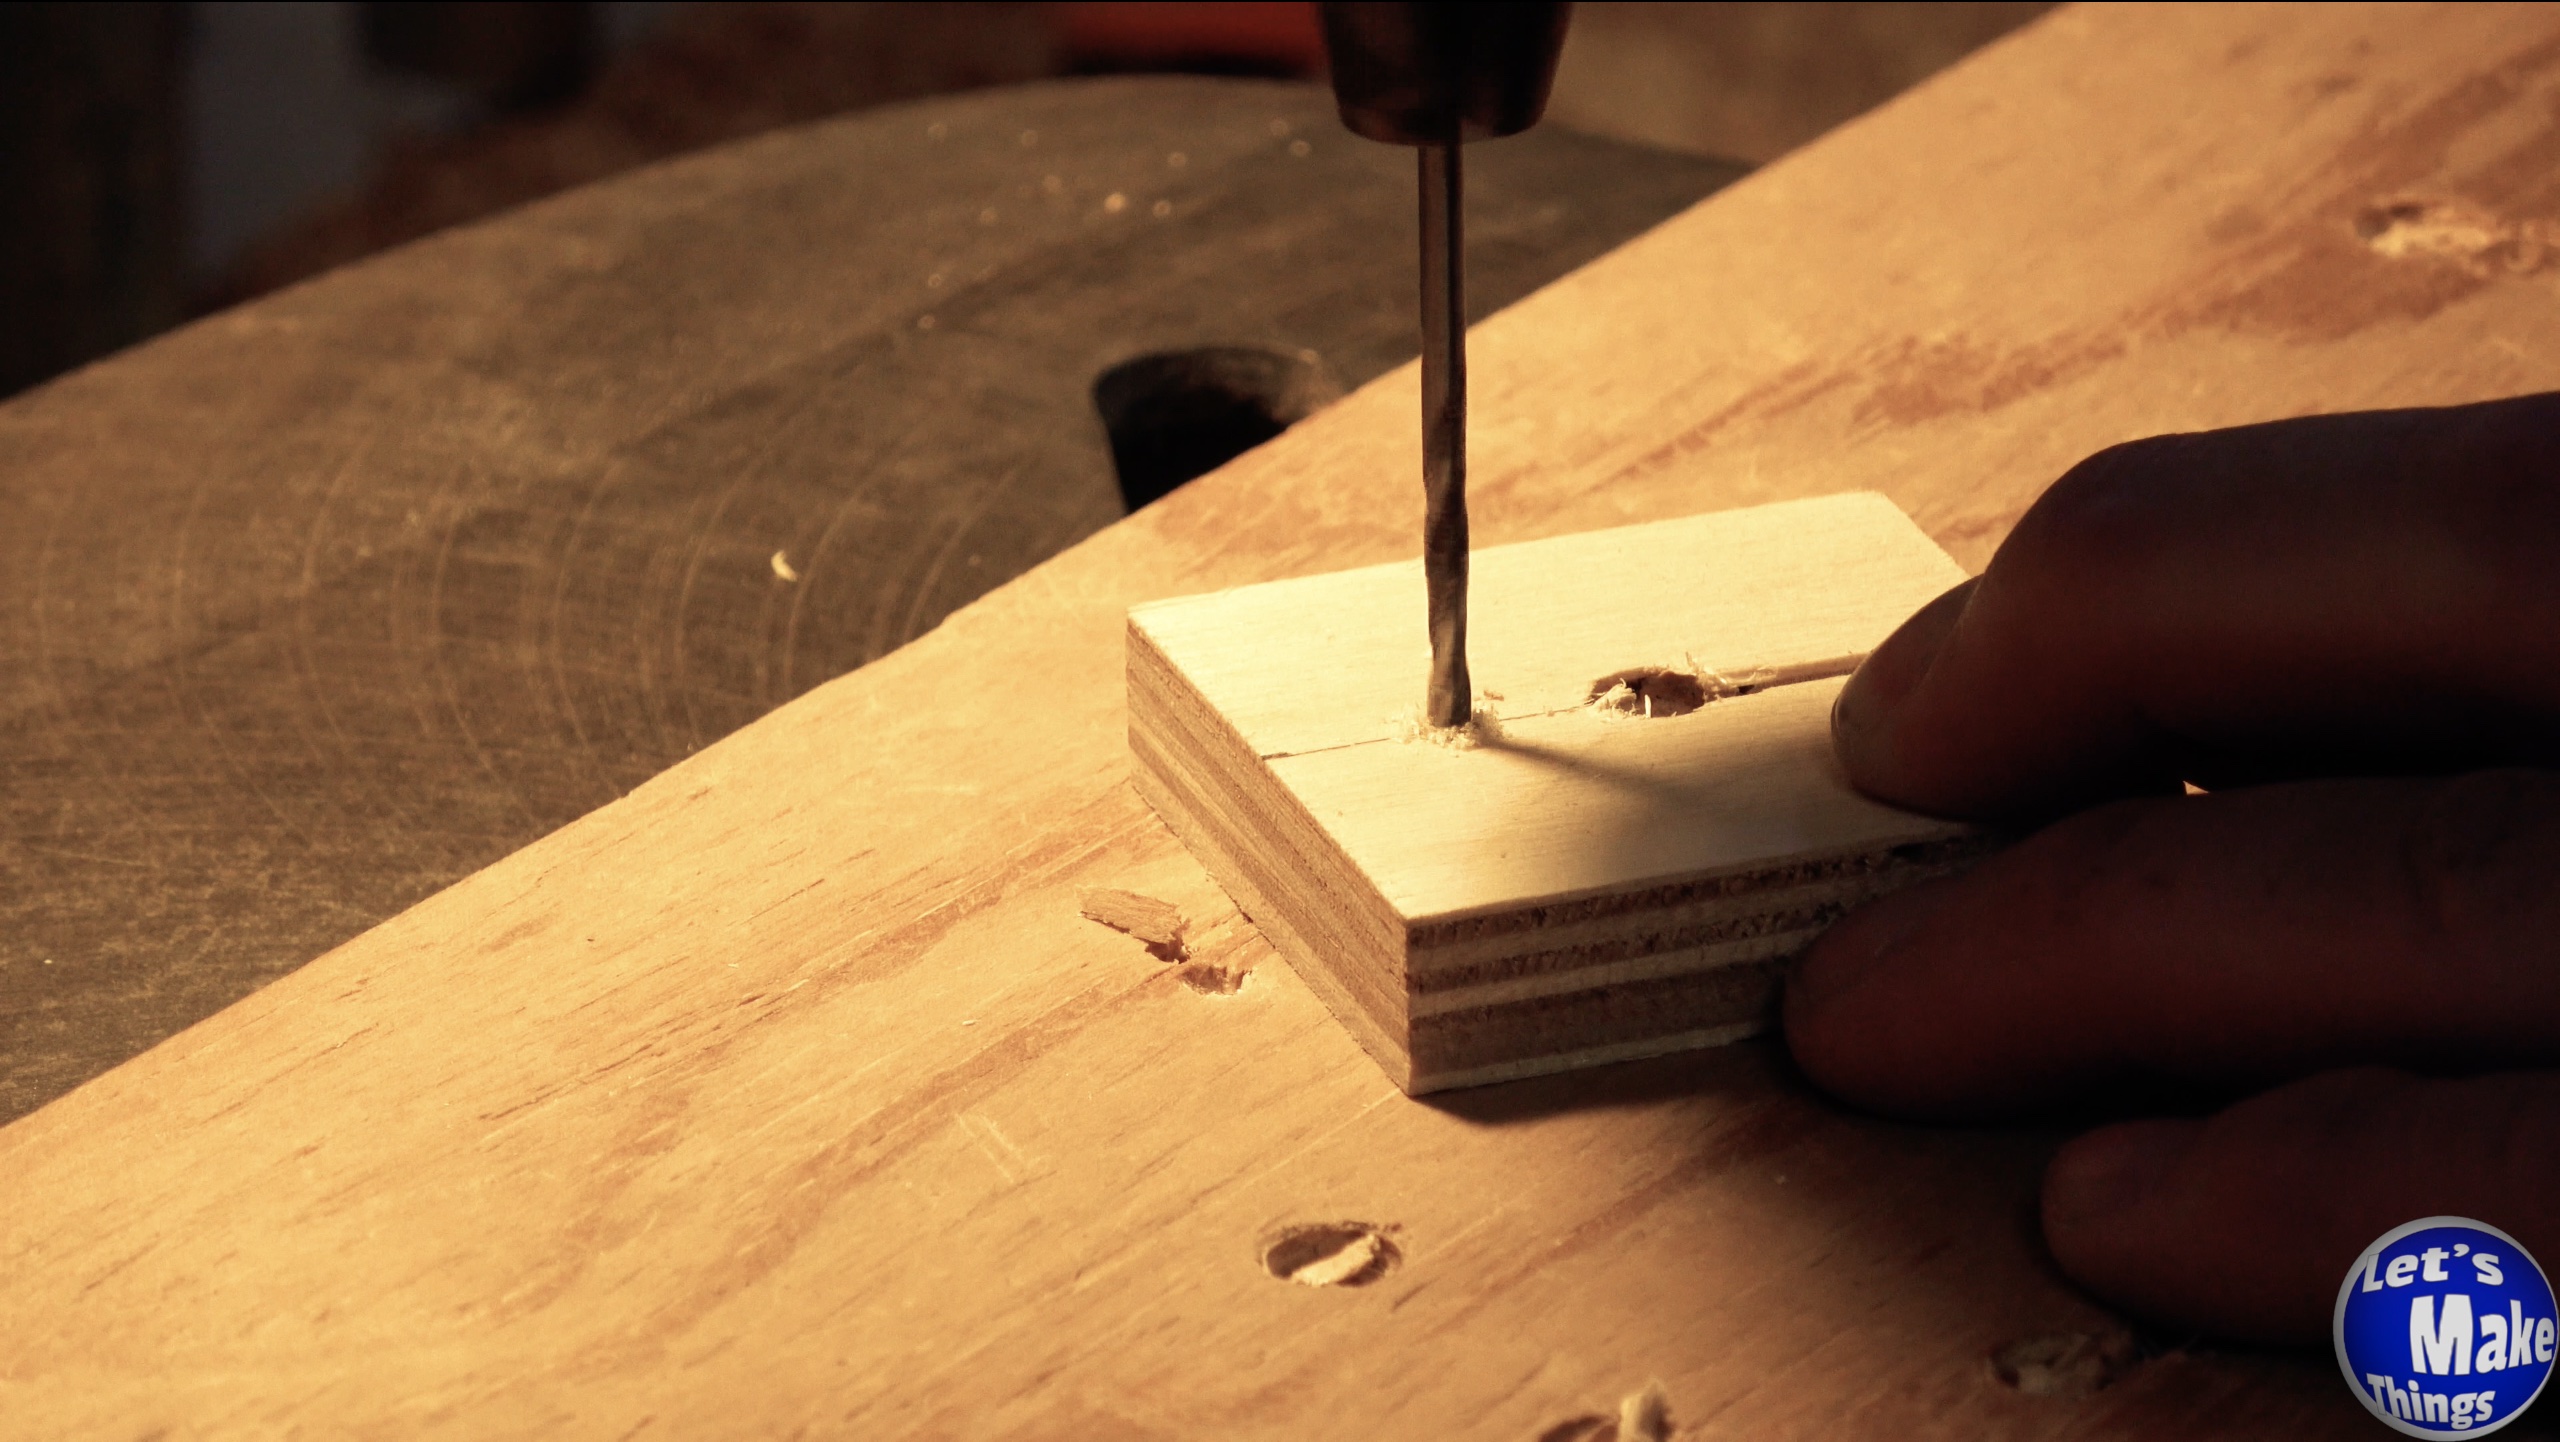
Step 4
Now, across from the cut you just made, we’ll find the center of that line and use our awl on it. Measure the thickness of your nail and you’ll then drill out a hole that’s slightly smaller than the diameter of your nail.
Note: Clicking the picture on the right shows this step in motion at youtube.
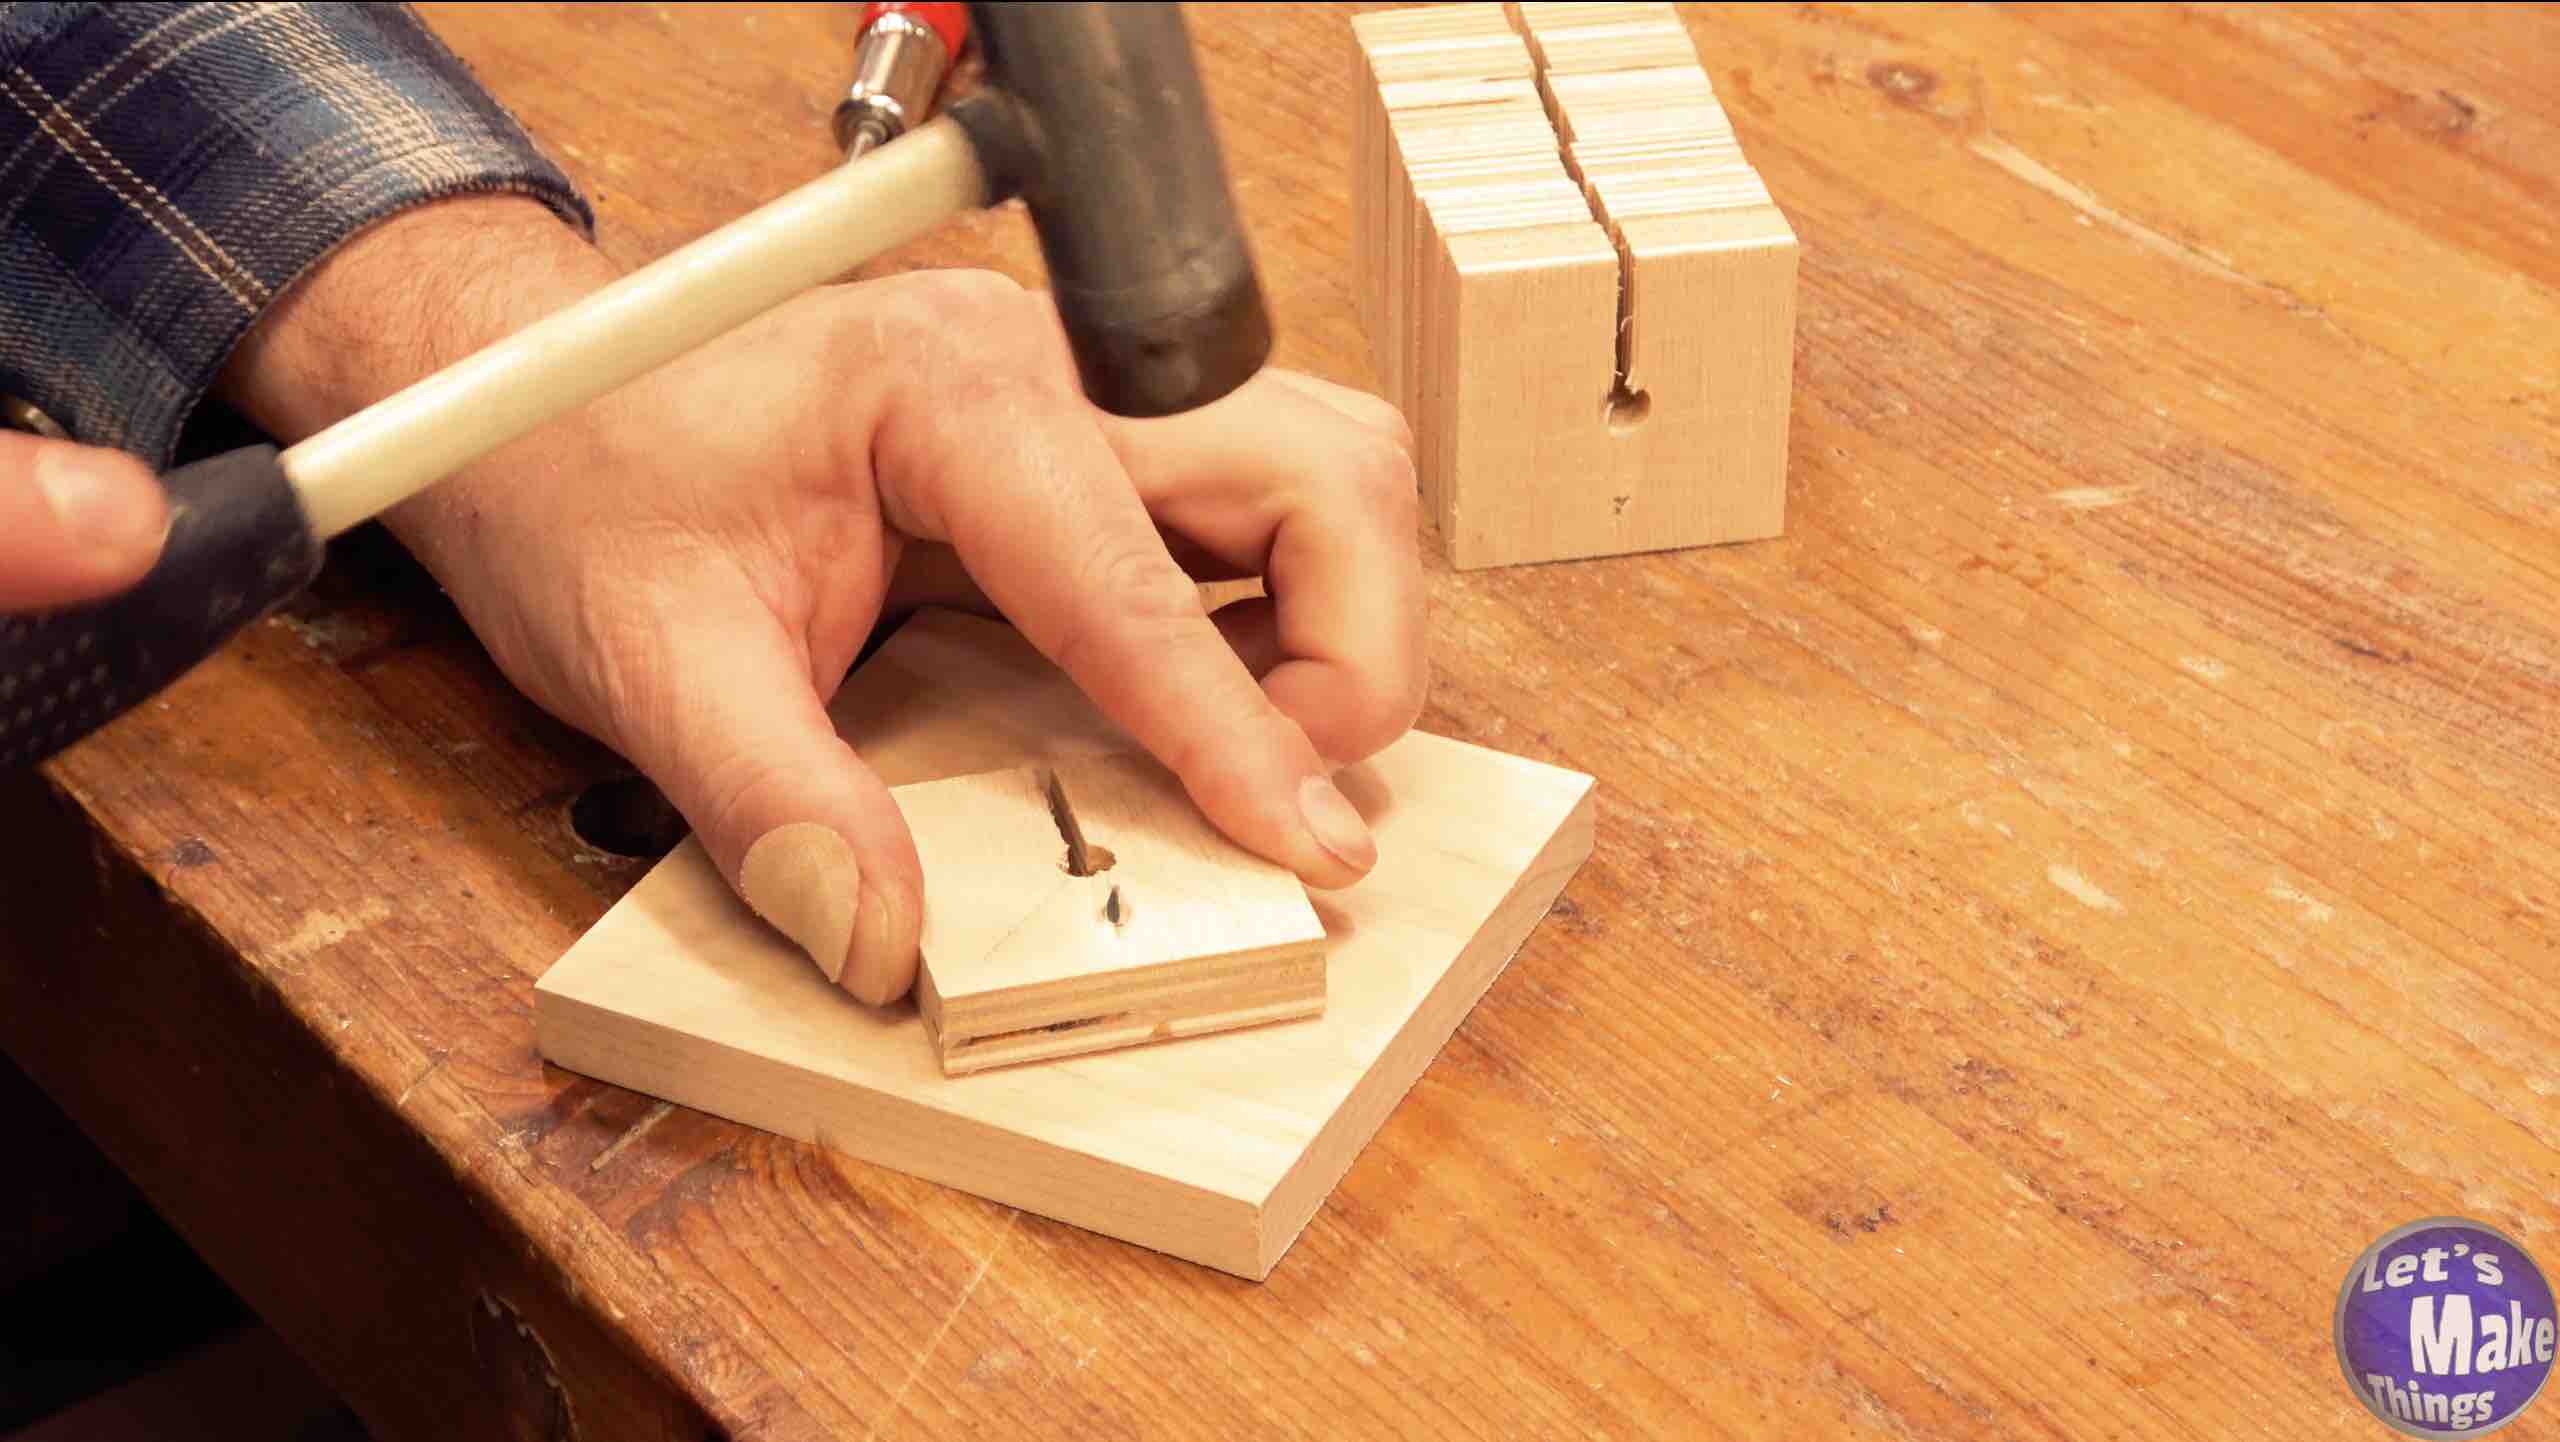
Step 5
Add your nail. You could add a longer nail, I suppose, but it really isn’t necessary. If you used a 1/2″ piece of plywood at the beginning, you’ll have a quarter inch of metal that will sit above your surface. It’s important that you either file or blunt the nail so that it doesn’t scratch your project.
Note: Clicking the picture on the right shows this step in motion at youtube.
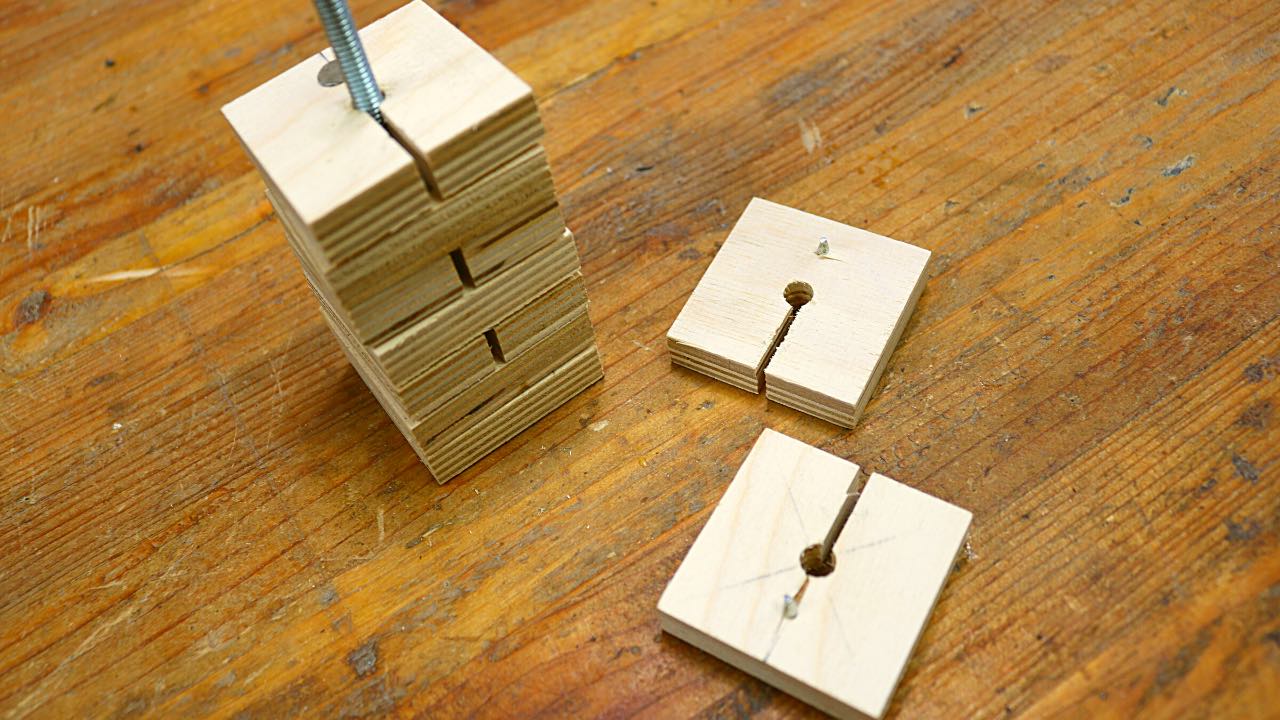
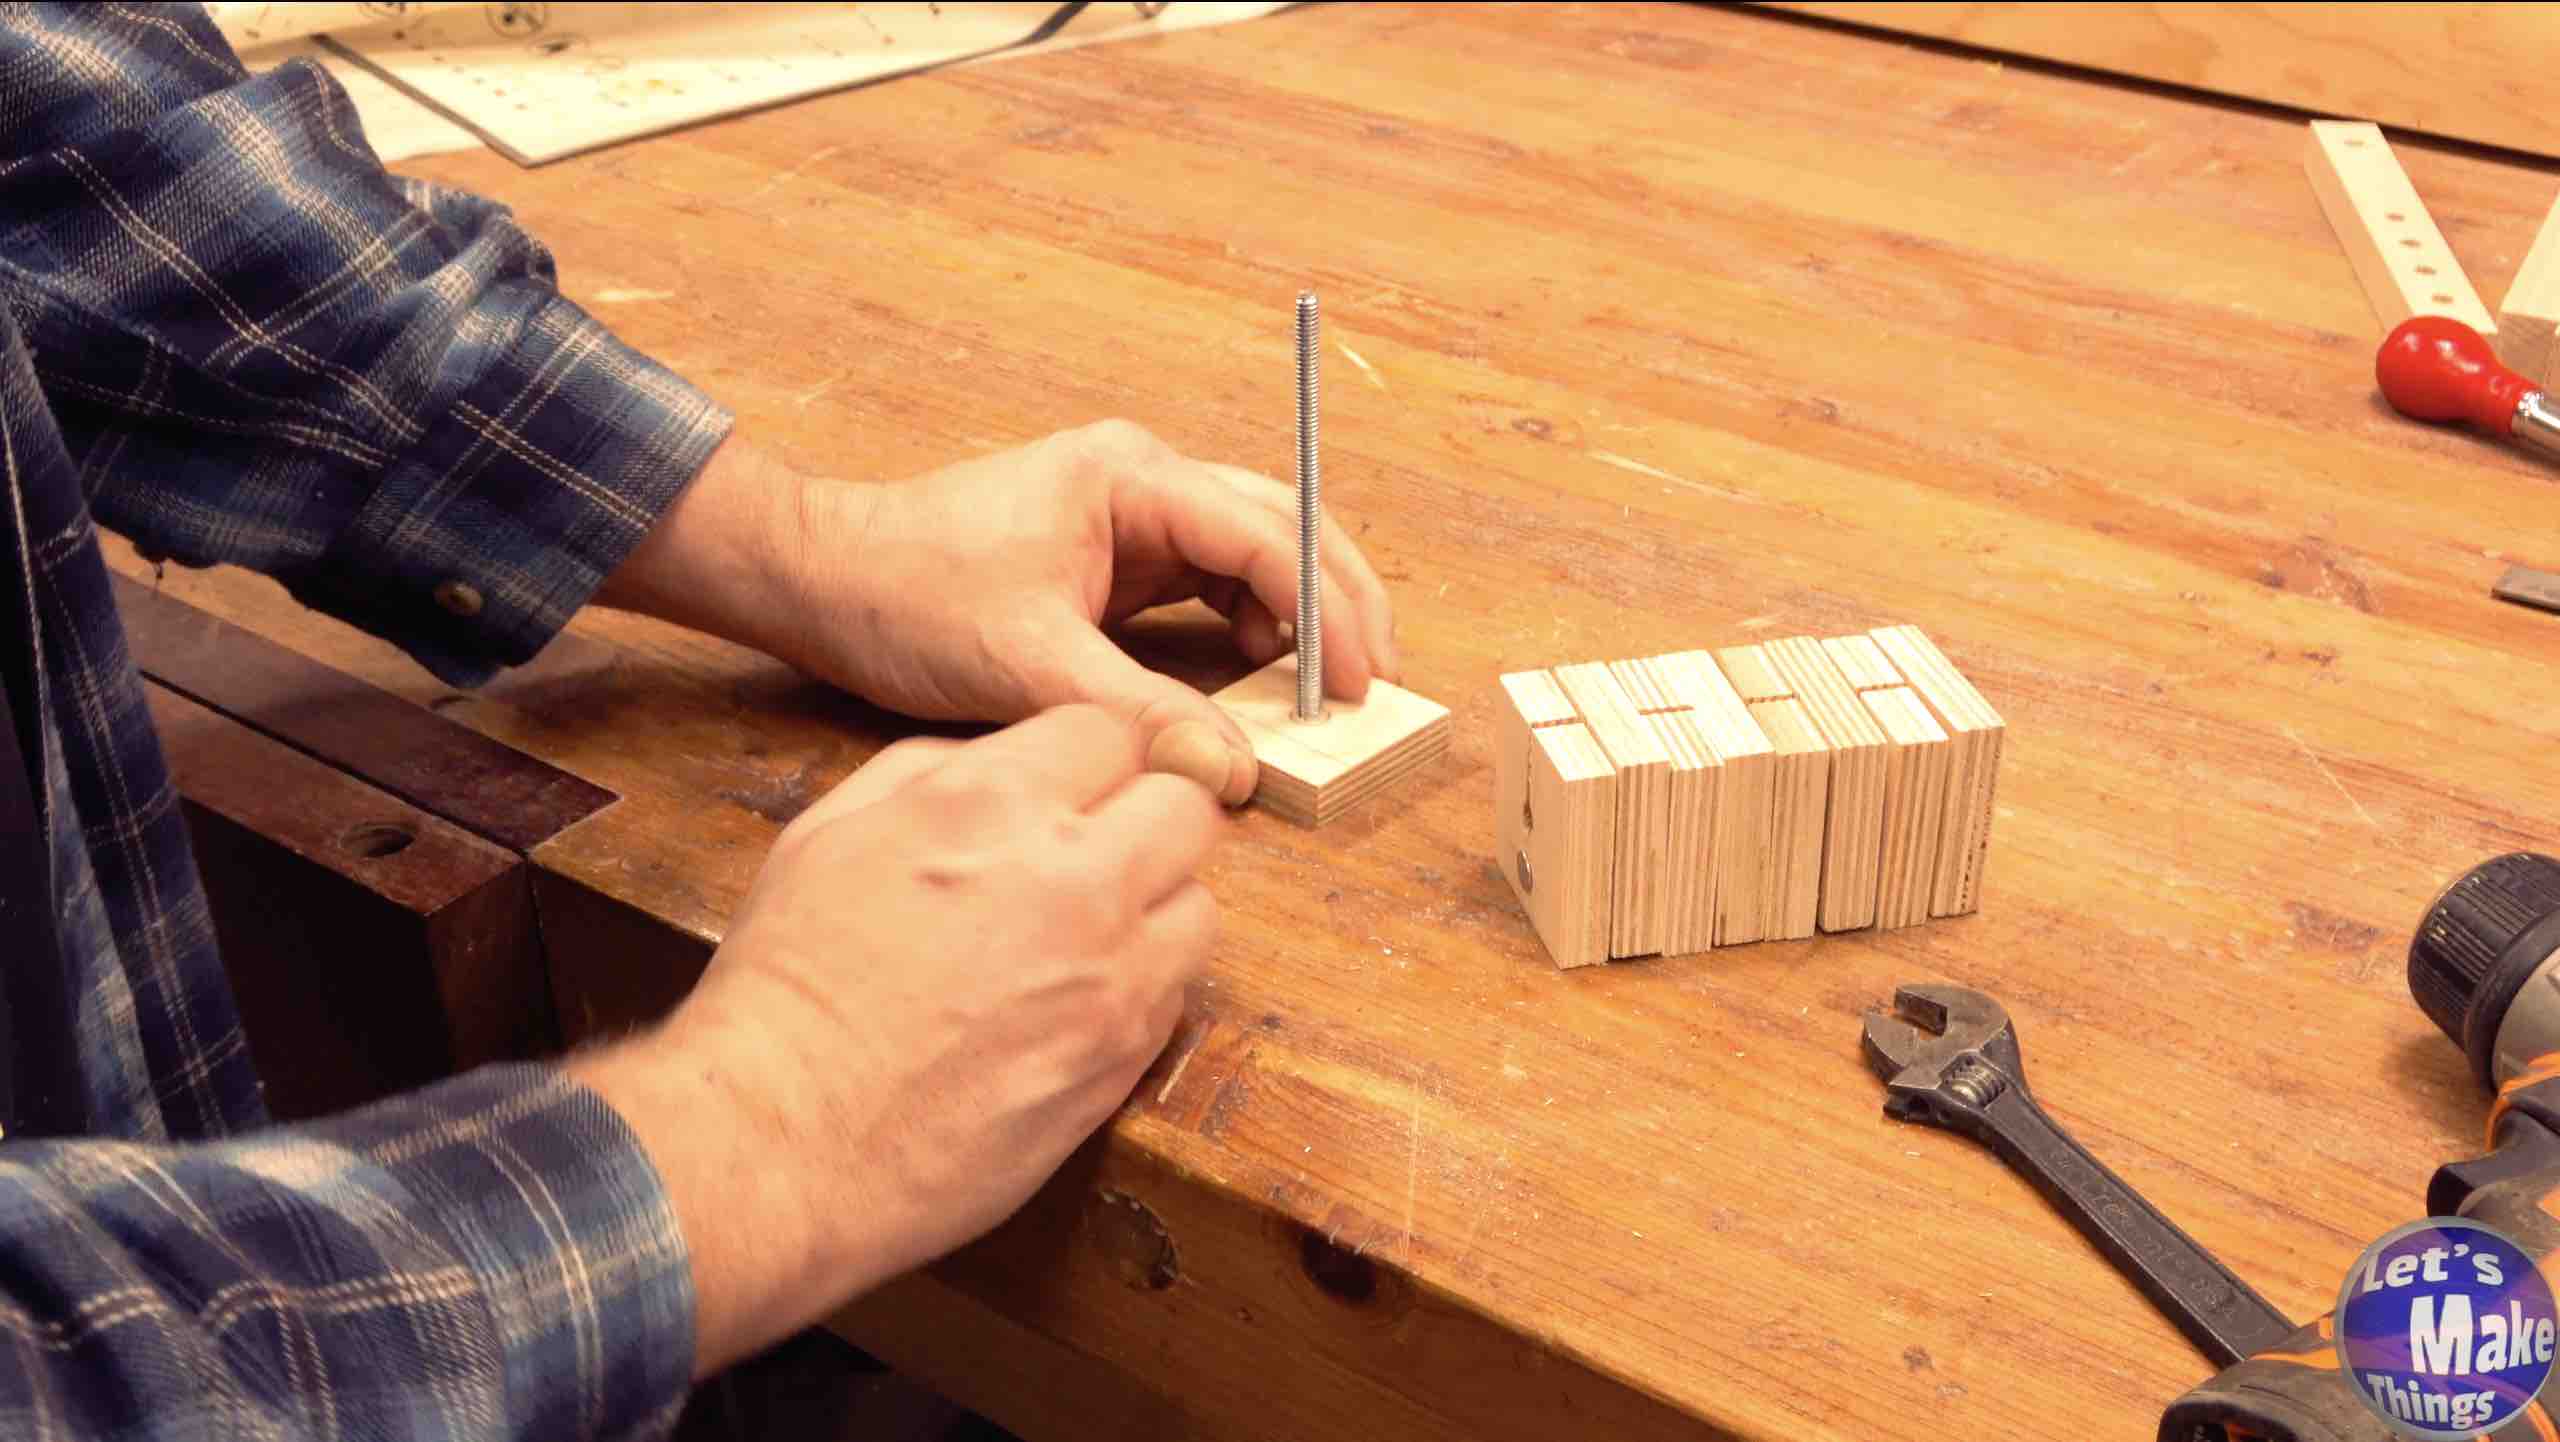
Storage
Well that was easy! To store these, you could take a 1/4 inch carriage bolt that’s about 6 inches long and run it straight through the middle, or you can make a simple storage system for it, which consists of another 2 inch by 2 inch block, and a 1/4″ carriage bolt.
To do that, we’ll take the 2 inch by 2 inch block, find our center like we did with the finish blocks and use a 5/8 inch forstner bit and drill down about a 1/16th of an inch. Then we’ll drill the center out, but instead of using a 5/16 inch brad point drill bit, like we did with the blocks, we’ll use a 1/4″ brad point drill bit to drill the full way.
Note: Clicking the picture on the right shows this step in motion at youtube.
Storage Continued
Something that I didn’t do in the video was to add a little bit of epoxy on the head of the carriage bolt. Chances are, the bolt will eventually get loose, so it’s a good idea. We’ll use a 1/4 inch nut and pull the carriage bolt into the wood by using a wrench.
And that’s it! Very simple!
Note: Clicking the picture on the right shows this step in motion at youtube.

Tip Jar
If you enjoyed these free plans and have a few bucks sitting around, why not help us keep the website going and feed the tip jar? Completely optional!