This jig is nothing more than a stick with 5 holes on it, one of which is a pivot that an awl fits in, or even a nail. All holes are drilled with an 1/8″ drill bit, which is also big enough for a pencil to fit in.
Once all holes are drilled, you’ll insert the awl into the pivot hole, a pencil in each of the other holes, and spin, completing four circles.
Click image to see this step on youtube
Mapping the top
We’ll section the circle into four different quadrants and then measure 3 3/4″ marks at the top of each quadrant. When all marks are down, we’ll connect each parallel mark with a yard stick or a straight edge.
Click image to see this step on youtube
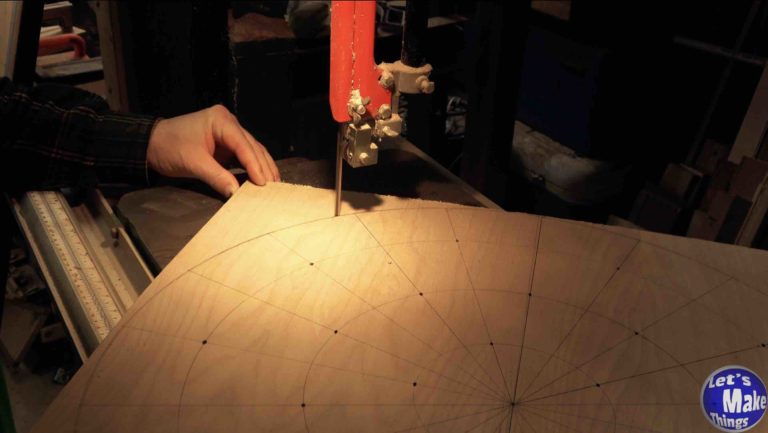
Plotting each circle
We’ll now want to mark where we’ll put our 2″ holes. I have a handy little sheet you can download here that will show you exactly where to plot each point. The circle is divided by the lines we drew in the past step, as well as by the circles.
Click image to see this step on youtube
cutting to size
After the last step has been completed, we’ll cut the outside circle. I used a bandsaw, but you may use a hand saw (like a copy saw) to cut it out.
Click image to see this step on youtube
Inner Circle Jig
Because we want straight, half inch deep holes, this little jig will make it easy for us to get the right depth in each of the 2″ holes we make. First we’ll drill each of the 20 outer holes on the drill press, then we’ll use this jig to get the 6 inside holes that our drill press can’t reach.
Comprised of 2 pieces of scrap plywood, we’ll make it long enough that we can clamp the outside. The second plywood scrap will have a hole just big enough for our forstner bit hole. With painters tape, we can make a depth guage that will let us drill exactly a 1/2″ deep hole.
Click image to see this step on youtube
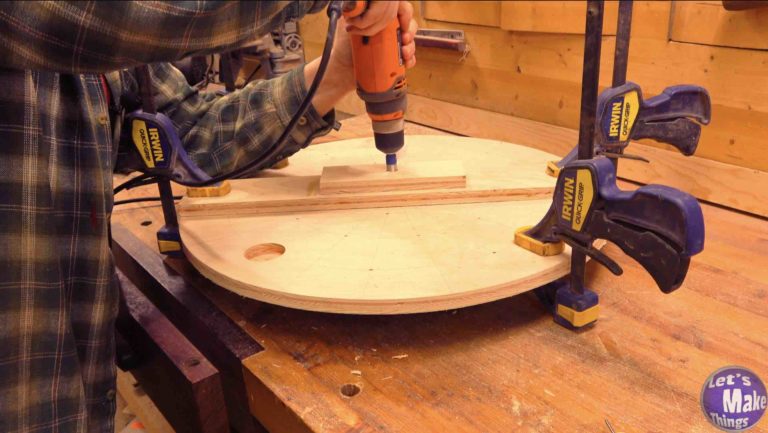
Drill through holes
With all the 26 holes drilled, we’ll want to finish the top of this finish table with a 1/4″ drill bit, which will allow our cone heads bolts to fit in.
Click image to see this step on youtube
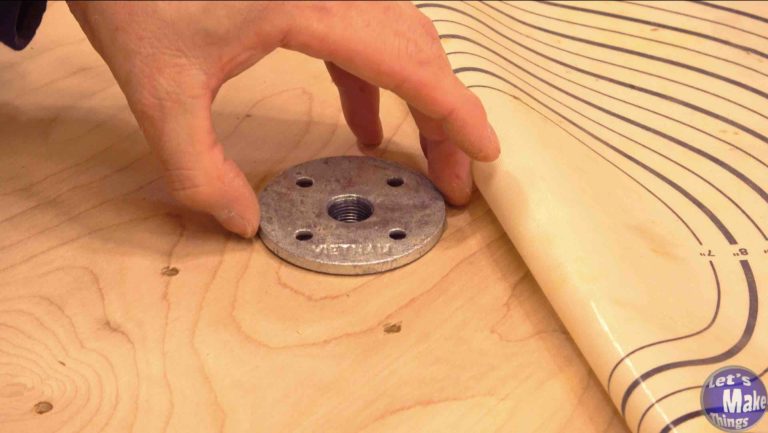
Center Flange
In the center, we’ll want to use a 1/2″ spade bit to drill the hole out. In this hole, we’ll put a 3/8’s flange. We’ll epoxy it and add four #6 x 1/2″ screws in. You’ll next need a 3/8 x 3″ nippel that will screw in the flange.
Click image to see this step on youtube
Leveling the bottom
Unfortunately, the flange will create a 1/4″ gap from the table to the bottom of your finish board, so we’ll use 1/4″ thick strips to flesh it out. I cut my strips out with a table saw, but if you don’t have a table saw, you can always pick up 1/4″ strips at your local hardware store.
Click image to see this step on youtube
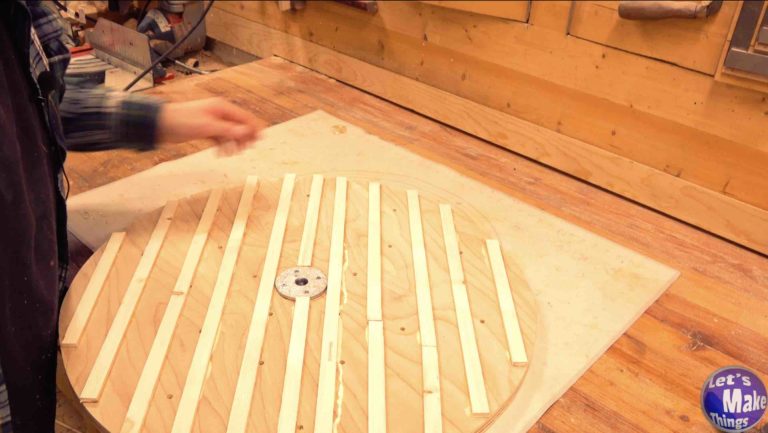
Creating the pads
Tools Needed/used
Awl
Pencil
Yard stick (or Tape measure)
Fine ruler
Square
Utility knife (or knife of some kind)
F-clamps and C-clamp
Glue mat
5/8″ Forstner bit
1/16″, 1/4″ Brad point bit
1″ Spade bit
Hacksaw
Drill press
Bandsaw
Belt sander
Blow torch (optional)
Materials
1/4″ x 1″ Carriage bolt and 1/4″ nut
1/4″ x 24″ threaded rod
3/4″ x 3 1/2″ x 10″ piece of plywood
(26) 1/2″ x 2″ x 2″ plywood squares
(3) 3″ x 21″ Carpet Utility runner
Wood glue, Mod podge and Epoxy
Painter’s tape
(4) #6 x 1/2″ wood screws
1/8″ magnets (optional)
The next 6 instructions come from this video
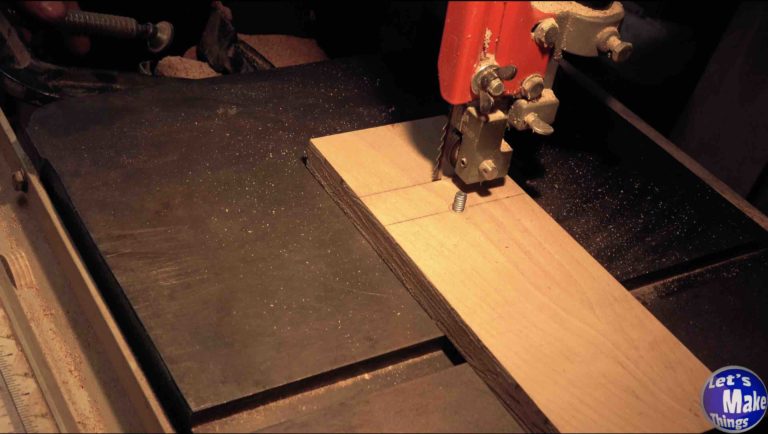
Circle Jig
With a 3 1/2″ x 10″ piece of plywood (3/4″ thick), we’re going to make a circle cutting jig that will cut 2″ circles out of 1/2″ plywood.
We’ll draw two lines on the top and find the center of the line closest to the center of the scrap. I used a 1/16″ drill bit and drilled through, switched to a 5/8″ forstner bit and drilled in a half inch. Then finished by drilling the rest of the way through with a quarter inch drill bit. a 1/4″ x 1″ carriage bolt inserts in through the bottom.
Do you need to make this jig? No, but it makes it easier to cut the circles that will go on your finish board.
Click image to see this step on youtube
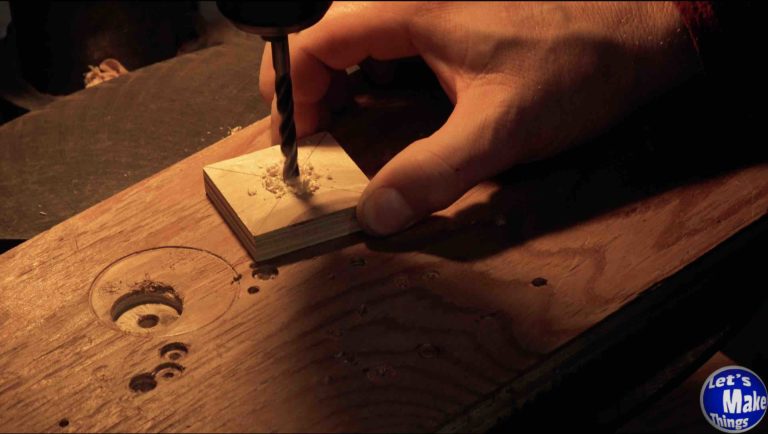
Pad Creation
Now that we’ve made our circle jig, it’s time to make the blocks that will fit on it. You’ll need to cut out (26) 1/2″ x 2″ x 2″ squares. On each square, you’ll need to find the center. By connecting the diagonals, you’ll achieve this.
Once you’ve found the centers, use a 1/4″ brad point bit to drill them out.
Click image to see this step on youtube
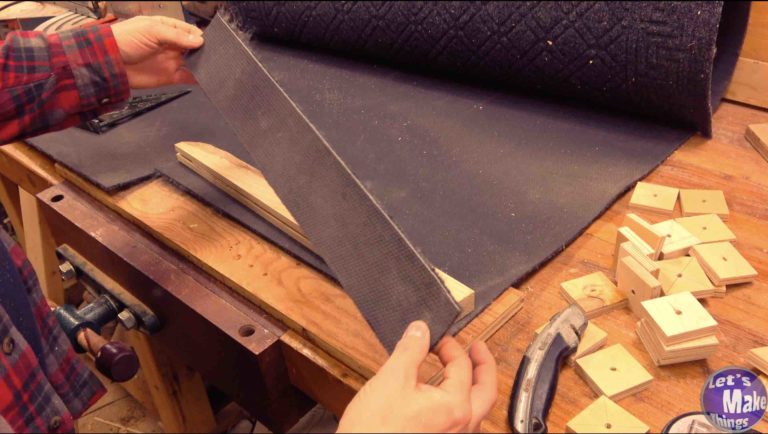
Adding Carpet Utility Runner
We’ll cut out (3) 3″ x 21″ pieces of carpet utility runner. If you haven’t heard of this, check out my webpage explaining this magical material. With mod podge, we’ll glue the tracker runner to the 26 blocks we cut and shaped in the last step, finishing by clamping it together.
Click image to see this step on youtube
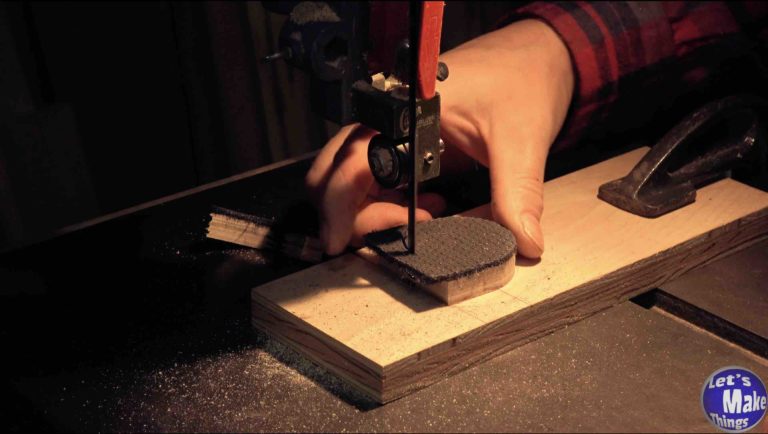
Using the circle Jig
At this point, using the jig is simple. We’ll cut half way on the line we drew that’s closest to the edge and turn off the drill press. The jig will need to be clamped down and I found a c-clamp did a great job.
With the jig in place, the rest is a snap: insert the 1/4″ carriage bolt into each square and spin.
Click image to see this step on youtube
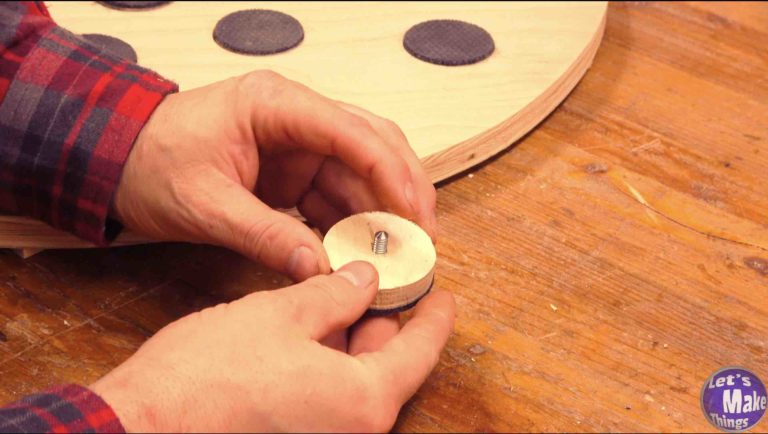
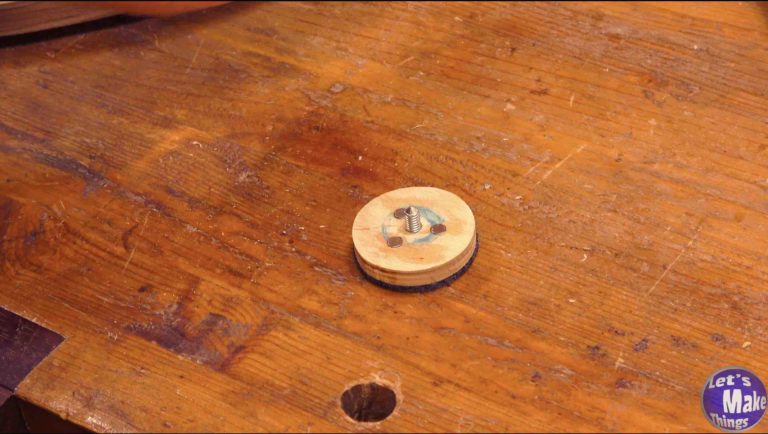
Adding Cone screws
With a 1/4″ x 24″ threaded rod, we’ll make (26) 3/4″ cone headed bolts that we’ll then epoxy into each square.
Click image to see this step on youtube
Adding small magnets (Optional)
I added magnets to the center pad so that when I store the finishing plate on its side, it won’t fall out. The others use the 1/4″ hole we drilled, but, due to the flange, that hole is bigger. This is a work around.
Not necessary, but an option.
Click image to see this step on youtube
Making finish blades (optional)
Tools Needed/used
Awl
Pencil
Tape measure
Utility knife (or knife of some kind)
1/16″, 1/4″ Brad point bit
Hand drill (optional)
Table saw (optional)
Materials
(2) 1″ x 2″ x 16″ Pine lumber
(2) 16″ Plumbing straps
(2) 1/4″ T-nuts
Epoxy
Painter’s tape
(4) #6 x 1/2″ wood screws (optional)
The next 6 instructions come from this video
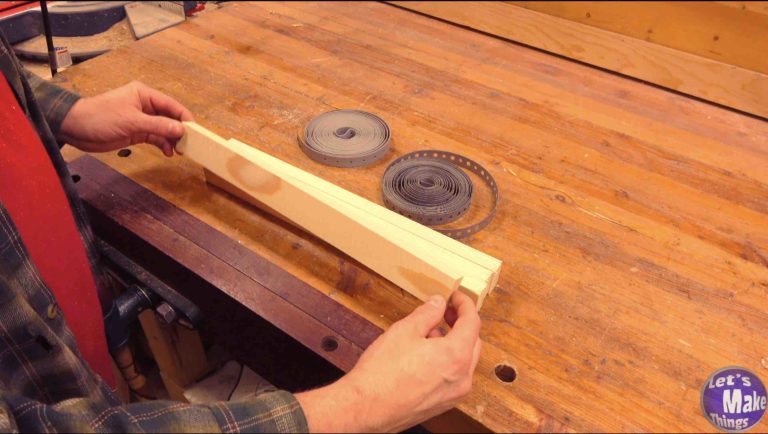
Material Explanation
We’ll be using plumbing strap on 2 separate 1″ x 2″ x 16″ boards. We could use metal, but due to rust and black marks that it creates on our wood, we’ll use the cheaper plastic strap.
Click image to see this step on youtube
Universal Instructions
There are a couple ways to make these, but first we’ll need to cut our straps to size, again, at 16 inches.
Click image to see this step on youtube
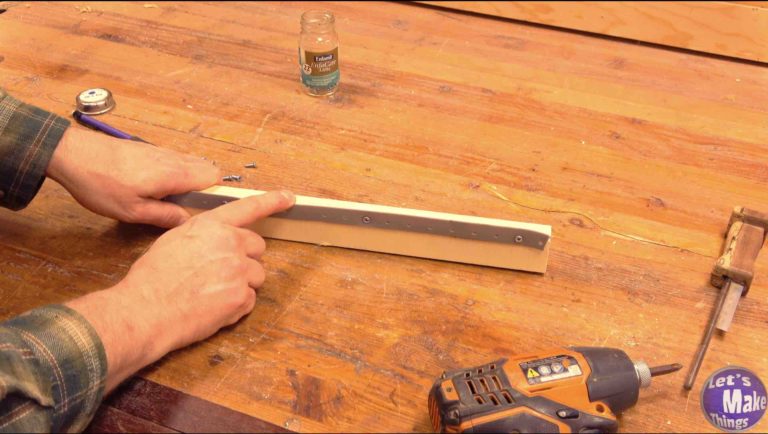
Adding t-nuts
We’ll find the center, drill out a 1/4″ hole that’s about a half inch deep and (3-4 (depending on your t-nut)) 1/16″ inch holes for the tines.
With epoxy we’ll glue them in.
Click image to see this step on youtube
First method (no table saw)
With this method, we’ll draw a line on each 1″ x 2″ at an 1/8th inch, drill and then add screws along the plumber strap.
Click image to see this step on youtube
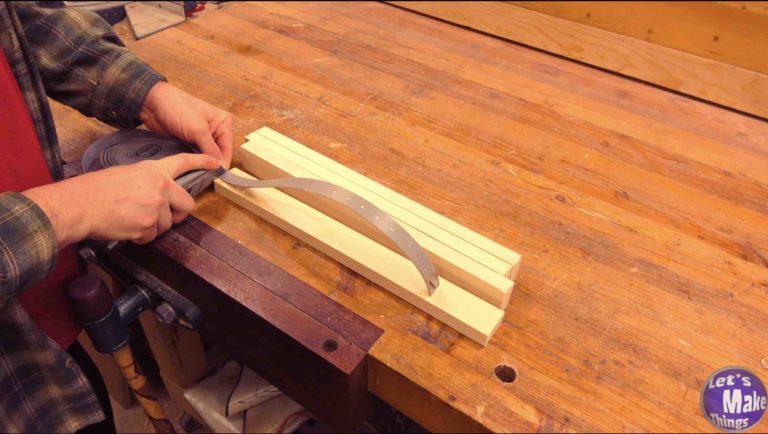
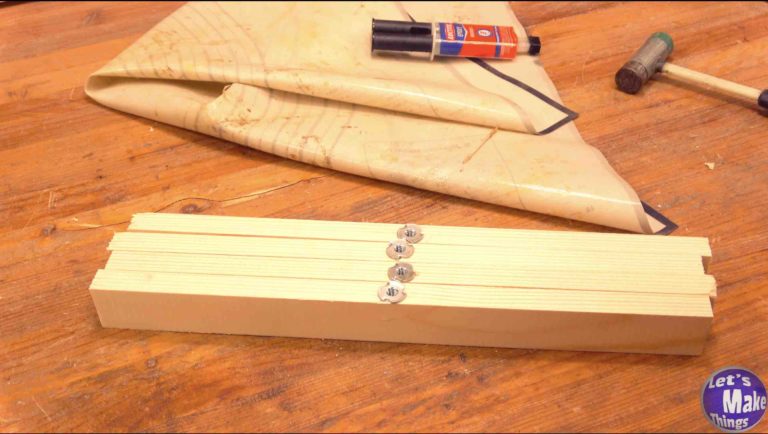
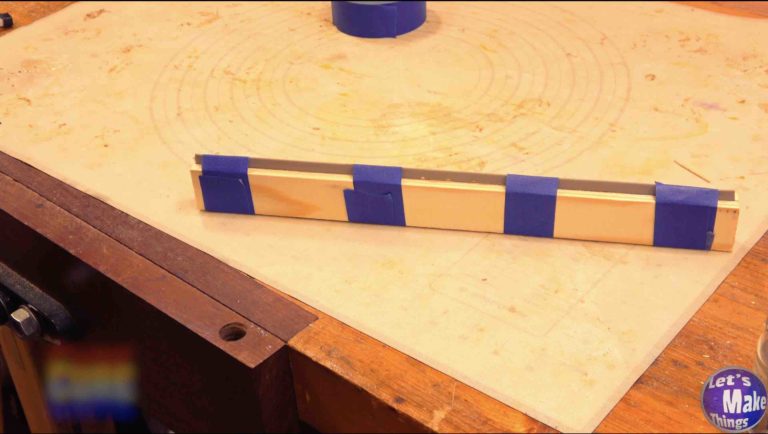
Second Method (table saw)
With this second method, we’ll create a groove in the 1″ side that we’ll then add epoxy and the strap. With painter’s tape, we’ll glue the plumber strap in place.
Click image to see this step on youtube
Why would you want to make this?
Due to round or narrower stock, using the above fnishing board is not possible. These blades make it easier to use those.
Click image to see this step on youtube
Tip Jar
I want to thank you all so much for checking out this webpage. This website is done out of a labor of love as I have dedicated it to help others that are new or looking to do newer, creative woodworking things. Unfortunately, there are a lot of expenses. If you’d like to add a few bucks to the tip jar or even sign up for patreon, it would help greatly to keep this website going.
If you found any errors on the page, please contact me and let me know!