Lap joints are about as old as time itself. Take a board and put it over another board (perpendicularly) and you have a lap joint. While lap and half lap joints are simple to create, the one problem that I’ve always had is centering a lap joint correctly. I came up with a jig that I think dramatically makes that easier.
On this page you’ll find instructions to making one of these, but it’s pretty simple. Two arms slide on a bar and are locked by screws at the top to the bar.
watch all steps in this video before starting
Please use the material and tool list below as a guide to finding the products locally.
As an amazon associate I earn from qualifying purchases.
Step by step instructions
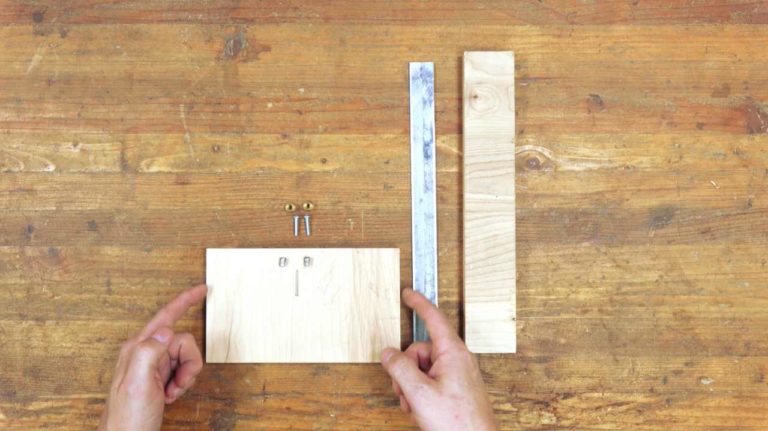
1. Materials
I’ve listed all the materials above, which should very easily be found in your local box hardware stores. Plywood needs to be 3/4 of an inch due to the cut that you’ll add in both pieces. Again, because of that cut, it should be plywood and not solid wood as solid wood, no matter how you slice the grains, is going to be weaker. One thing I did change was the size of the #6-32 machine screw…it would be better to go with 1″.
Click image to see this step on youtube
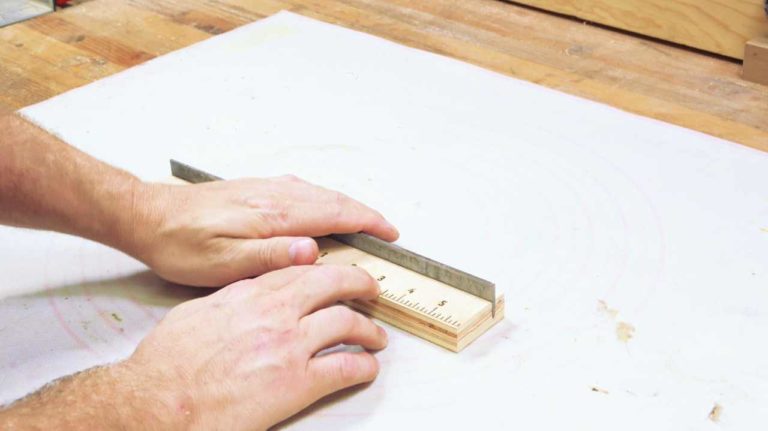
2. Making the body
This step is pretty simple: you’ll cut a channel through the plywood that’s a 1/2″ in depth. The really important part of this and step 3 is that you’ll need to use a 3/32″ kerf blade as a 12 gauge piece of steel is exactly 3/32″. The really good news is that 3/32″ is pretty standard. But if you have a more expensive 1/8″ blade, this will not work for it.
After the channel is cut we’ll add the epoxy and then the steel. We’ll then need to add a channel at the zero for a nail, which we’ll again epoxy in.
Click image to see this step on youtube
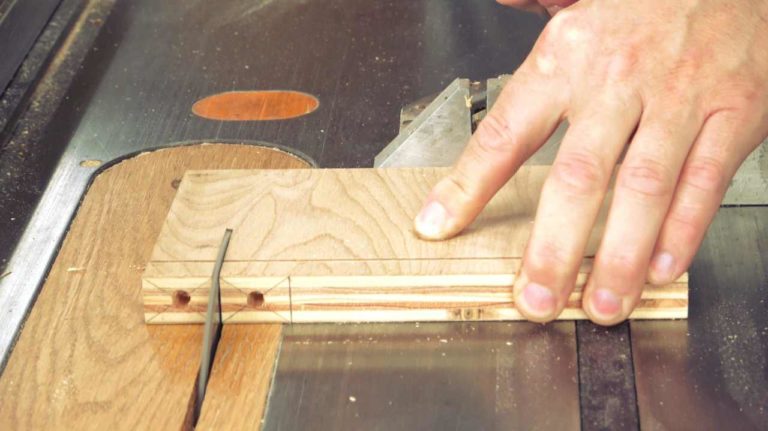
3. cutting the arms
Each arm is only an inch wide, but cross cutting an inch wide piece of plywood is, of course, very dangerous, so I made it 6″ wide. Each piece will be cut after the groove is cut on the backside, as well as each hole is made in the center. We’ll then epoxy a 3/32″ wood insert into the hole and the #6-32 x 1″ screw to either a knurled thumb knob or a wing nut. Of course, if you just want to use a screwdriver to screw the screw in each time, you don’t need to add a knob or wing nut.
Click image to see this step on youtube
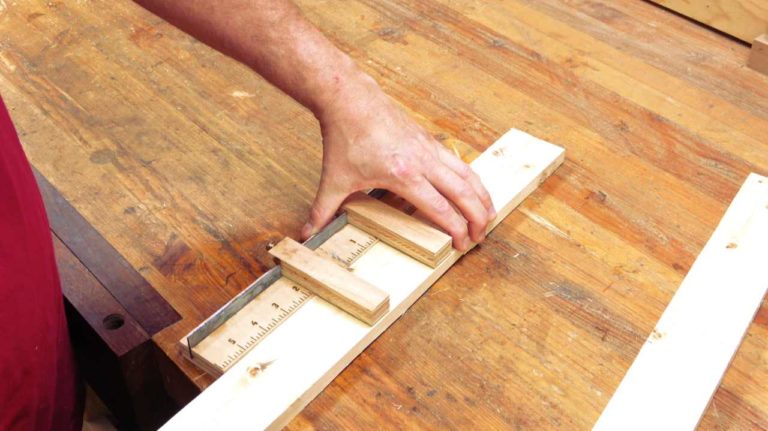
4. How it works
To use it you’ll need to find the width of your stock and center it on the jig. When it’s time to use it, you’ll draw a line on the stock you plan on using and center the jig to the stock by pushing the nail into the piece. Now you use a pencil to mark both parallel lines which you’ll cut out.
It can also easily be set on the end and turned slightly to find the width.
Click image to see this step on youtube
Tip Jar
If you enjoyed or found this useful, throw me a tip →