Plunge or panel saws make cutting sheet goods down to size incredibly easy. As they are coming down in price, it might be a good investment if you cut a lot of these materials down to size. But if using plywood or paneling is something that only needs to be taken care of once in a blue moon, this is a great alternative that will give you fast results that will make you wonder why you ever tried to attempt to use a table saw to do the same thing.
Below I have free step by step plans that will make creating one of these simple as well as easy and will take less than 30 minutes to make so you can get back to your projects.
ATTENTION: These plans are yours to use…they are offered as a gift from me to you. You have every right to use them to make this project for yourself, but please, do not sell or give these plans away as your own. I make absolutely no money off of these so I would appreciate those who view these plans to abide by basic copyright laws.
As an amazon associate I earn from qualifying purchases.
Step by step instructions
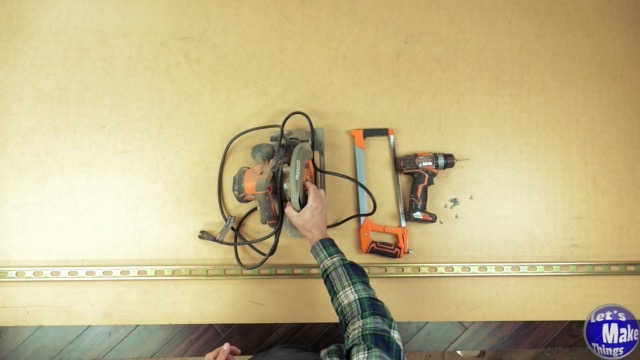
1. Materials and tools
The materials for this will cost you less than you think. The most expensive part of this is the strut, but it shouldn’t come as a surprise due to its thickness. Because we do want this to be as straight as possible, when you’re at the store, place it on the ground on its edge and make sure that it is as flat as can be.
Sheet metal screws (that have a flat head) are cheap and needed to do this project right.
Click image to see this step on youtube
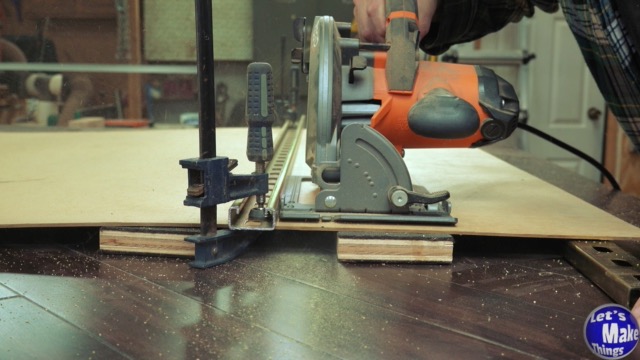
2. Cutting to size
In this step we’ll cut all of our materials to size. I used a hacksaw but an angle grinder obviously is better suited. Be sure to sand the steel so that there aren’t any sharp edges that will gouge into your wood.
Click image to see this step on youtube
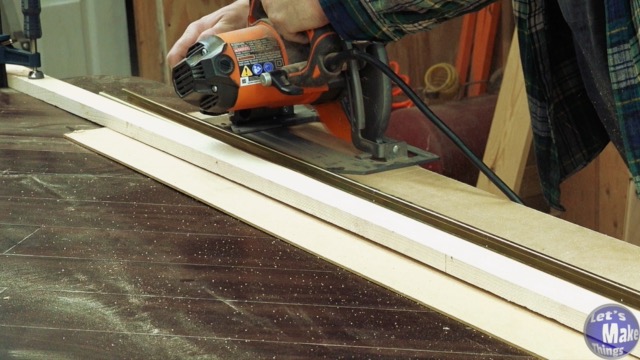
3. Drilling and attaching the strut
After adding double sided tape, we’ll drill out our holes through the steel and into the paneling using an 1/8th inch drill bit. Flipping the straight edge over, we’ll use a countersink bit and add our screws, making sure the surface is flat and that the screws don’t protrude.
Click image to see this step on youtube
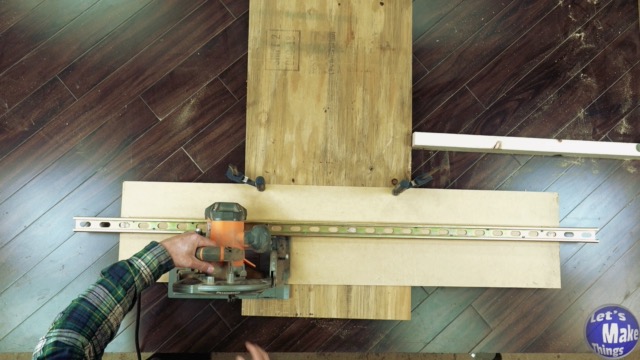
4. Creating zero for alignment
The easiest part of this entire project is just to cut your panel edge to size to get a good zero edge. The nice thing about this is that you shouldn’t ever need to worry about the saw damaging that edge as it can’t go inward.
Click image to see this step on youtube
5. Example
Click the image to see an example as to how this works.
If you enjoyed or found this useful, throw me a tip →
To support me with patreon, click here → Patreon
Click here to Subscribe to me on youtube → Youtube
If you found any errors on the page, please use my email below and contact me!