Normally, I use panel clamps to keep boards I’m gluing up in the same plane (flush). But panel clamps don’t pull boards into alignment. If you’re looking for a more robust clamping system that actually pulls the wood together, you need to make yourself a set of cauls. Cauls are strong and guarantee that your boards are lined up.
While most are made out of wood which are large, heavy and have a chance of sticking to the surface to what you’re gluing, steel cauls are made out of metal square tubing. There’s a slight bend in a set of them that squeezes the boards together…it’s that bend we’ll be making today with this project.
watch all steps in this video before starting
Please use the material and tool list below as a guide to finding the products locally.
Materials
(To make 4 full cauls at 18" in length)
(2) 1 x 1 x 72″ Square steel tubing
(8) 5/16″ x 8″ Hex bolts (preferably with very little threading)
Hydraulic press (Absolutely not necessary, but nice)
Pipe clamps
As an amazon associate I earn from qualifying purchases.
Step by step instructions
1. Materials & Process
In this project I’m using 1 inch by 1 inch steel tubing. For anything under 24 inches, and this should be fine. But if you’re going to do wider glue ups, I would consider using a wider size. Square tubing can be as large as 2 inches by 2 inches.
Of course, I haven’t tested any of this and the 1 inch by 1 inch could work for much more wider panels. This is just a thought to consider. The entire process–this build– is about bending tubing in the center by using clamps. In the next few steps I’ll show you my thoughts and process.
Click image to see this step on youtube
2. Important tips for tubing
It’s important to note a couple things. When you divide the square tubing, be sure to cut exactly between holes, this will give you more usable material. Also consider that tubing, like wood, has a tear out from where the holes have been milled. You wouldn’t want to leave the side that sticks out against your stock.
Click image to see this step on youtube
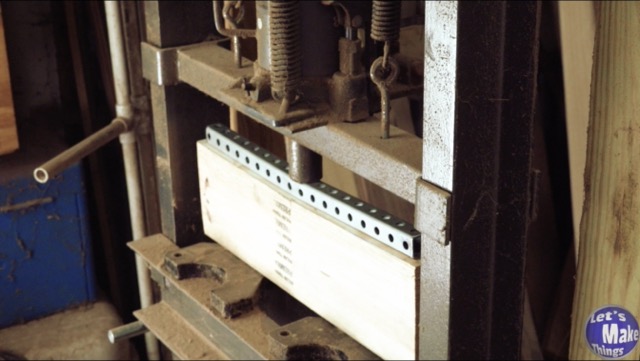
3. First method for bending
The first method is by far the easiest but also the least practical: using a hydraulic press. The one I have is over a hundred dollars and it wouldn’t make sense to buy one and give space to something you might only use once.
If you do have access to one, be sure to cut your v-notch (explained in the video) no deeper than a 1/4 inch, and even then to be light with the compression.
Click image to see this step on youtube
4. Second bending method
The second method is to use pipe clamps. It does take some time but you’ll be happy you made them later on…trust me. You’ll want to use 3 clamps that will inch you closer to your bend. We’ll be using a 1/2″ notch in the wood center and won’t try to compress the tubing to the wood, just slightly over half that distance.
Click image to see this step on youtube
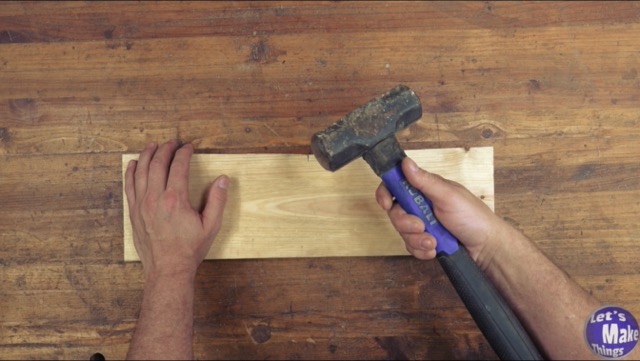
5. Third bending method (Untested)
The third option is to use a hammer and bang it out. You probably will want to go with the 1/2″ v-cut, and like the last step, not try to bend it to the wood. This is all theory though, I have never tried this. I do know that when I used a mini sledge on the backside of one of the tubing to correct an angle that it did move.
Click image to see this step on youtube
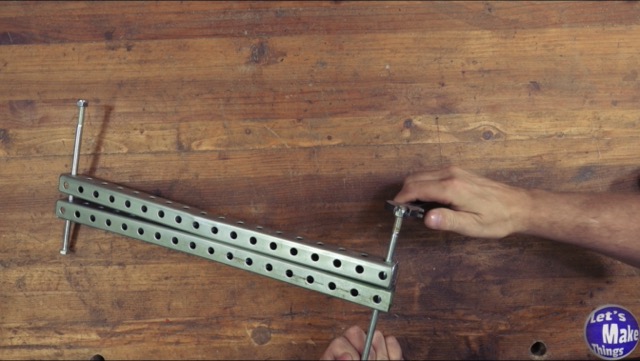
6. Hex bolts (Slightly optional)
I strongly suggest using a bolt at the end. This keeps they from wanting to slide around as you clamp and keeps them from possibly moving. They’re cheap. You should do use them!
Click image to see this step on youtube
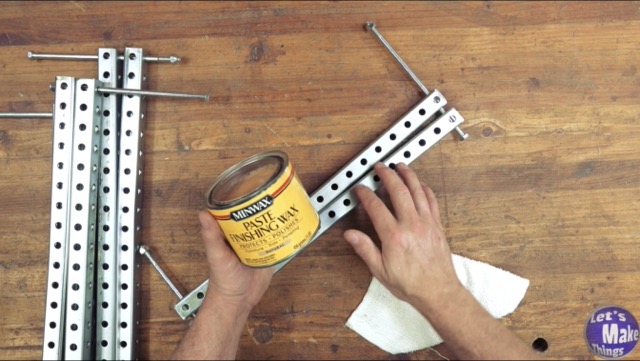
7. Wax that steel
In my bitesize tip #34, I talked about waxing steel, especially for panel clamps as it prevents the glue from sticking to the tubing.
Click image to see this step on youtube
8. In use
In use, it’s very very rigid. I ended up using a large c-clamp to tighten each side down and then adding an f-clamp and removing the c-clamp. This might sound like total overkill…until you remove the cauls and see how perfect the seem is between each board.
I recommend using slight horizontal pressure before putting pressure on the cauls. Pipe clamps are a good idea for the horizontal, too.
Click image to see this step on youtube
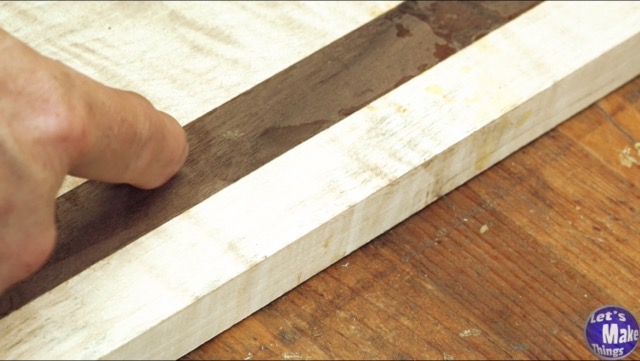
9. Results
Of all my glue ups over my many years, I’ve never seen seems that are so tight you would have assumed the board had been run through the planer. I’m not suggesting that these will always give me these impressive results as I’ve only used this once, but I can say I’ll be using them again!
Click image to see this step on youtube
Tip Jar
If you enjoyed or found this useful, throw me a tip →
To support me with patreon, click here → Patreon
Click here to Subscribe to me on youtube → Youtube
If you found any errors on the page, please use my email below and contact me!