
Stubby Awl
I believe in using tools that you’ve made in your woodworking. I will go a step further by saying that it will make you a better wooodworker to have homemade tools in your workshop. On this webpage, I’ll show you 2 simple ways to make an awl. At the end of the page, I’ll show you my own creative attempt, using one of the methods below to make an awl. I would love to show your creations on my website!
We’ll be covering everything in this video, on this webpage.
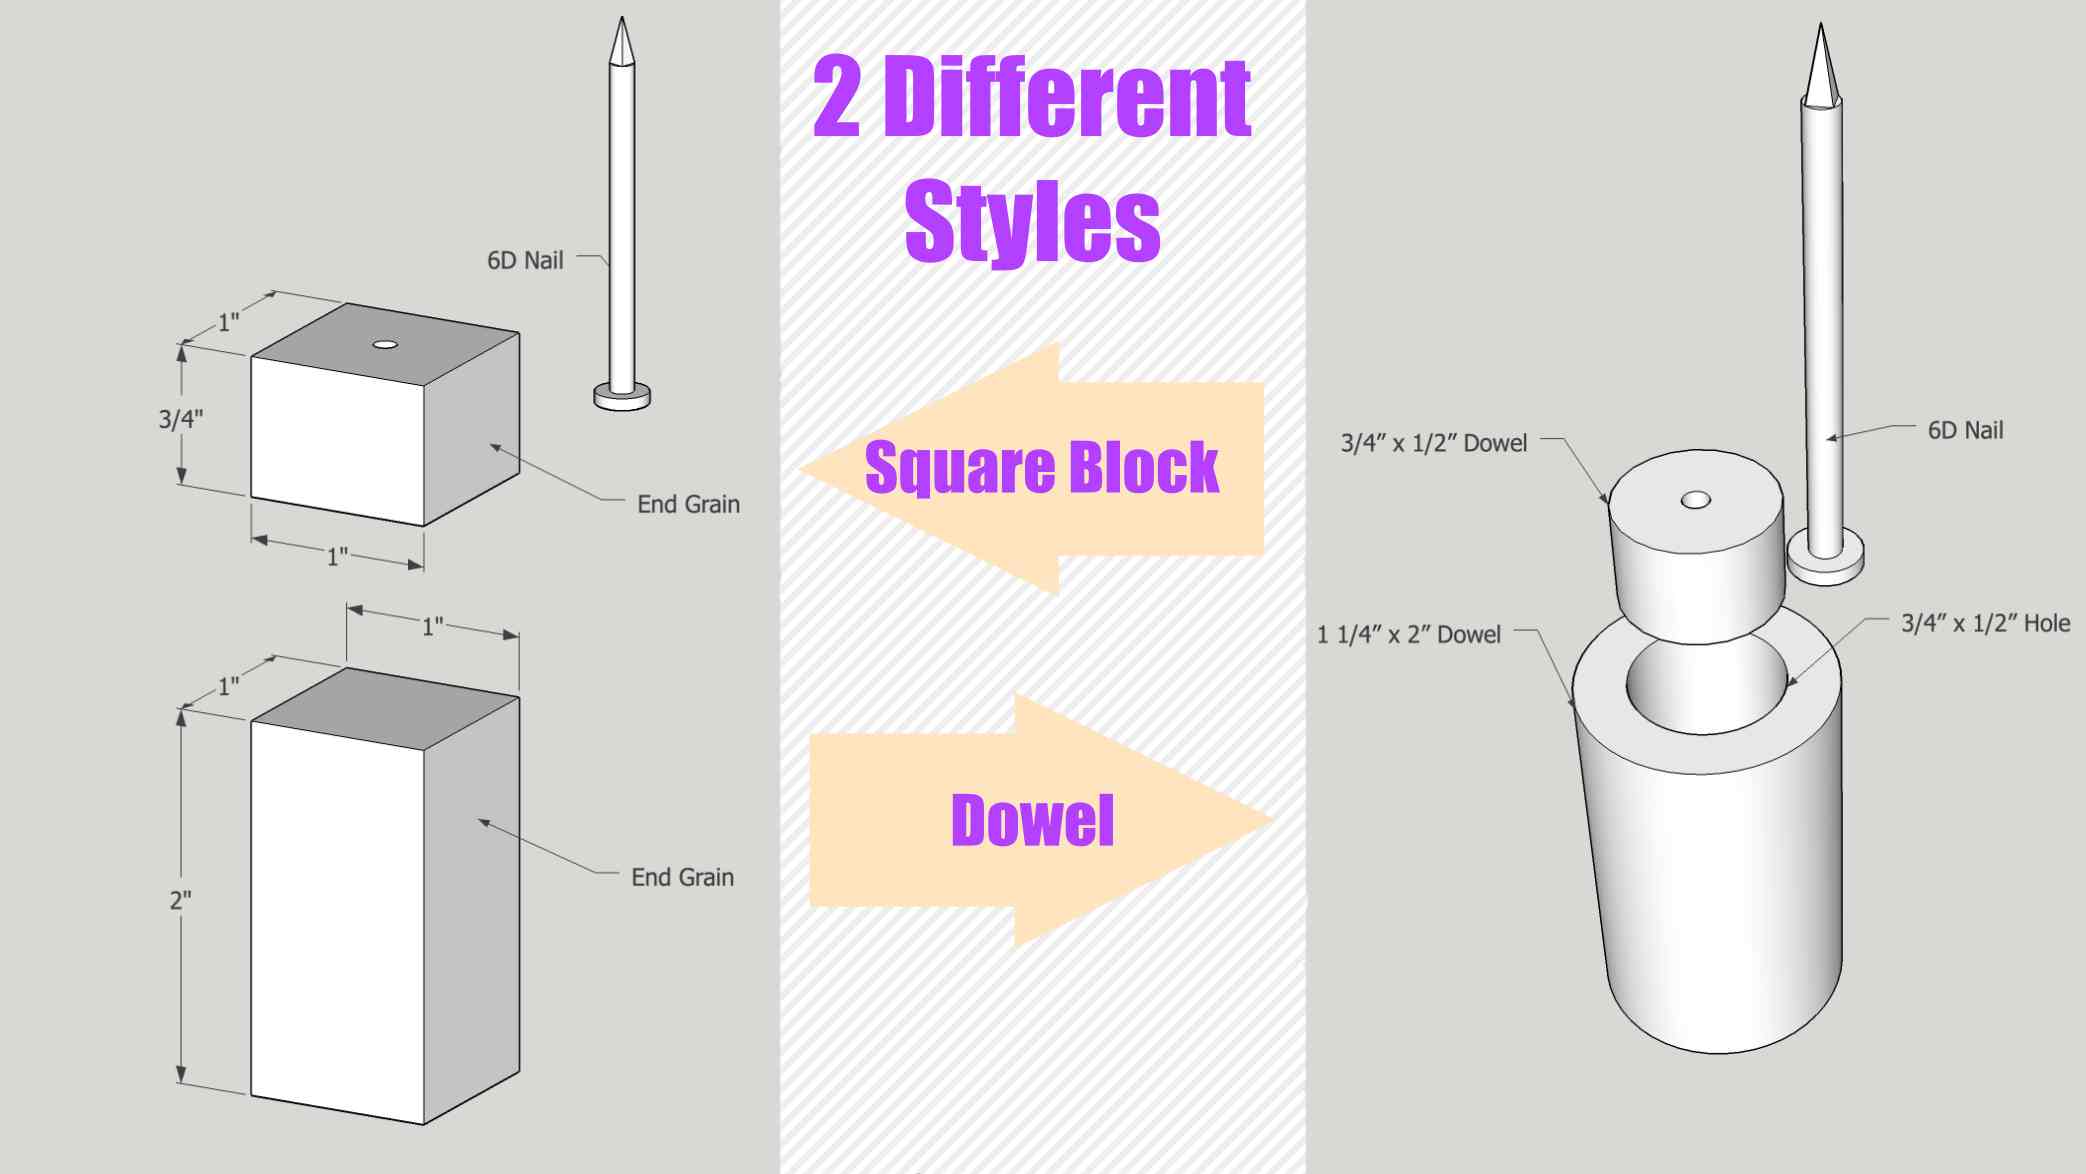
Dimensions
I’ve created 2 different versions. Of course, there are other ways to make this: these were just the two that I liked. In both I use a drill press, but you might be able to do it with a hand drill, if you’re better than me at drilling straight holes.
The steps below will be divided by the two different Styles and will be labeled as: Square Block and Dowel.
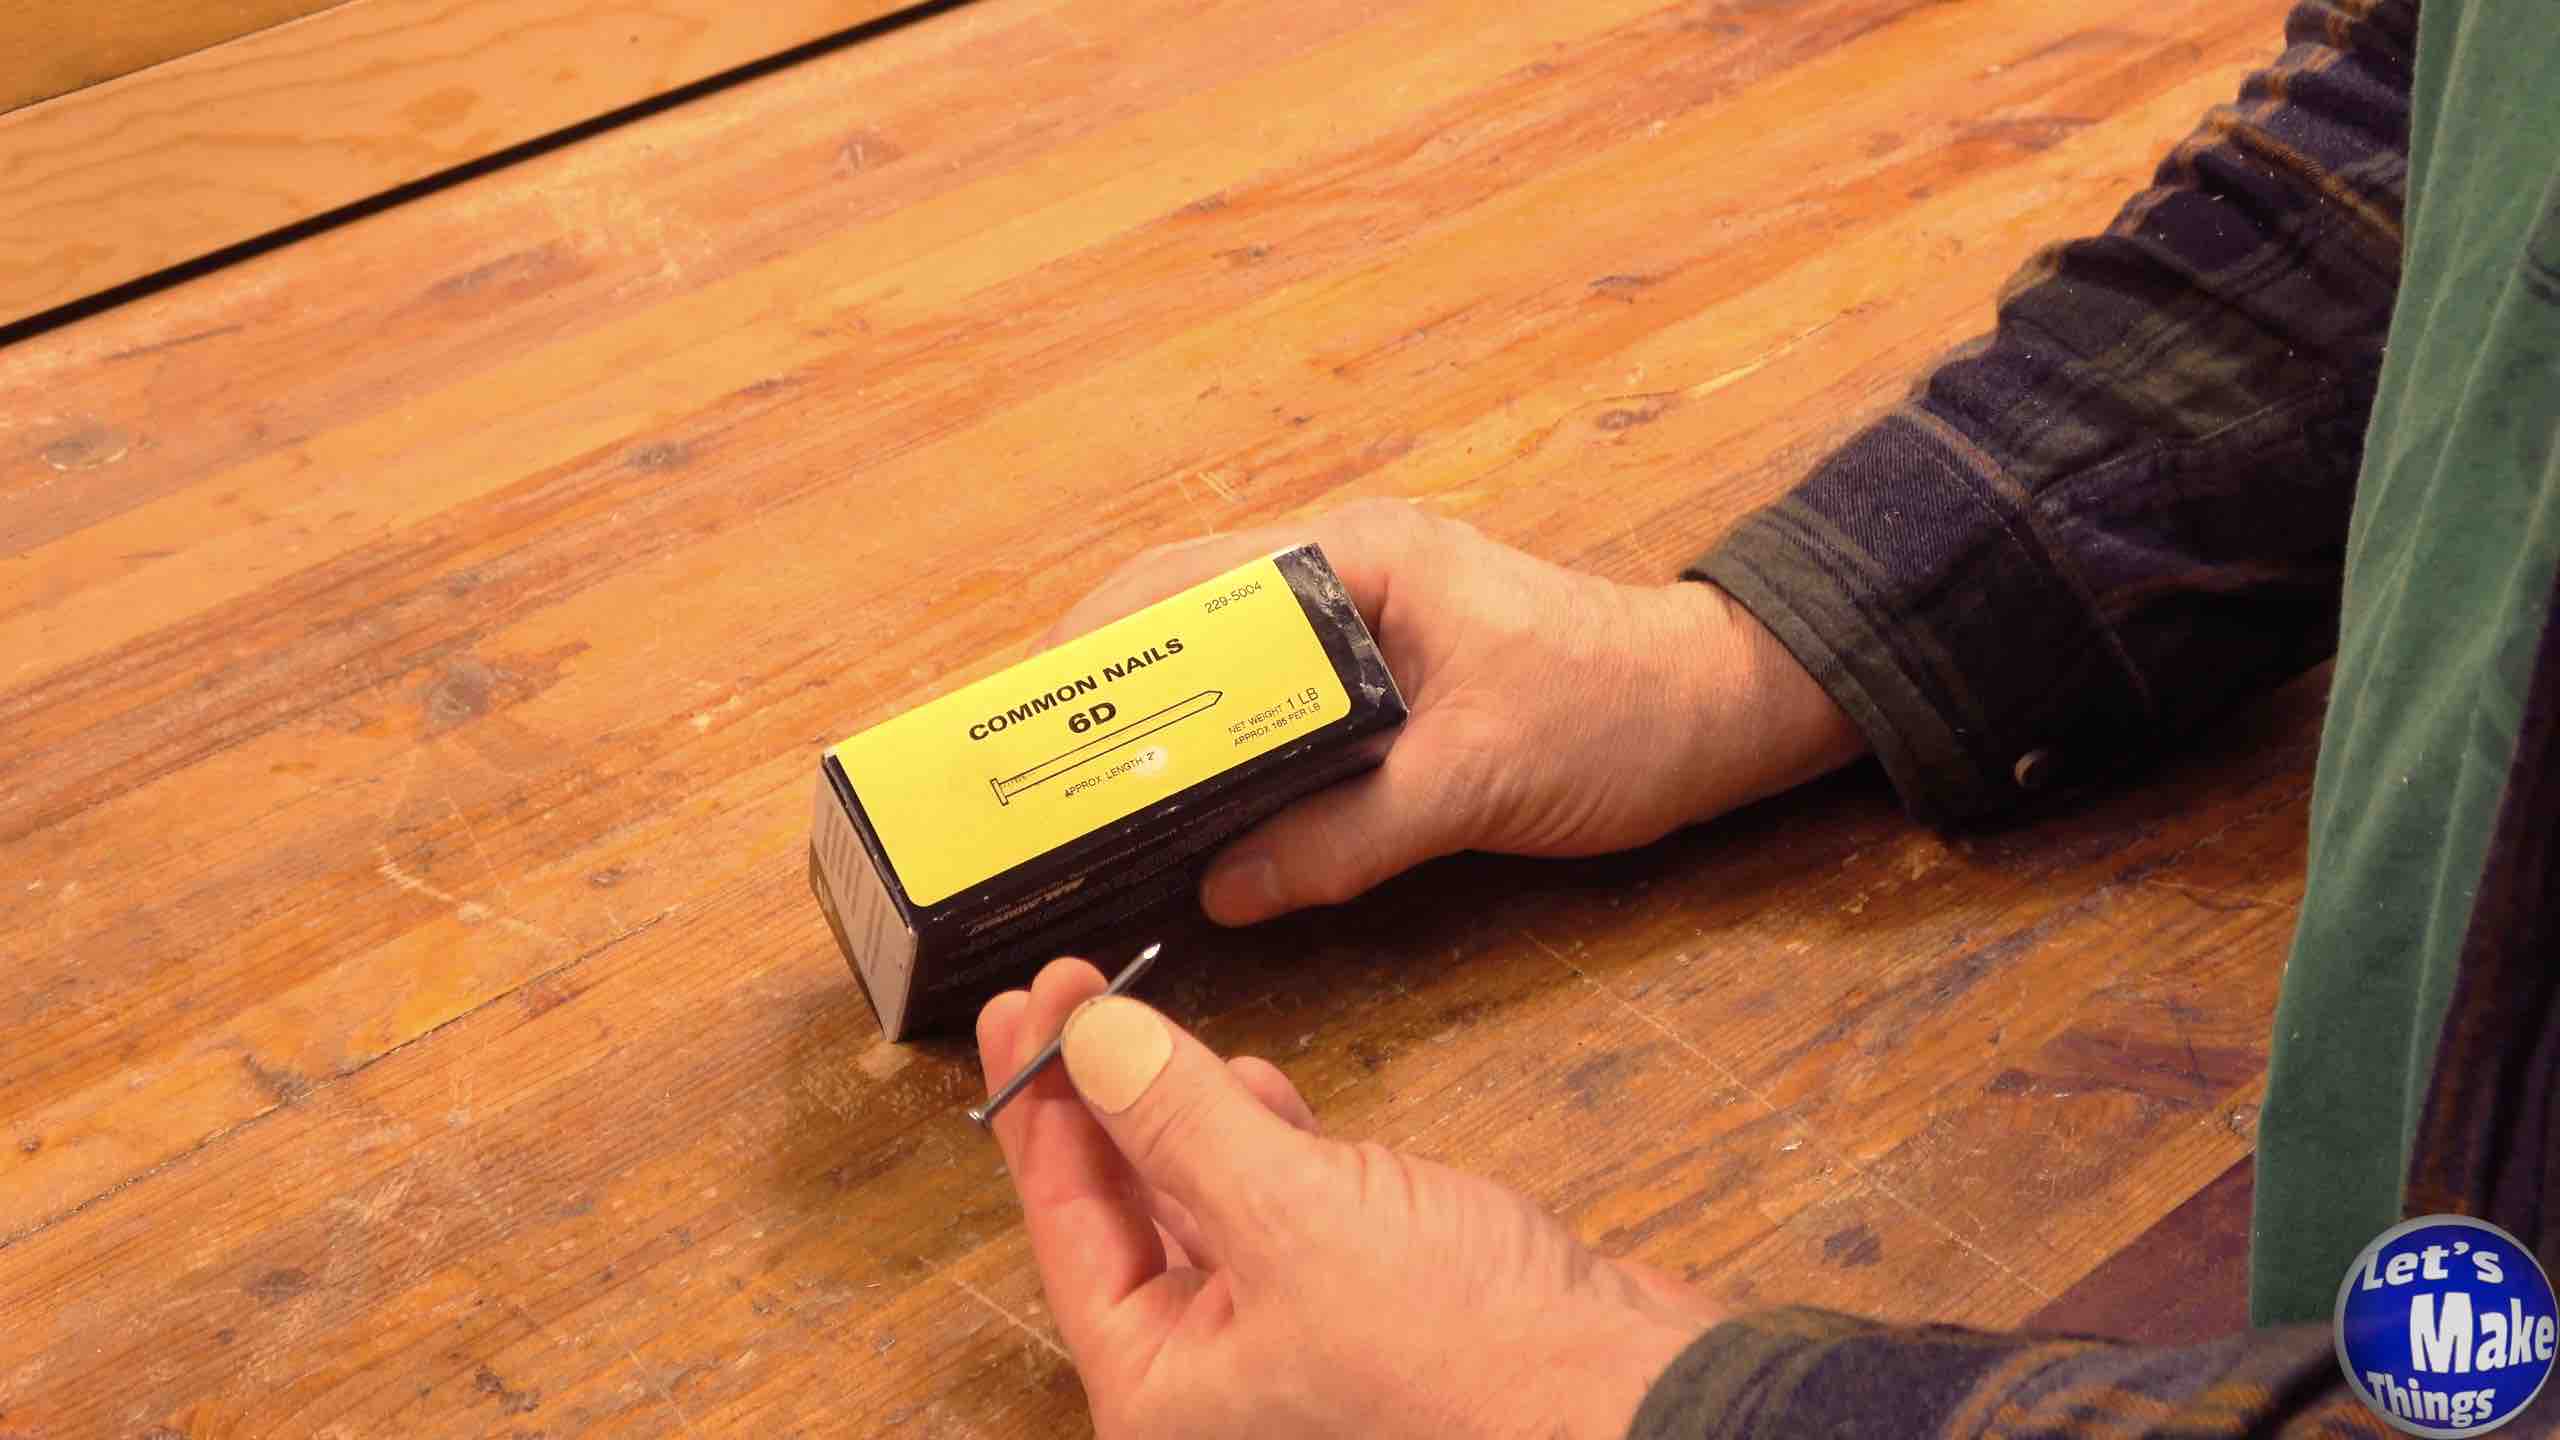
Selecting a Nail
Both versions will be using a 6D nail. I bought a large box of these (165) as I plan on giving them away in the future. You don’t have to though. Try Ace Hardware or other local stores around you that sell them by the pound…and then buy 1. Otherwise, check to see if you have a nail in a bolt bucket.
Once you’ve found your nail, you’ll want to measure the thickness of the nail as well as the head. I have a great little measuring device that I talked about in the video that guages sizes, you can find that drill bit organizor here. Once you find both sizes, you’ll need to grab two drill bits that match.
Note: Clicking the picture on the right shows this step in motion at youtube. Clicking on the link above will take you to amazon.
Part 1: Making an Awl from 2 dowels
Step 1 (Dowel)
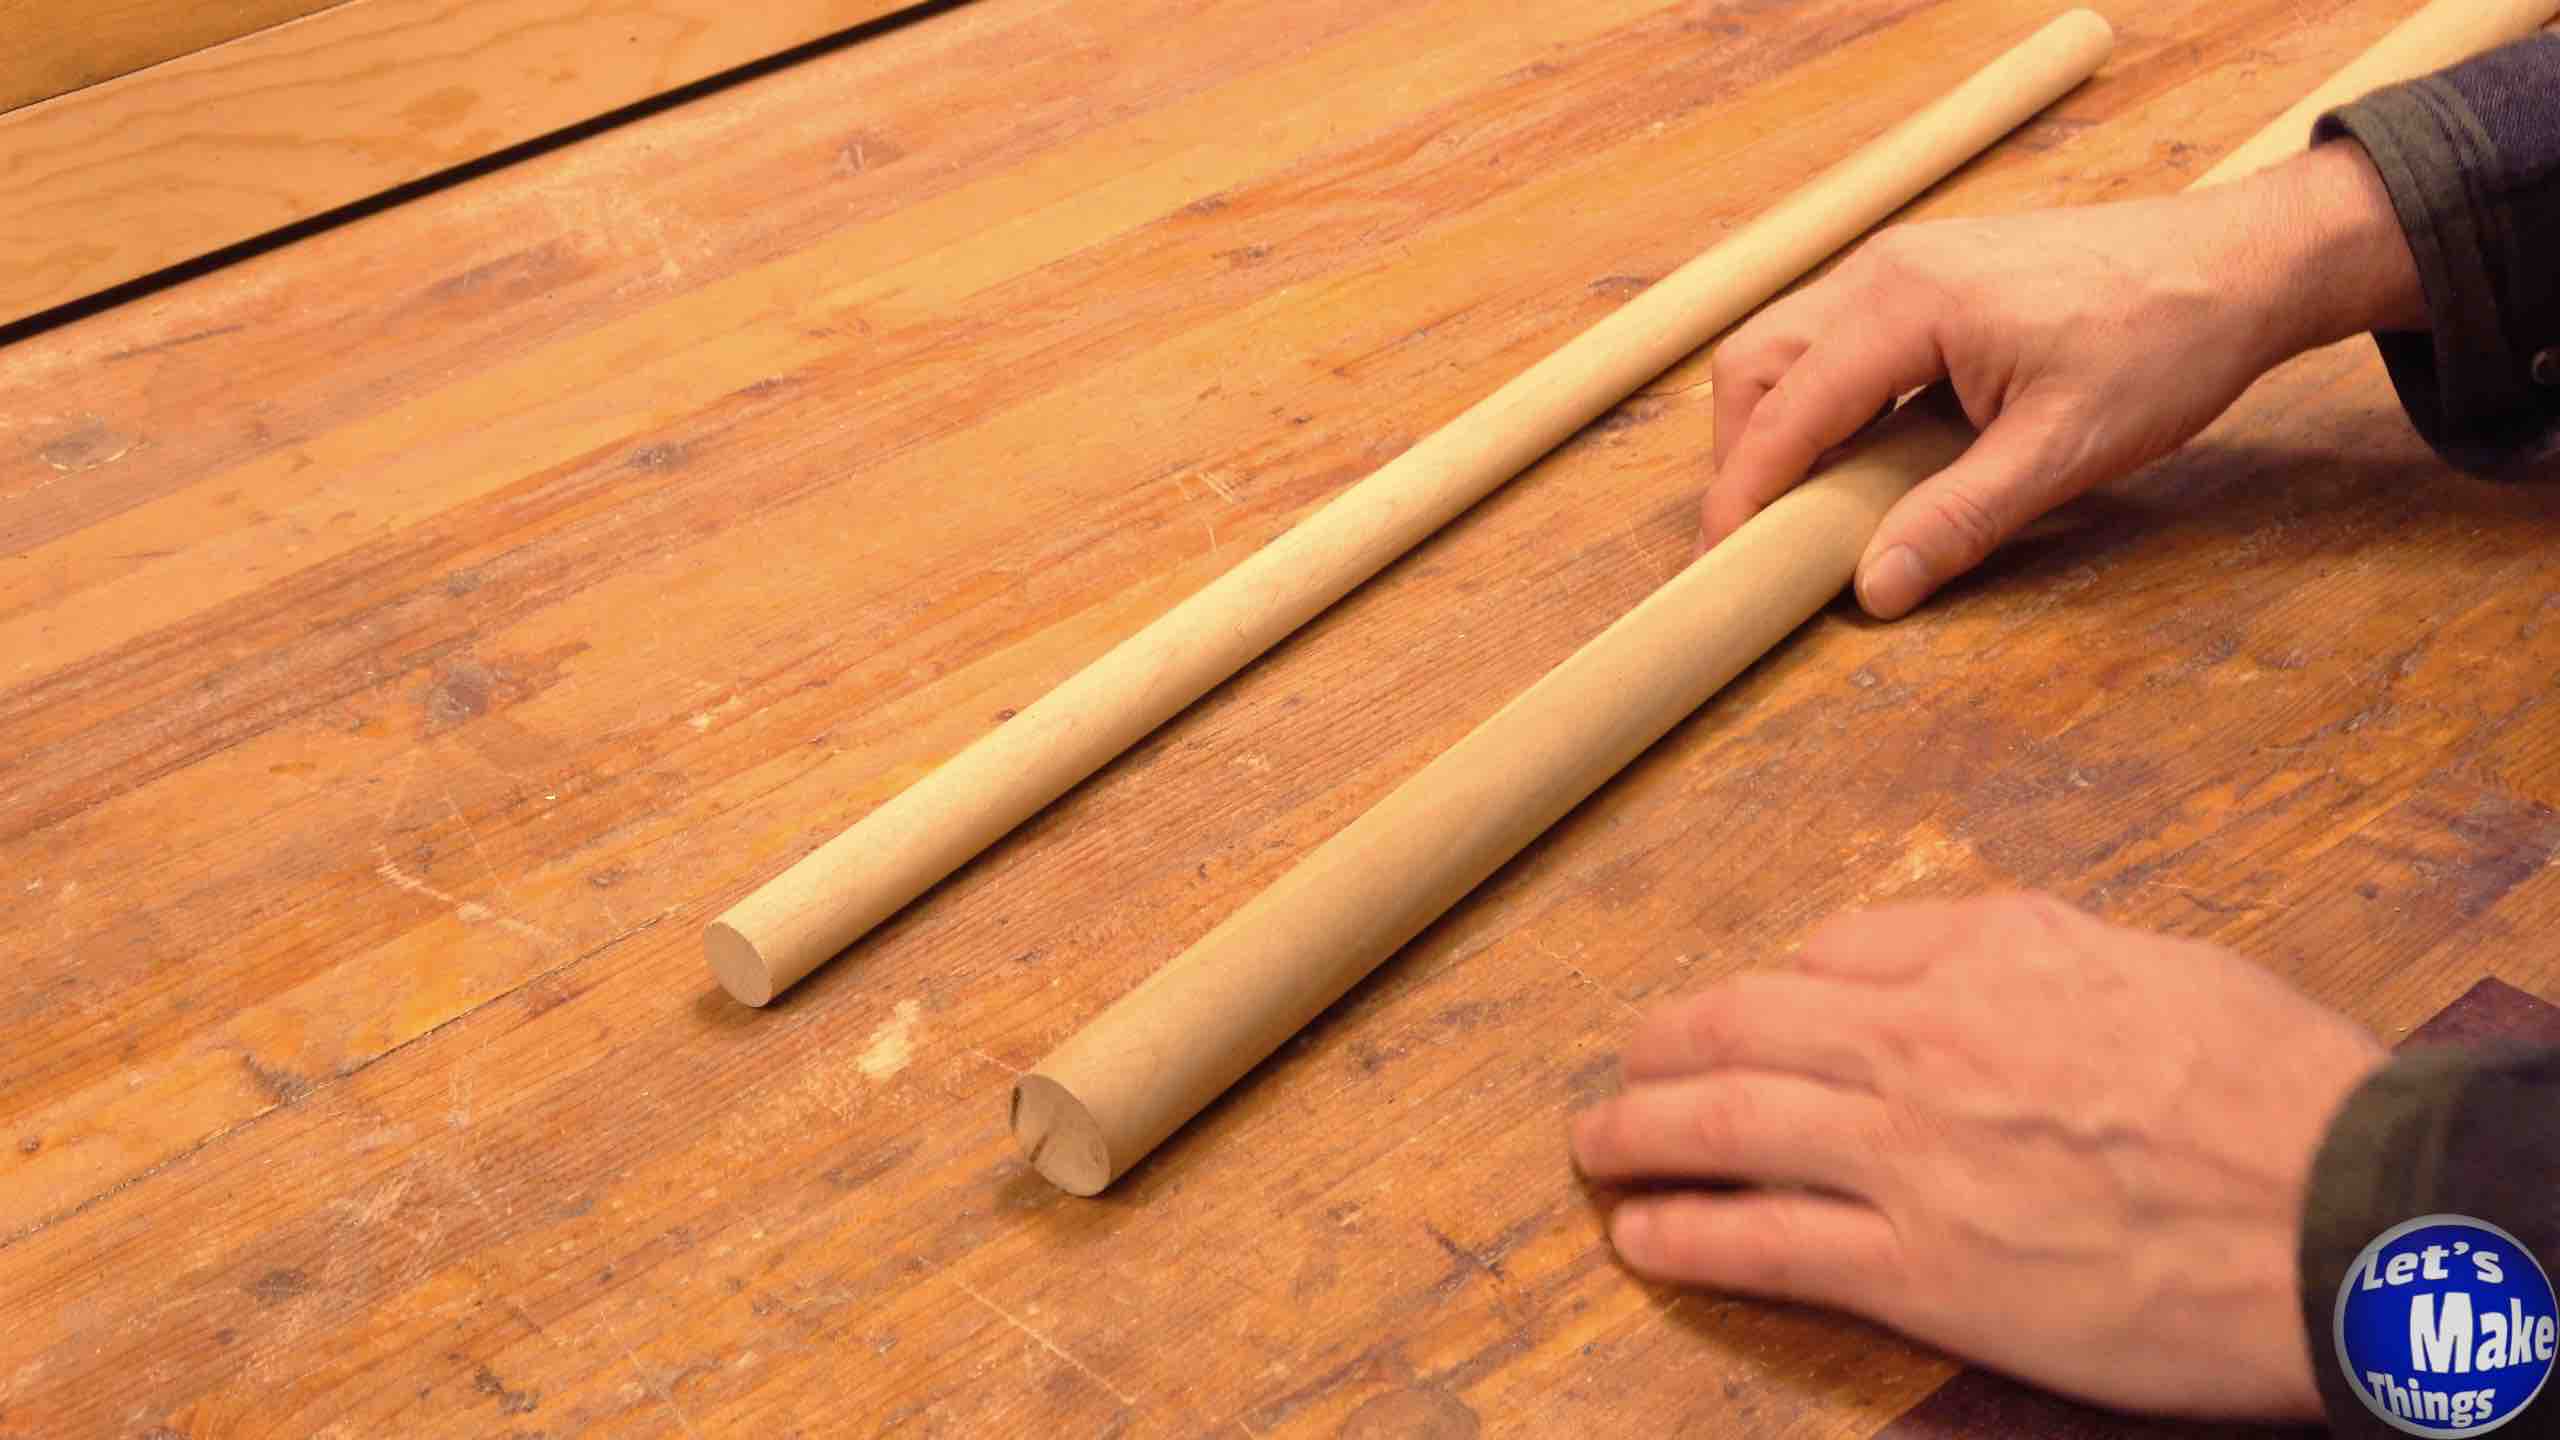
In this version, we’ll use two different dowel sizes. I chose to do this method because the end grains line up, ensuring a strong joint. The largest dowel I could find in my shop was 1 and 1/8th inches diameter. This is an odd size, but I’m sure you could find it in a 1 inch diameter at a local box store. The second dowel that I used was 3/4 of an inch in diameter.
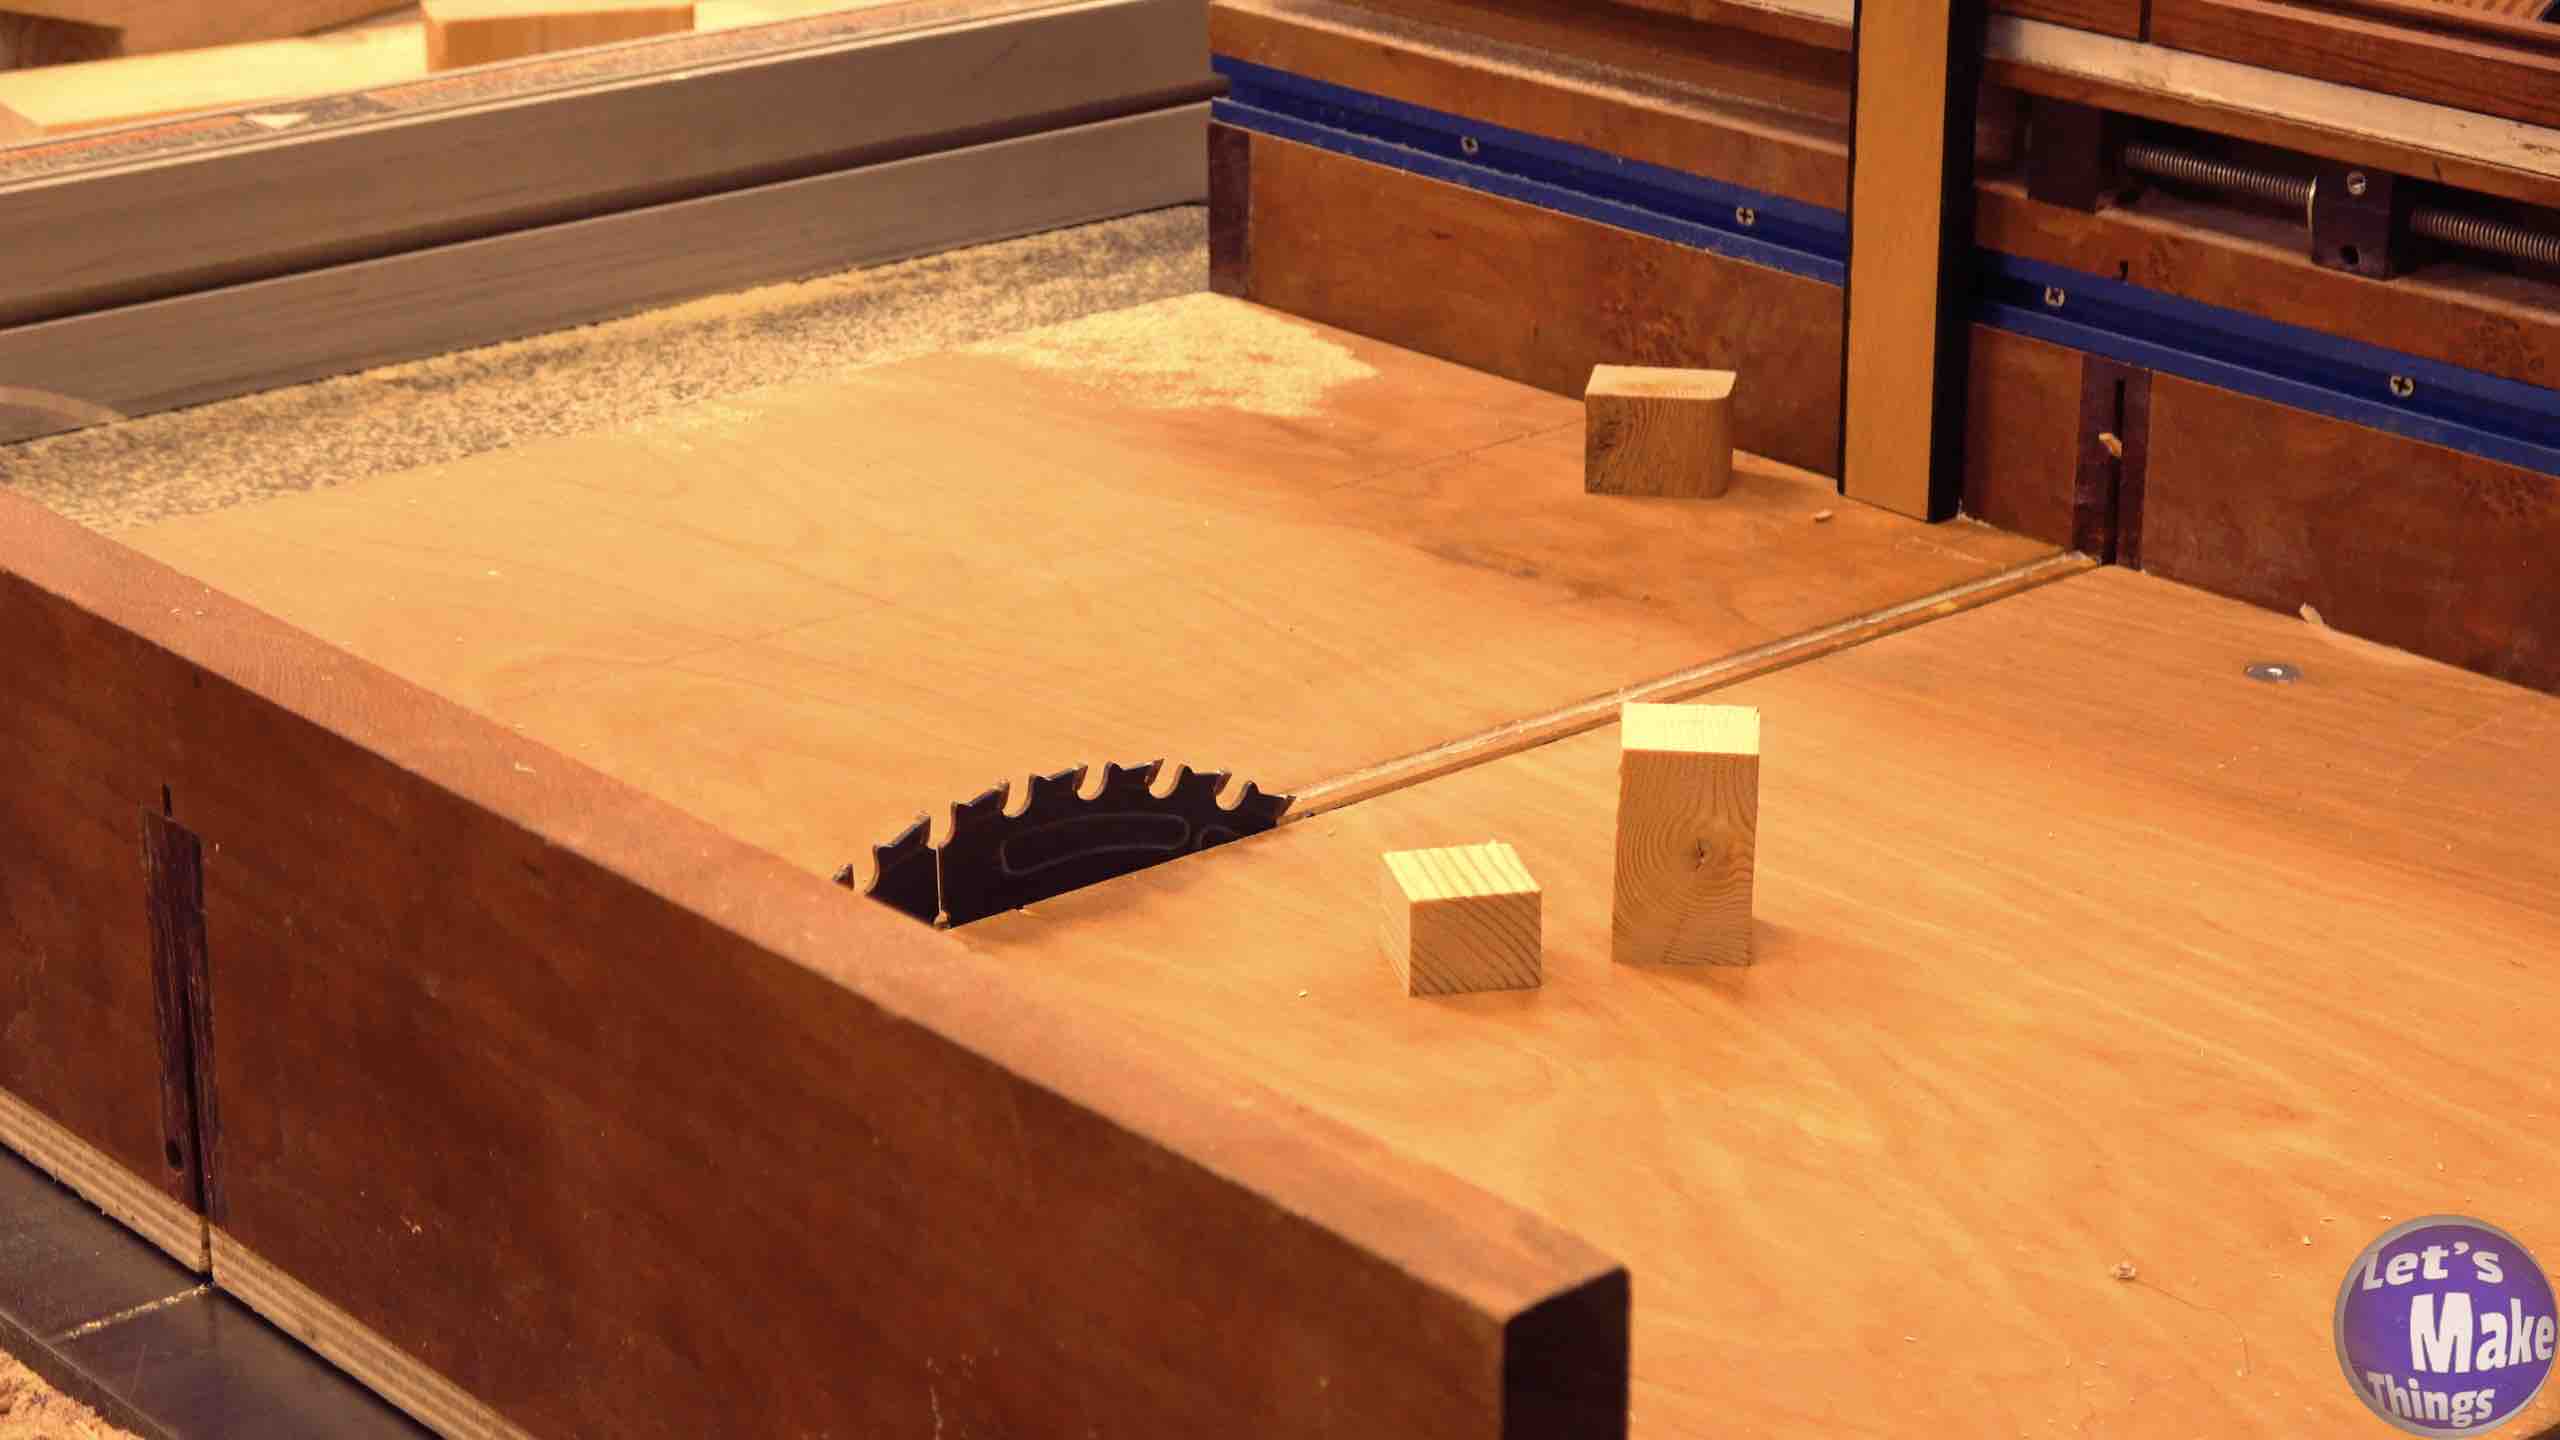
The first order of business is cutting each dowel to length. I cut my 1 1/8th inche dowel to 2 inches and the 3/4 inch dowel to a 1/2 inch. Be careful when you cut dowels, and do not cut them on bandsaws, unless you’ve created a jig to do so. If you’re interested in that jig, this video will explain the “V” shape you’ll need to do that.
Now we’ll find the center. In the video to the right, I show an interesting way that I found on youtube (Thanks Nik’s Workshop!) to do that.
Note: Clicking the picture on the right shows this step in motion at youtube.
Step 2 (Dowel)
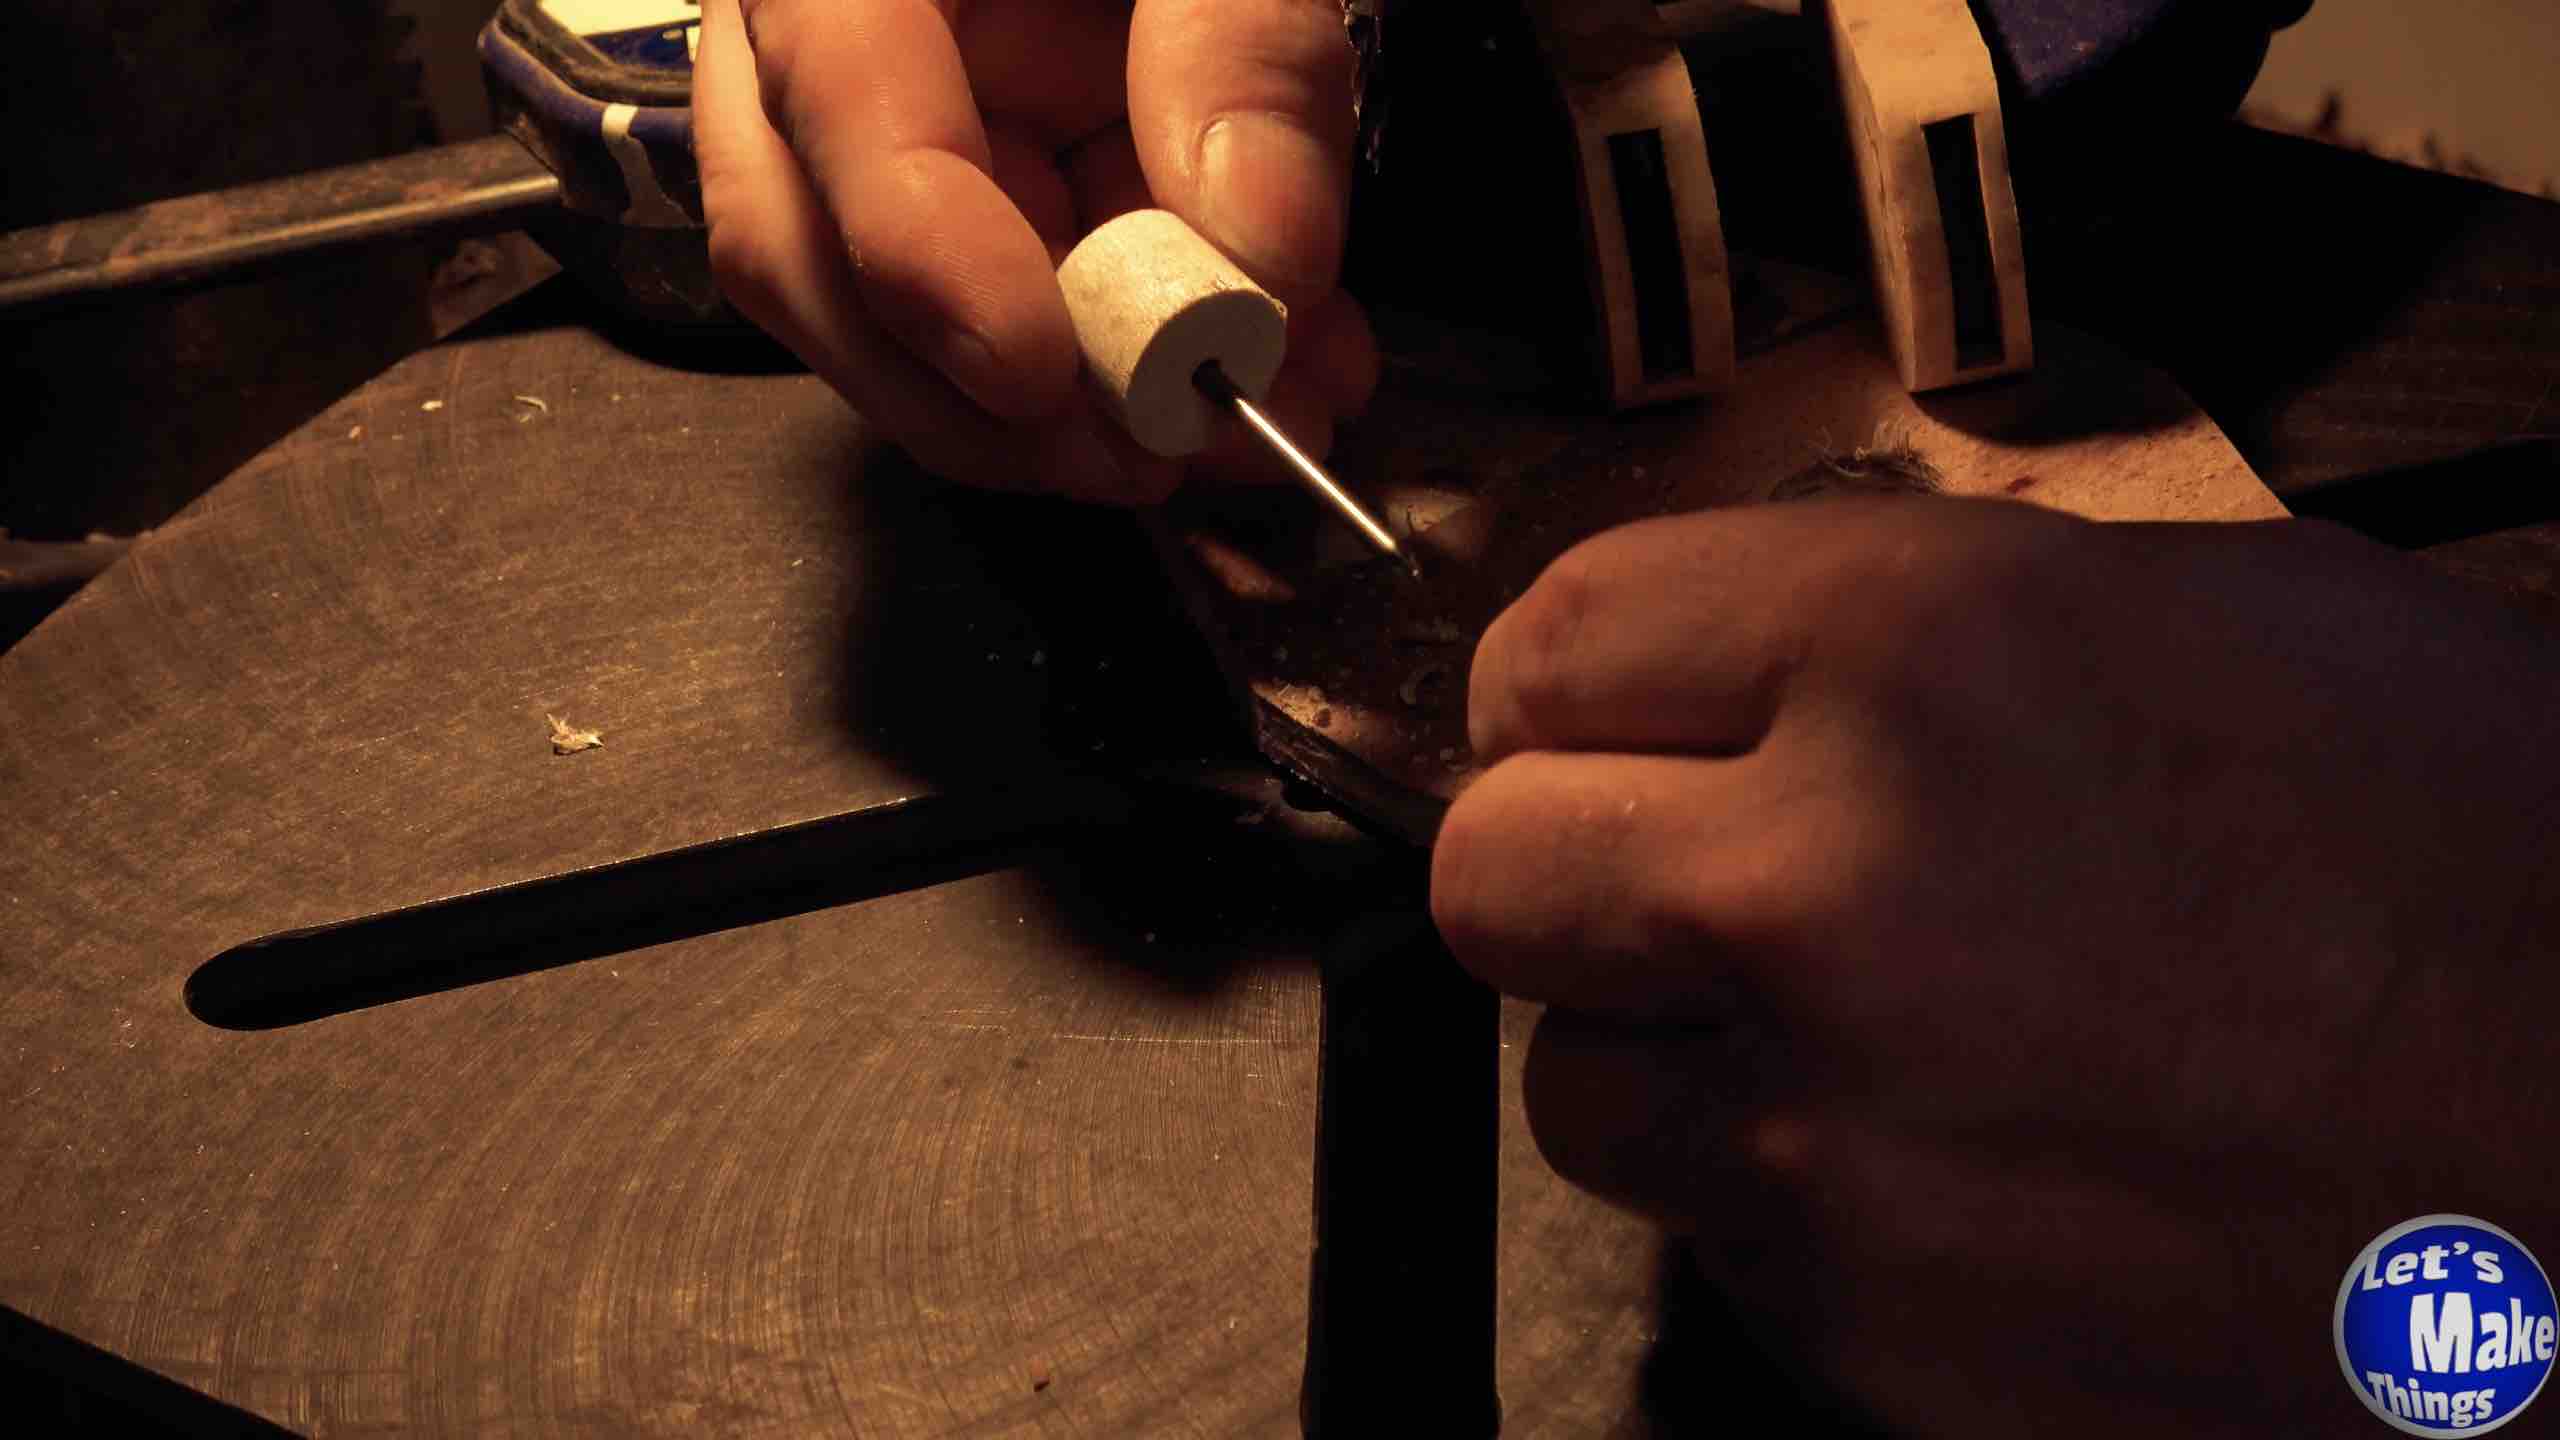
With our centers marked on both of the dowels we cut in the previous step, we’ll bring them to the drill press. Normally, I’d suggest using a drill press vice, but if you don’t have one, there’s another method that I show that works. Because, obviously, trying to hold a round dowel rod and drilling a hole in the center can be difficult to hold on to, I show how using a clamp makes it easier. We’ll take the measurement you found earlier (Selecting a Nail) in the head, and we’ll drill into our 3/4 inch dowel just enough that the head of the nail can be inserted into the dowel. Then we’ll drill the remaining center out with our second drill bit. Finally, we’ll drill out the large dowel rod with a 3/4 inch fostner bit.
Note: Clicking the picture on the right shows this step in motion at youtube.
Step 3 (Dowel)
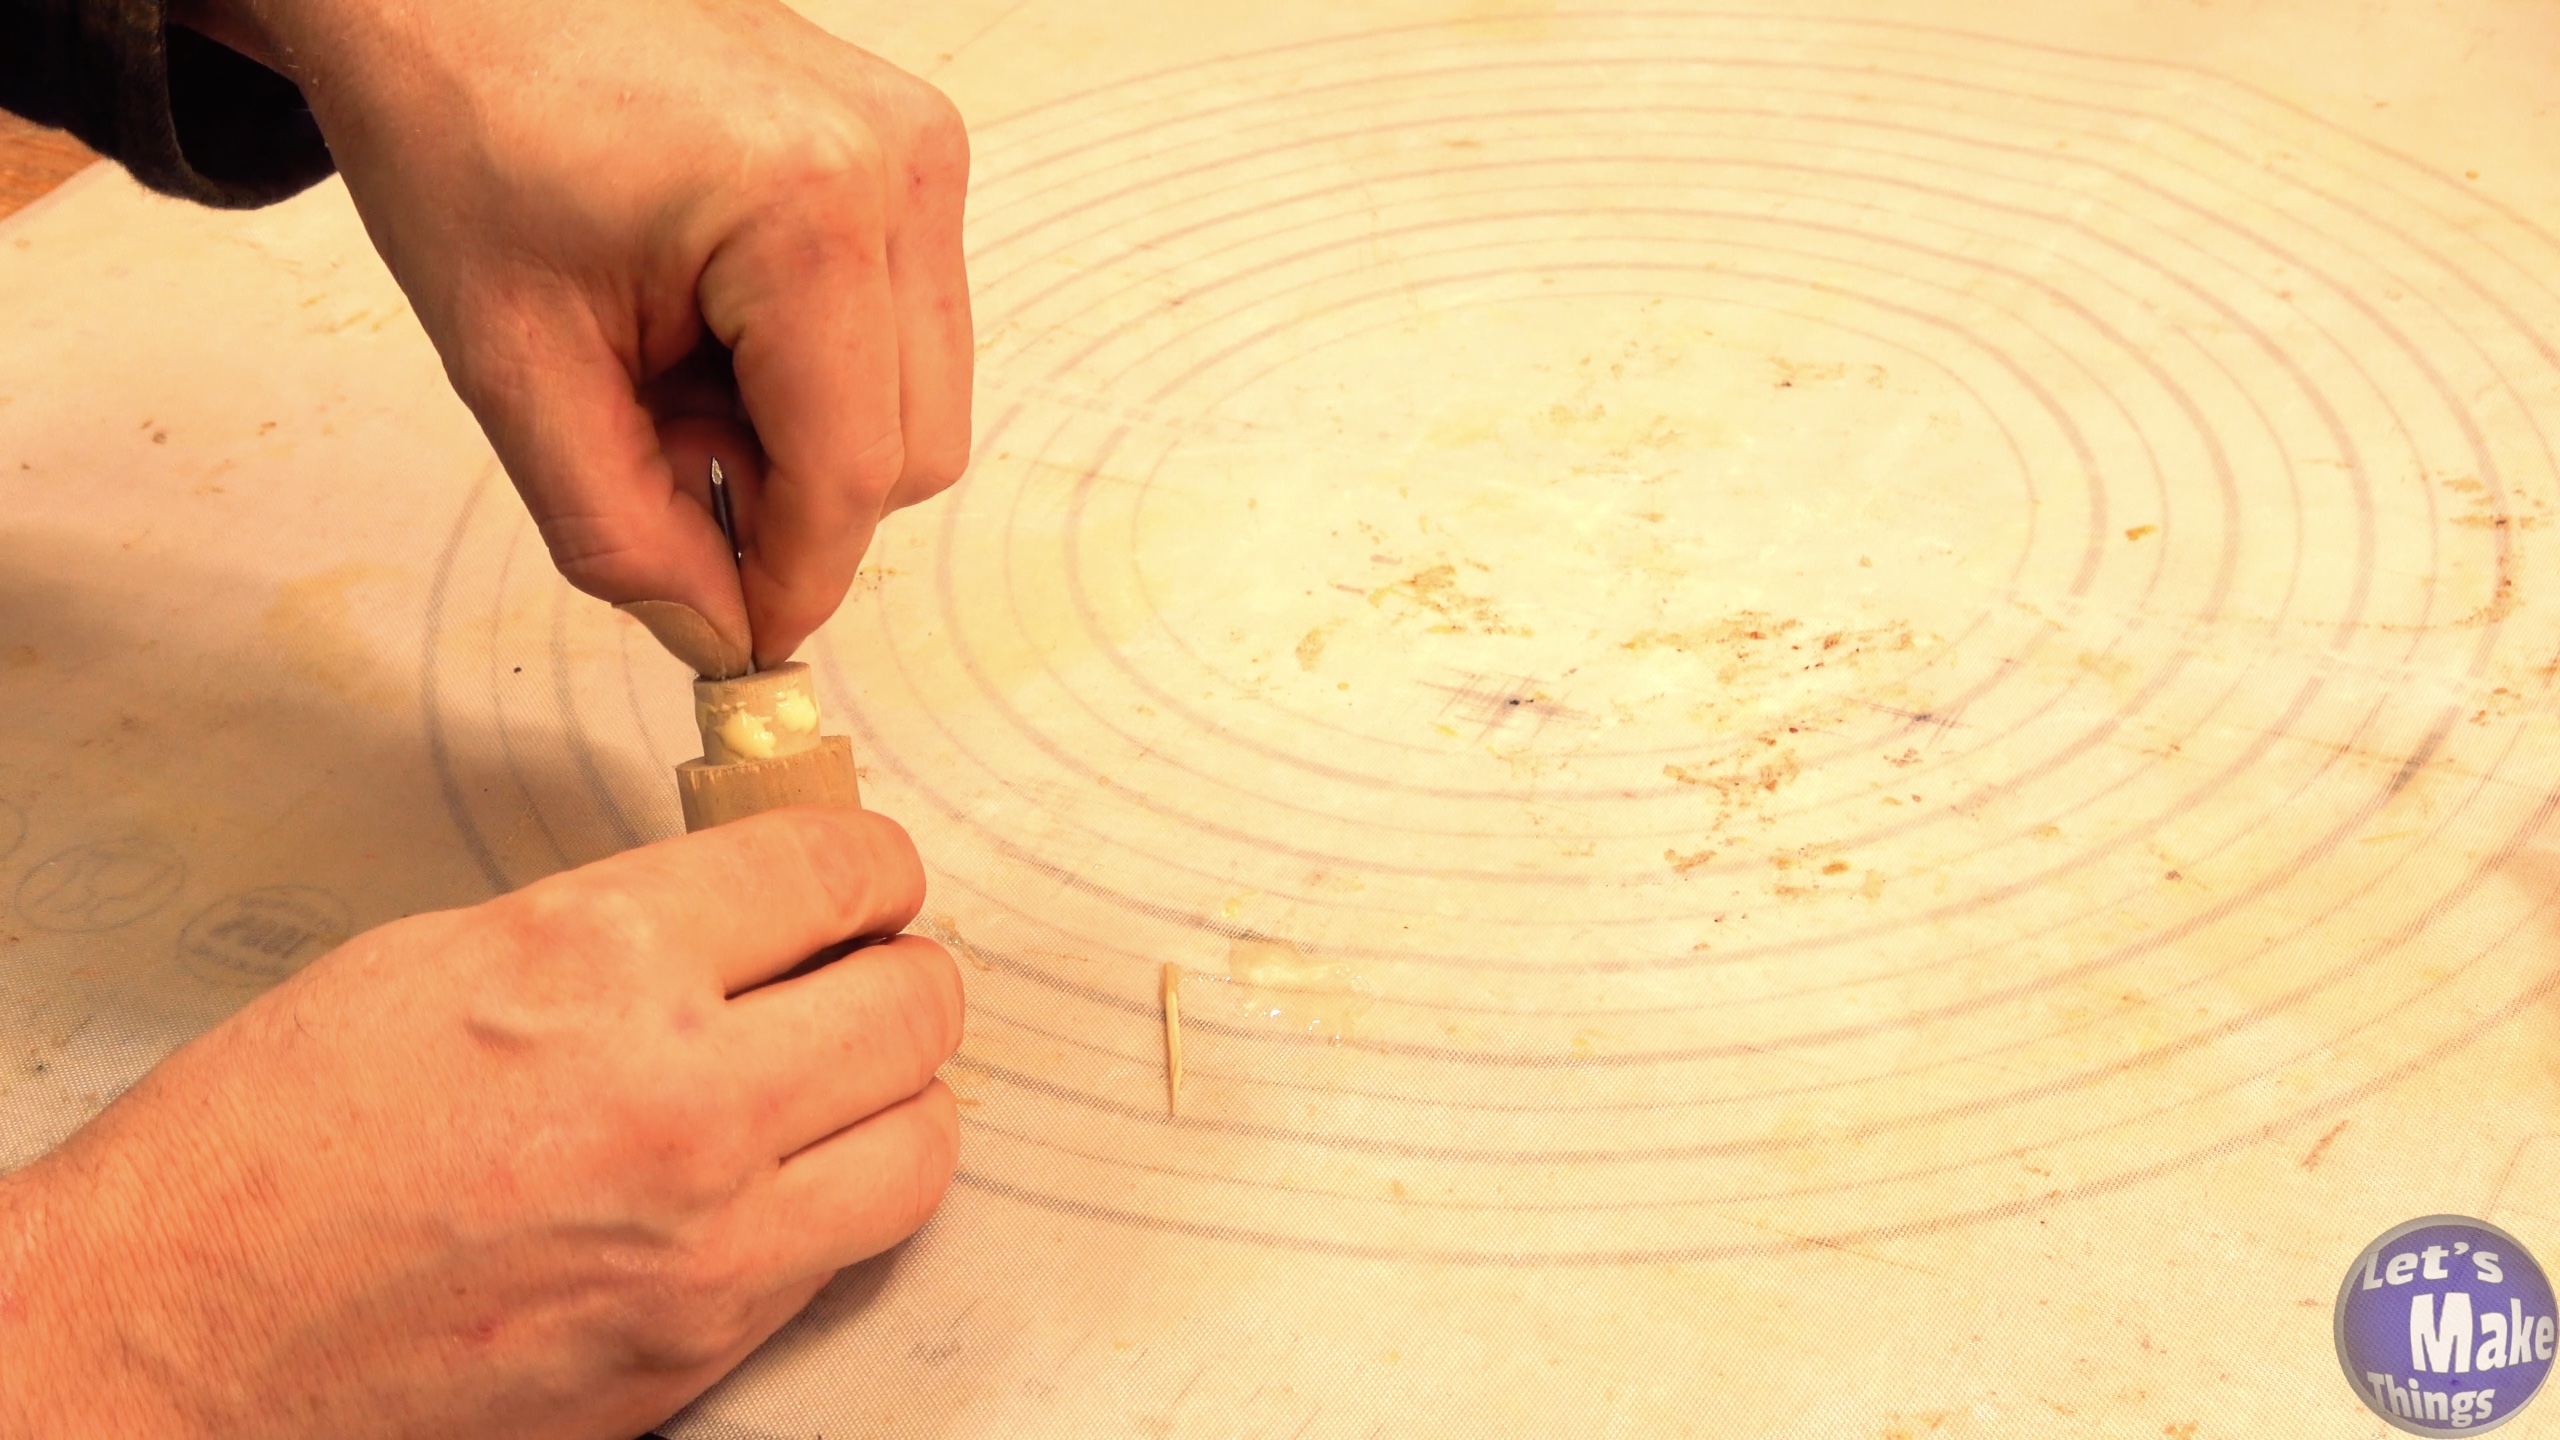
We’ll add some epoxy to our nail and string it through the 3/4″ dowel. With the nail in, we’ll use a little glue to glue the 3/4″ dowel to the inside center of the larger dowel, again, in my case a 1 and 1/8th inch dowel.
Note: Clicking the picture on the right shows this step in motion at youtube.
Part 2: Making an Awl from Blocks
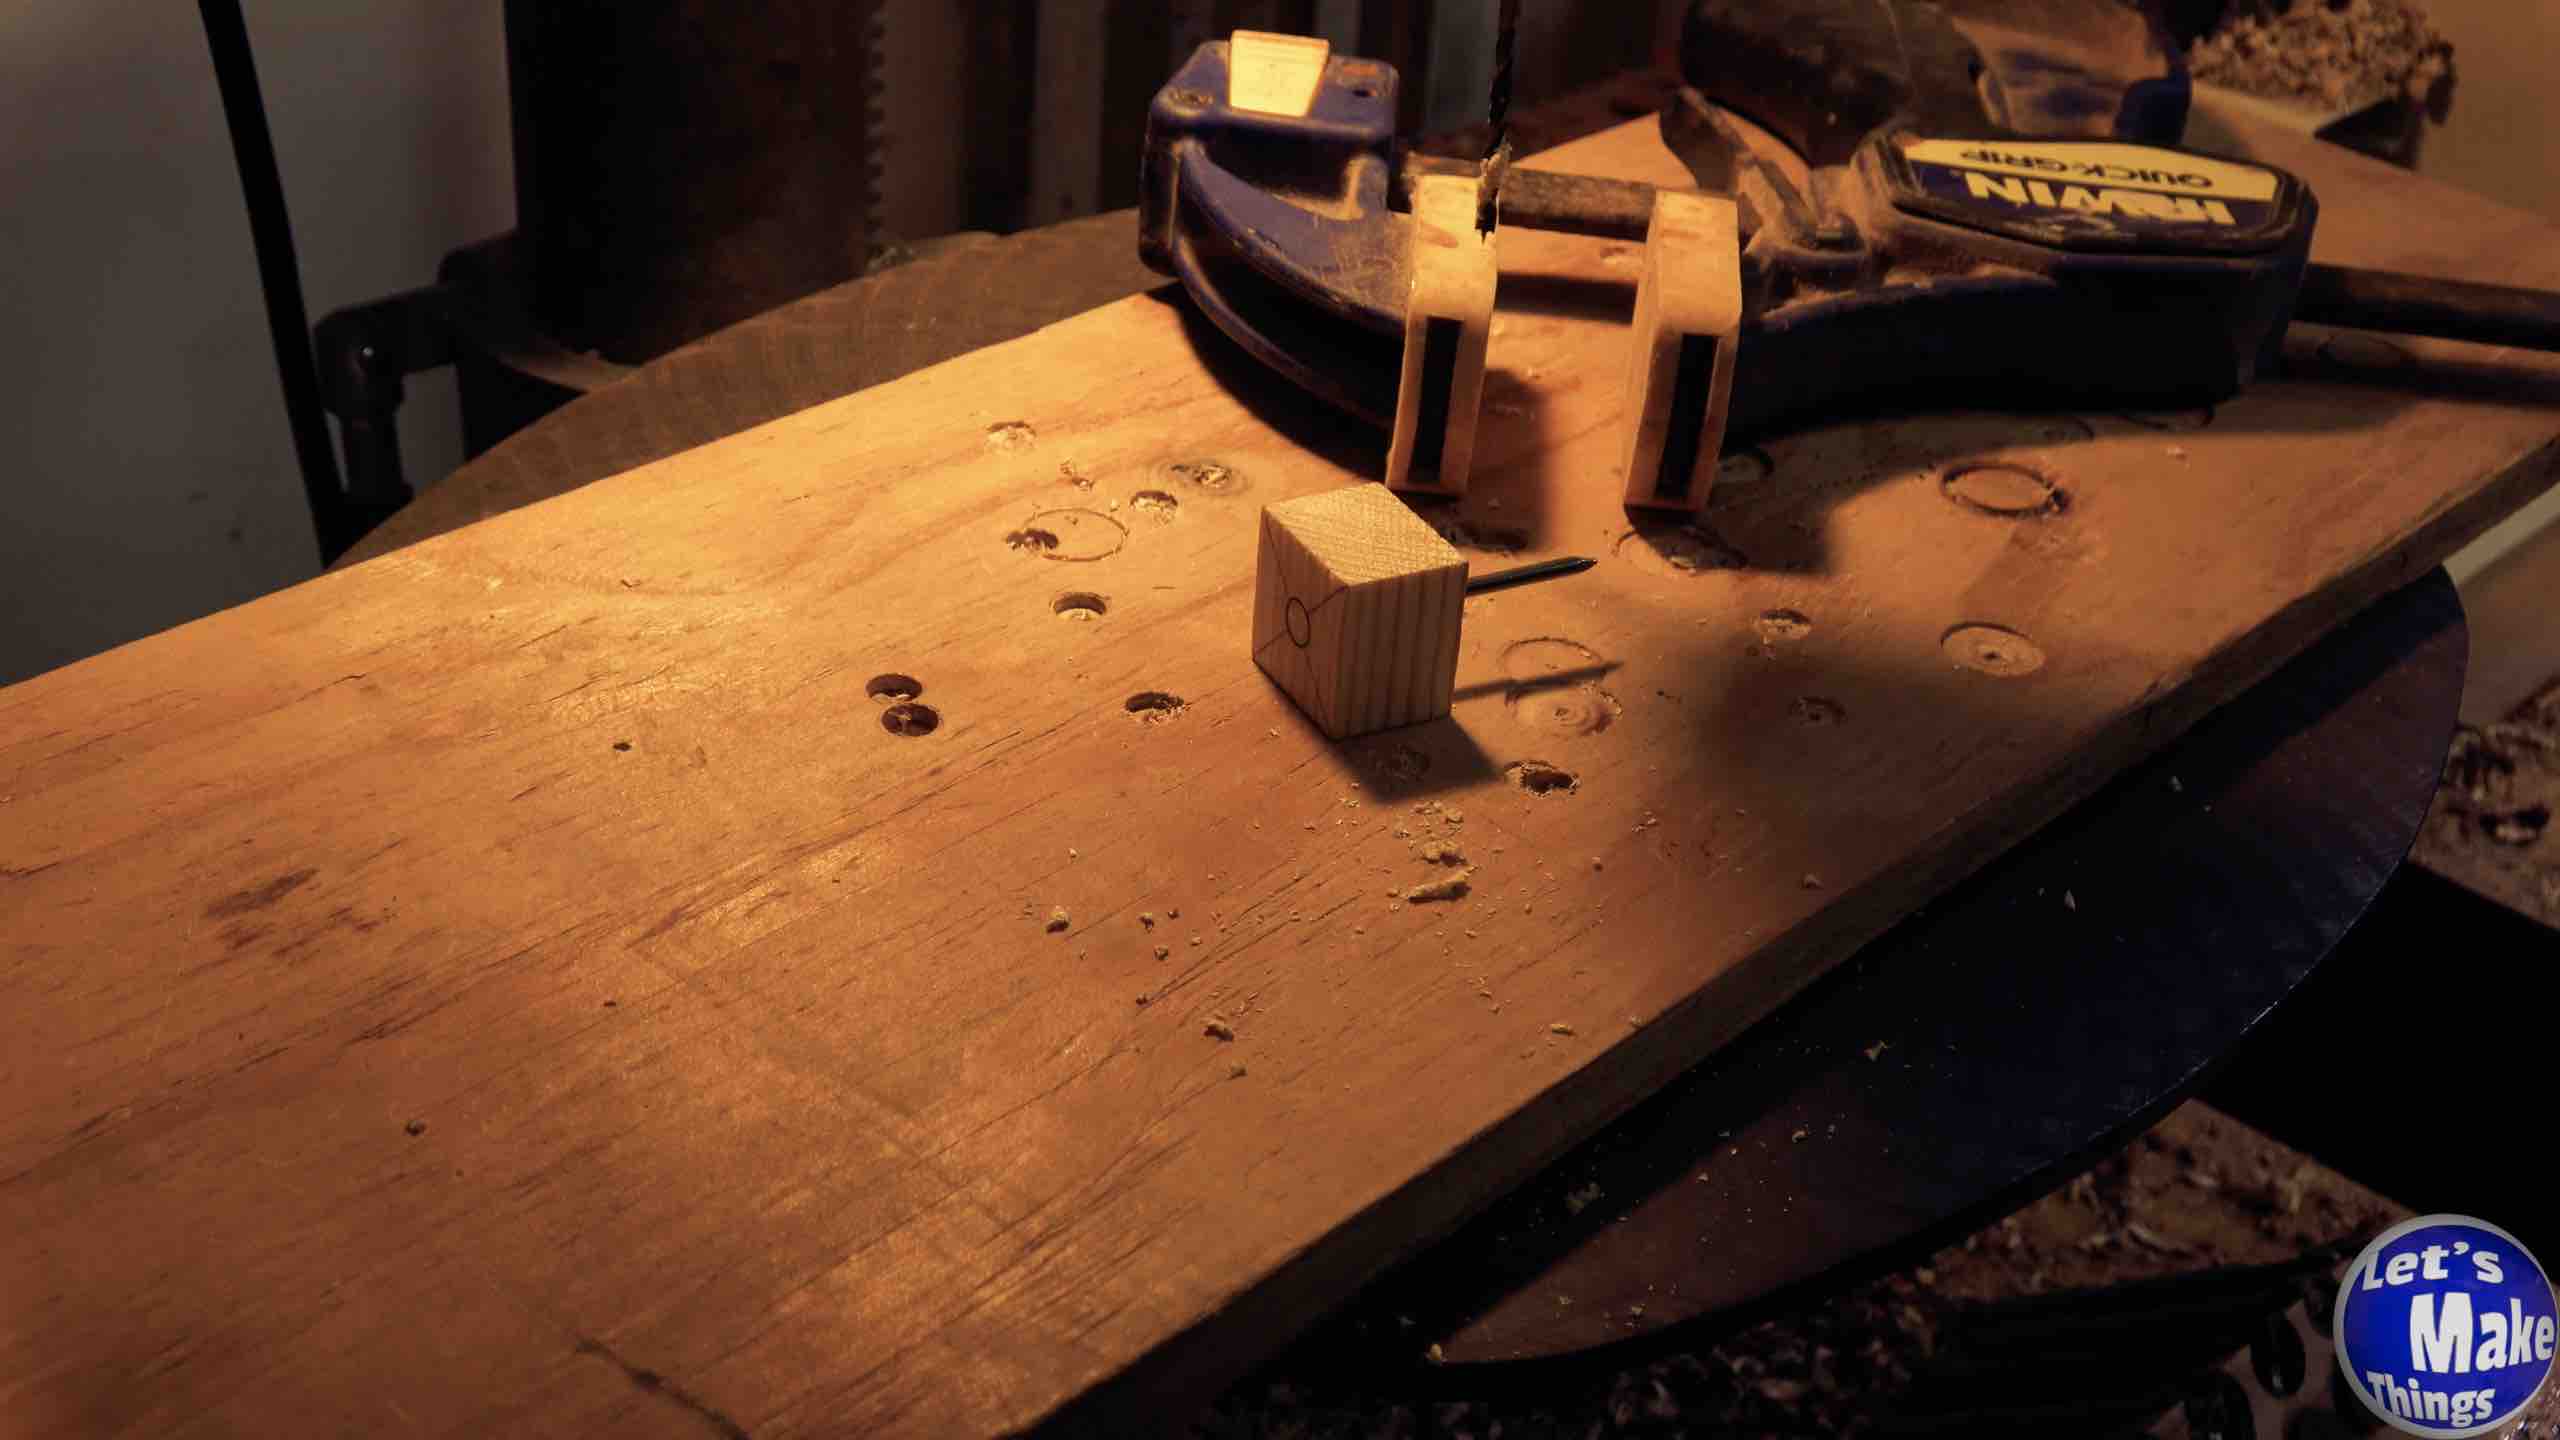
Step 1 (Square Blocks)
In this version, I used a 3/4″ thick scrap piece of wood and cut out a 1 inch by 1 inch block. I then used a scrap piece of 2×4 construction lumber and cut out a 1 inch by 1 inch by 1 and 3/4’s inches block. Pay special attention to the video as I explain grain direction and gluing.
Note: Clicking the picture on the right shows this step in motion at youtube.
Step 2 (Square Blocks)
With the smaller square, we’ll draw our diagonals to find the center. Just like previous steps with the dowels, we’ll take it to the drill press and use the larger drill bit we found in “Selecting a Nail” to drill just enough that the head of our nail fits in the drilled out portion. Then we’ll use the second drill bit and drill the rest of the way.
Note: Clicking the picture on the right shows this step in motion at youtube.
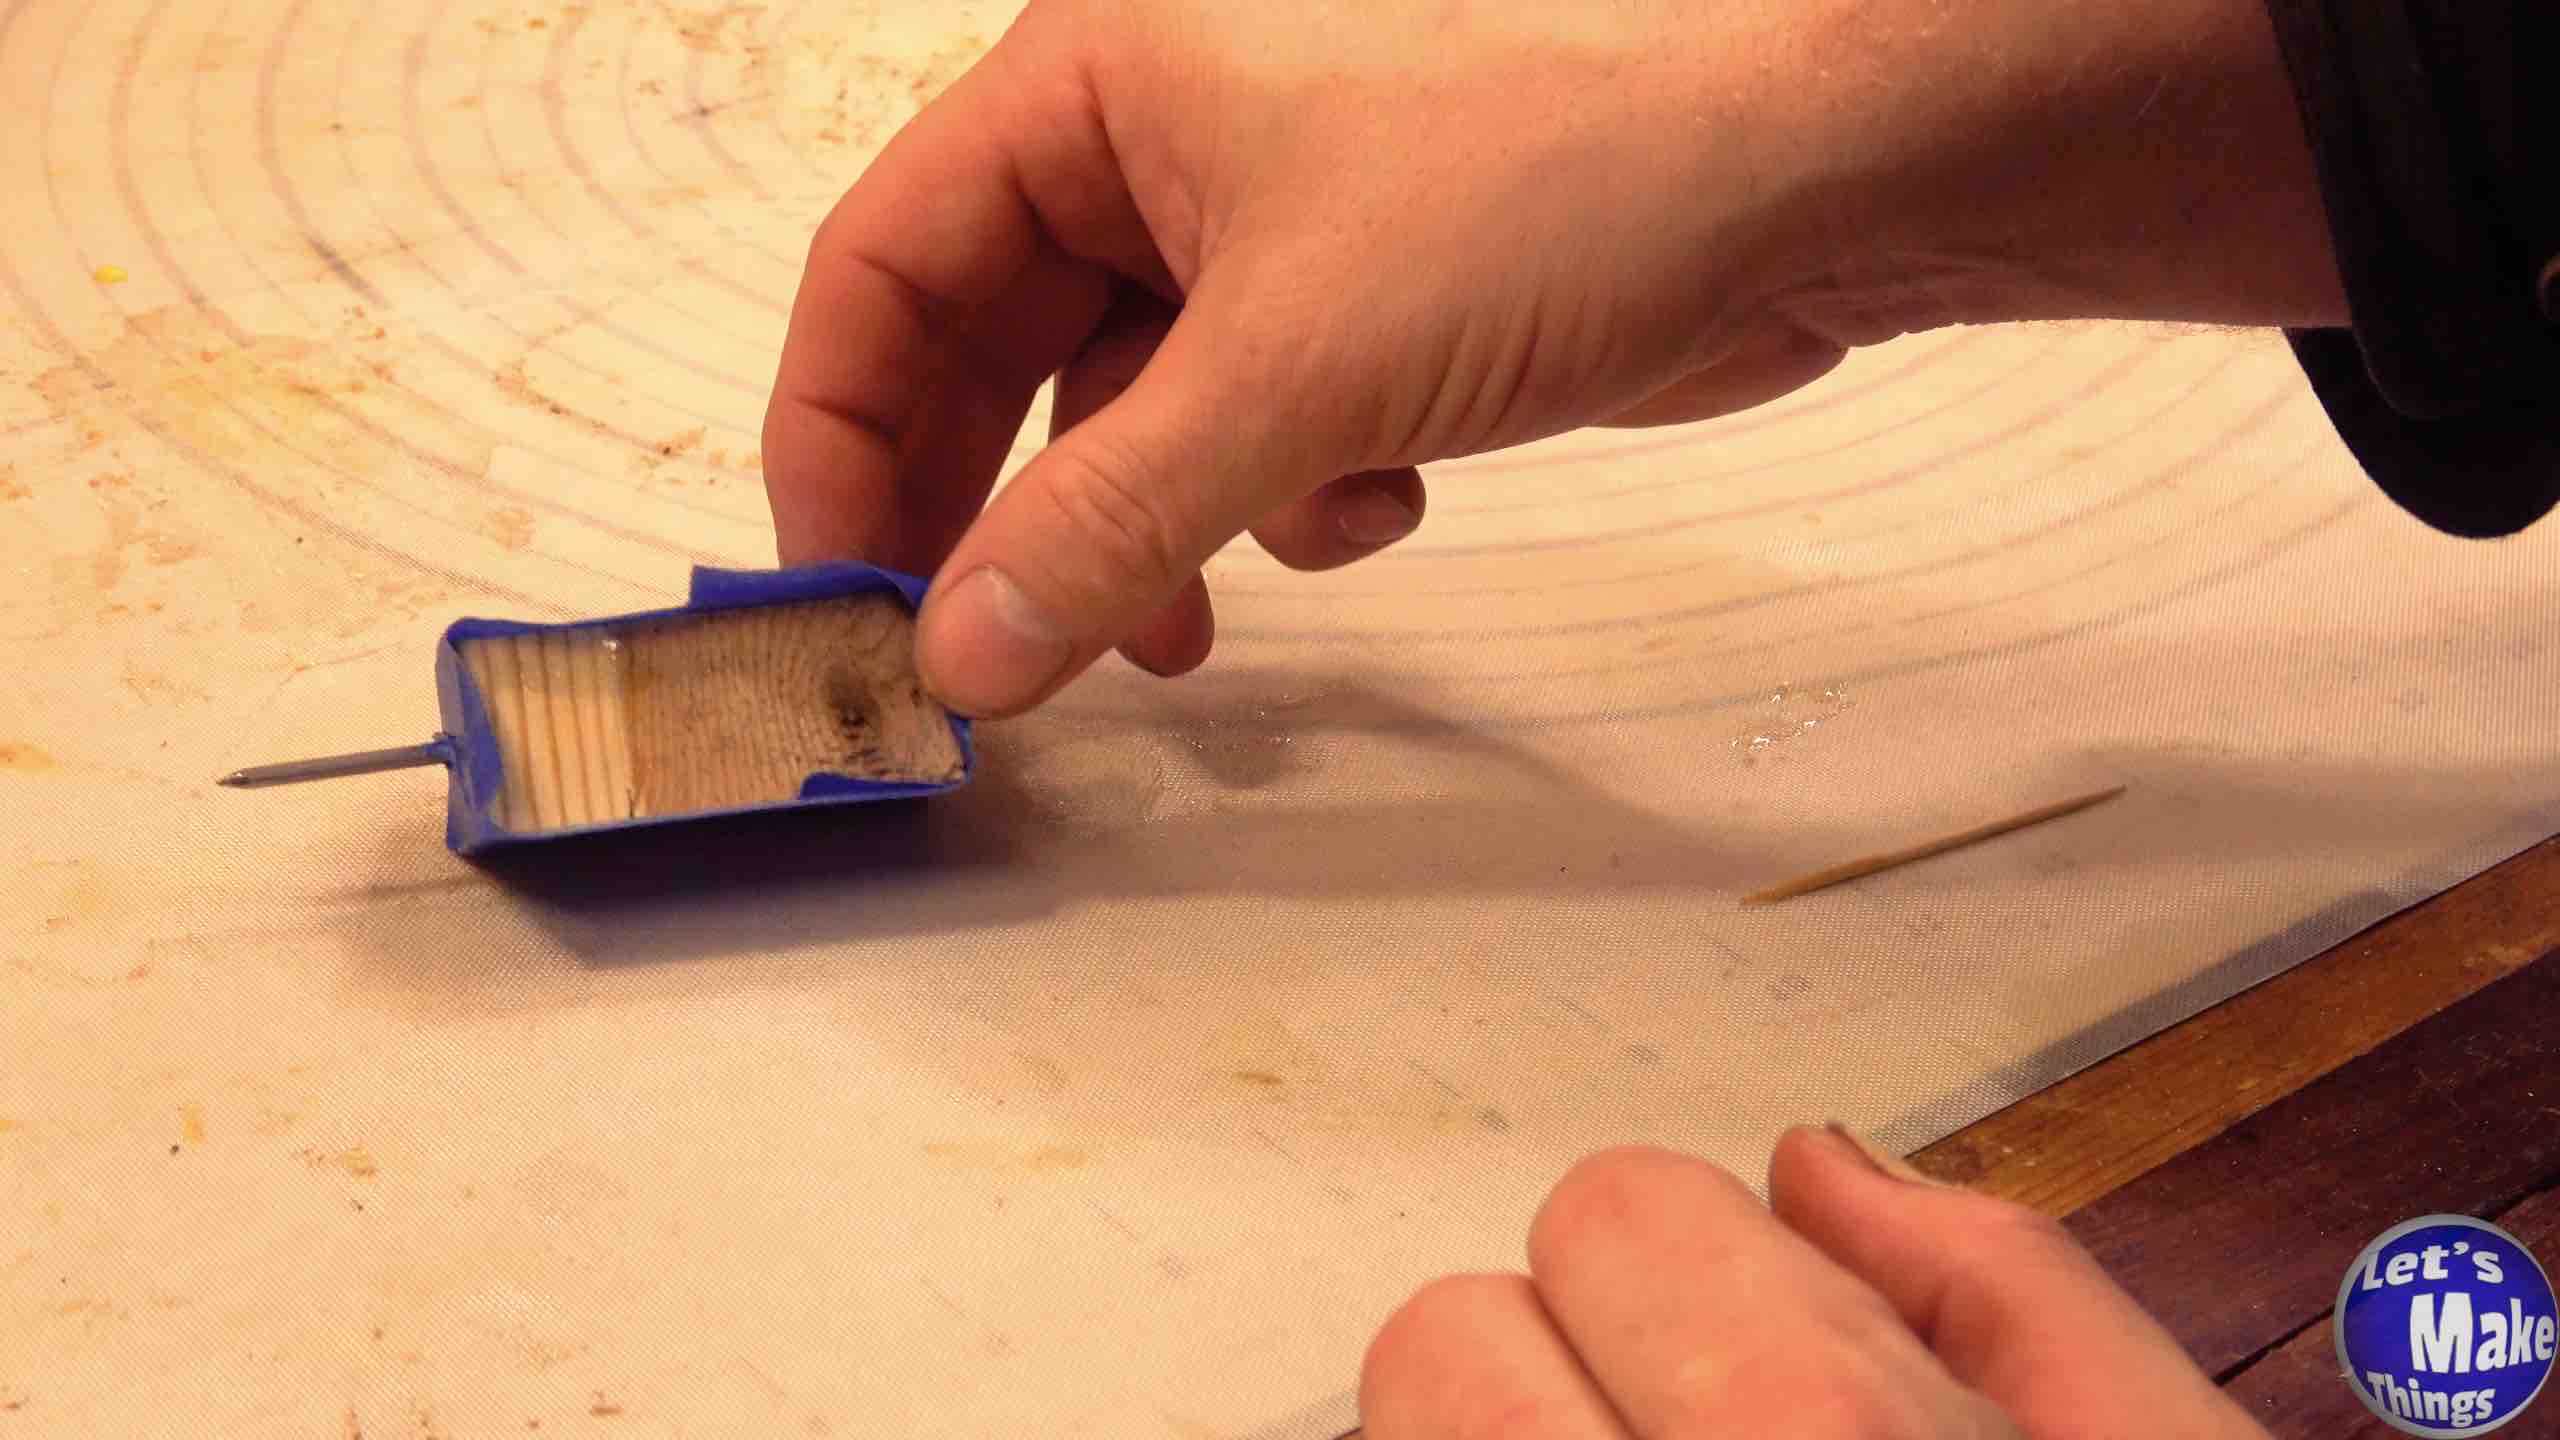
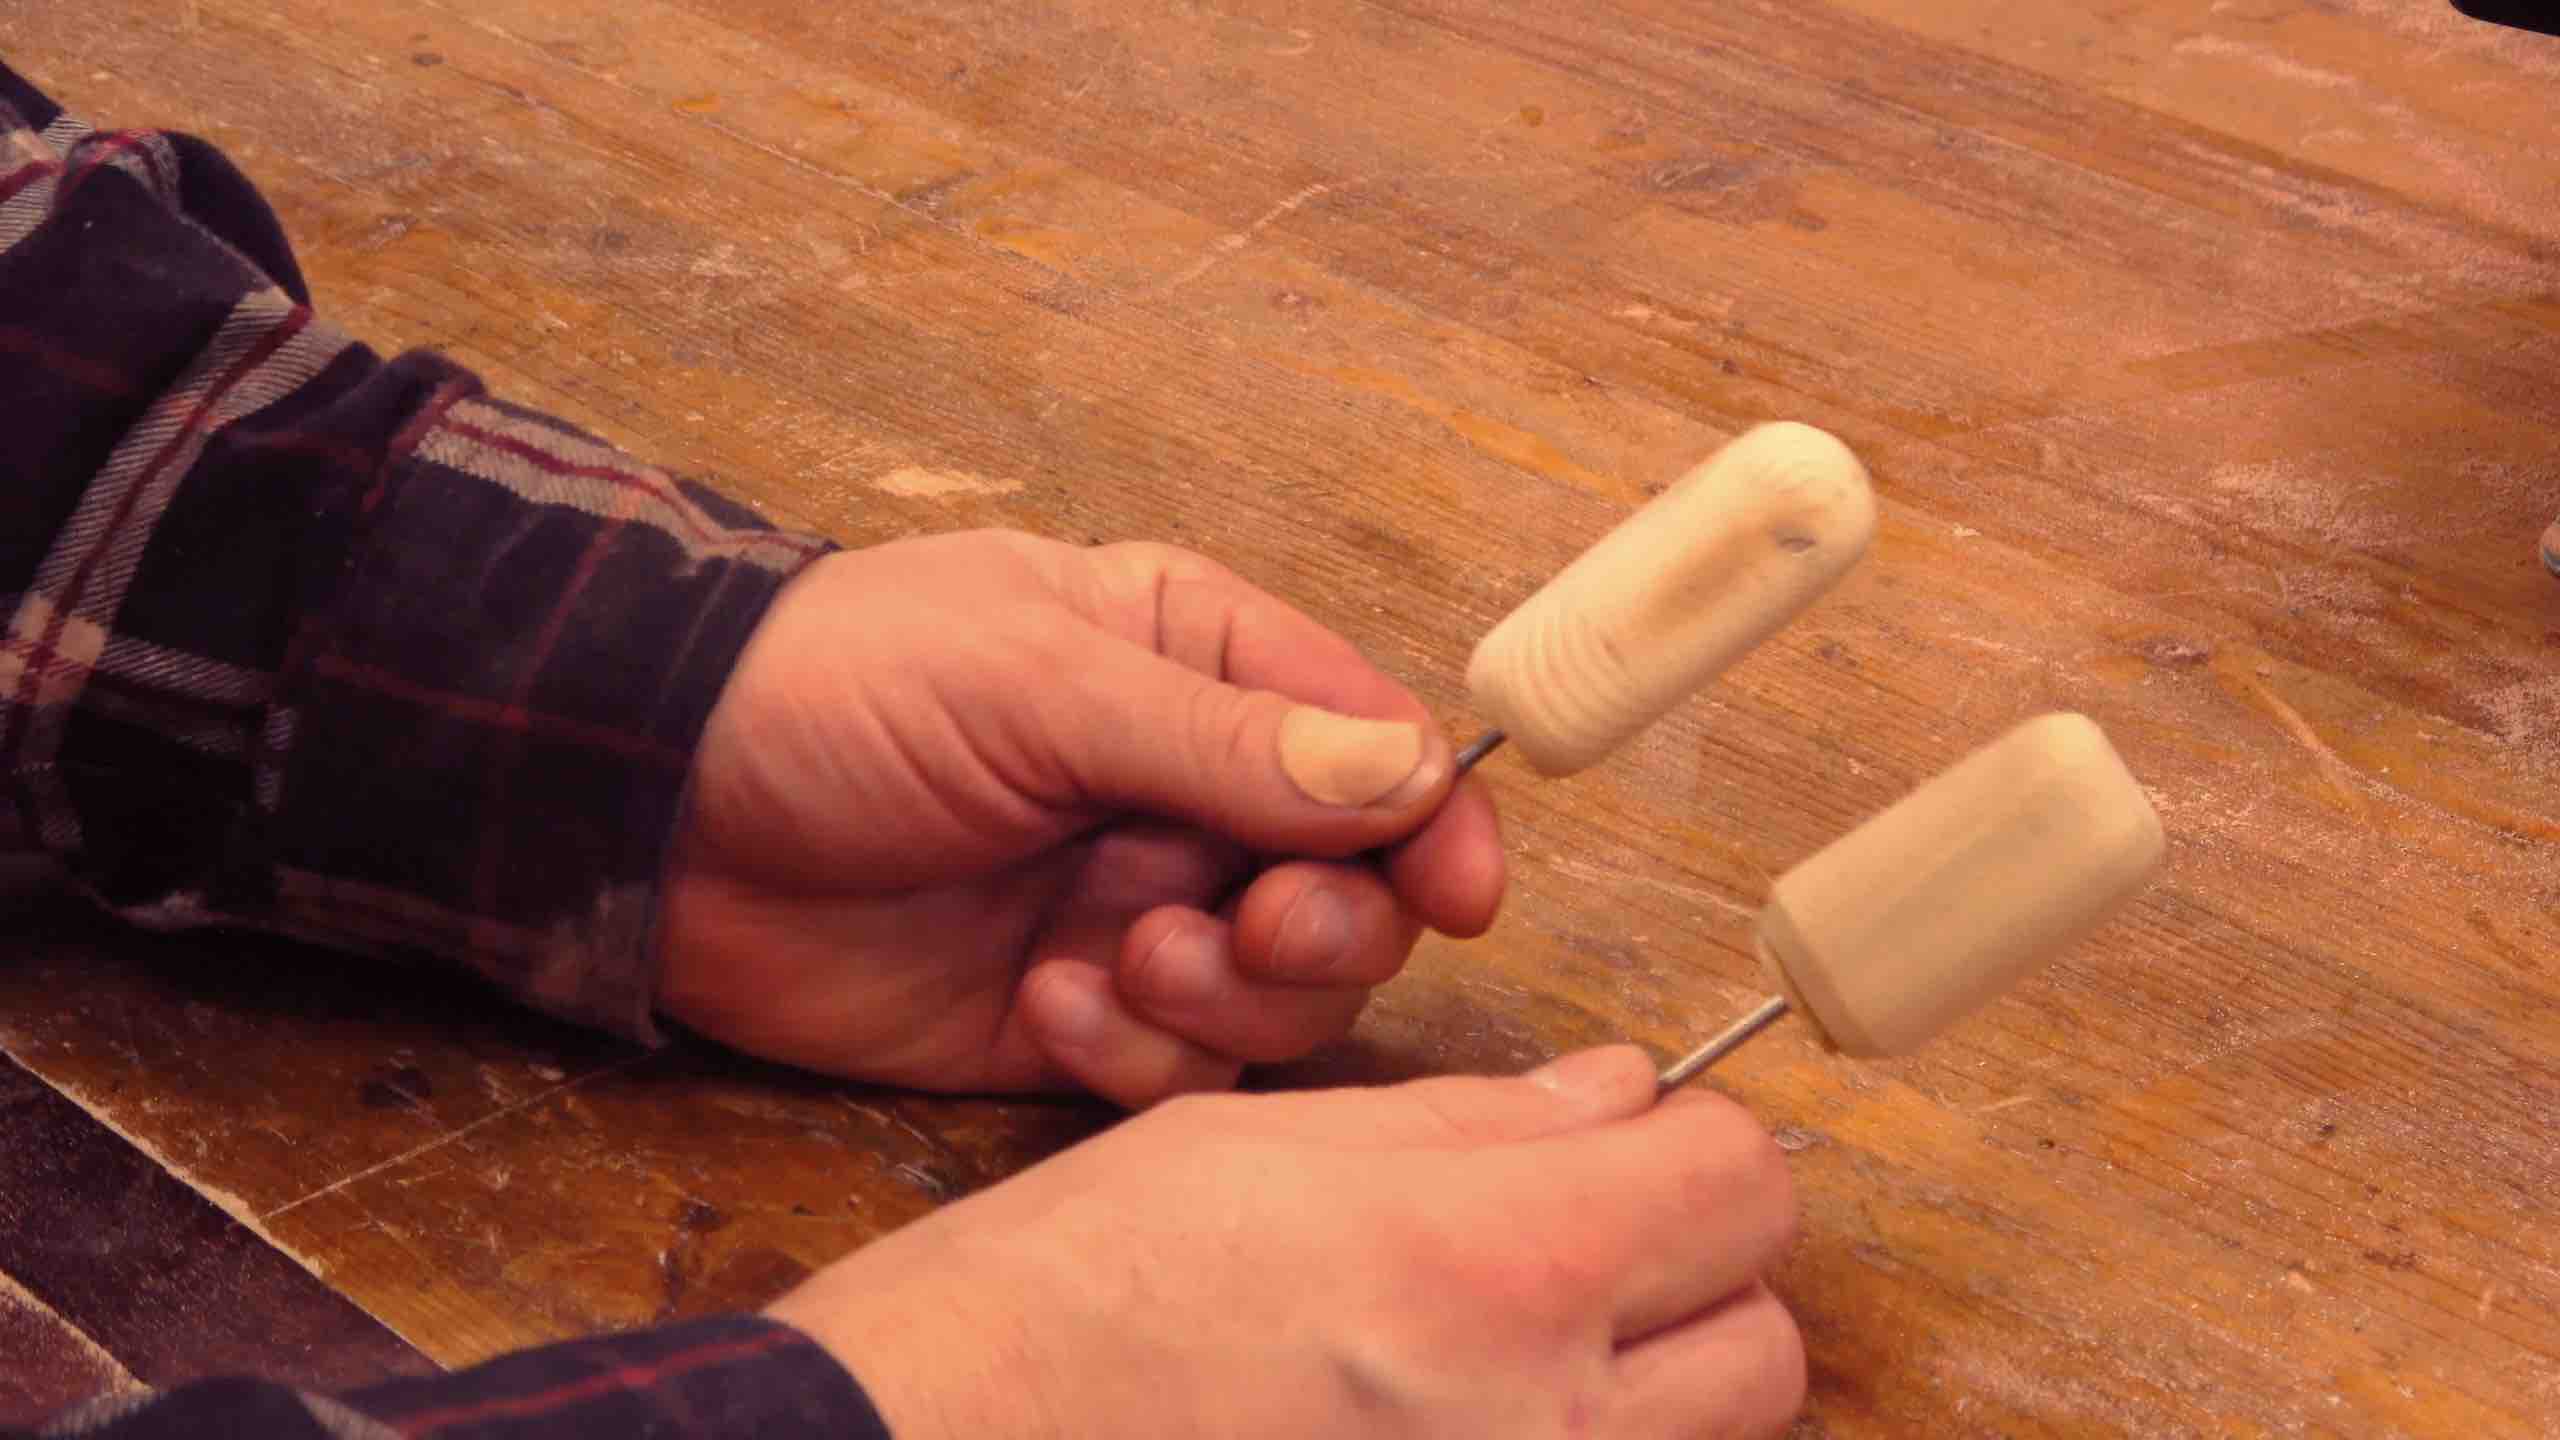
Step 3 (Square Blocks)
Epoxy time! We’ll add epoxy to the nail shaft and under the head and string it through our smaller square block. I used some painter’s tape in the video to clamp the two blocks together, after I had added wood glue. We’ll give this a while for the glue and epoxy to set.
Note: Clicking the picture on the right shows this step in motion at youtube.
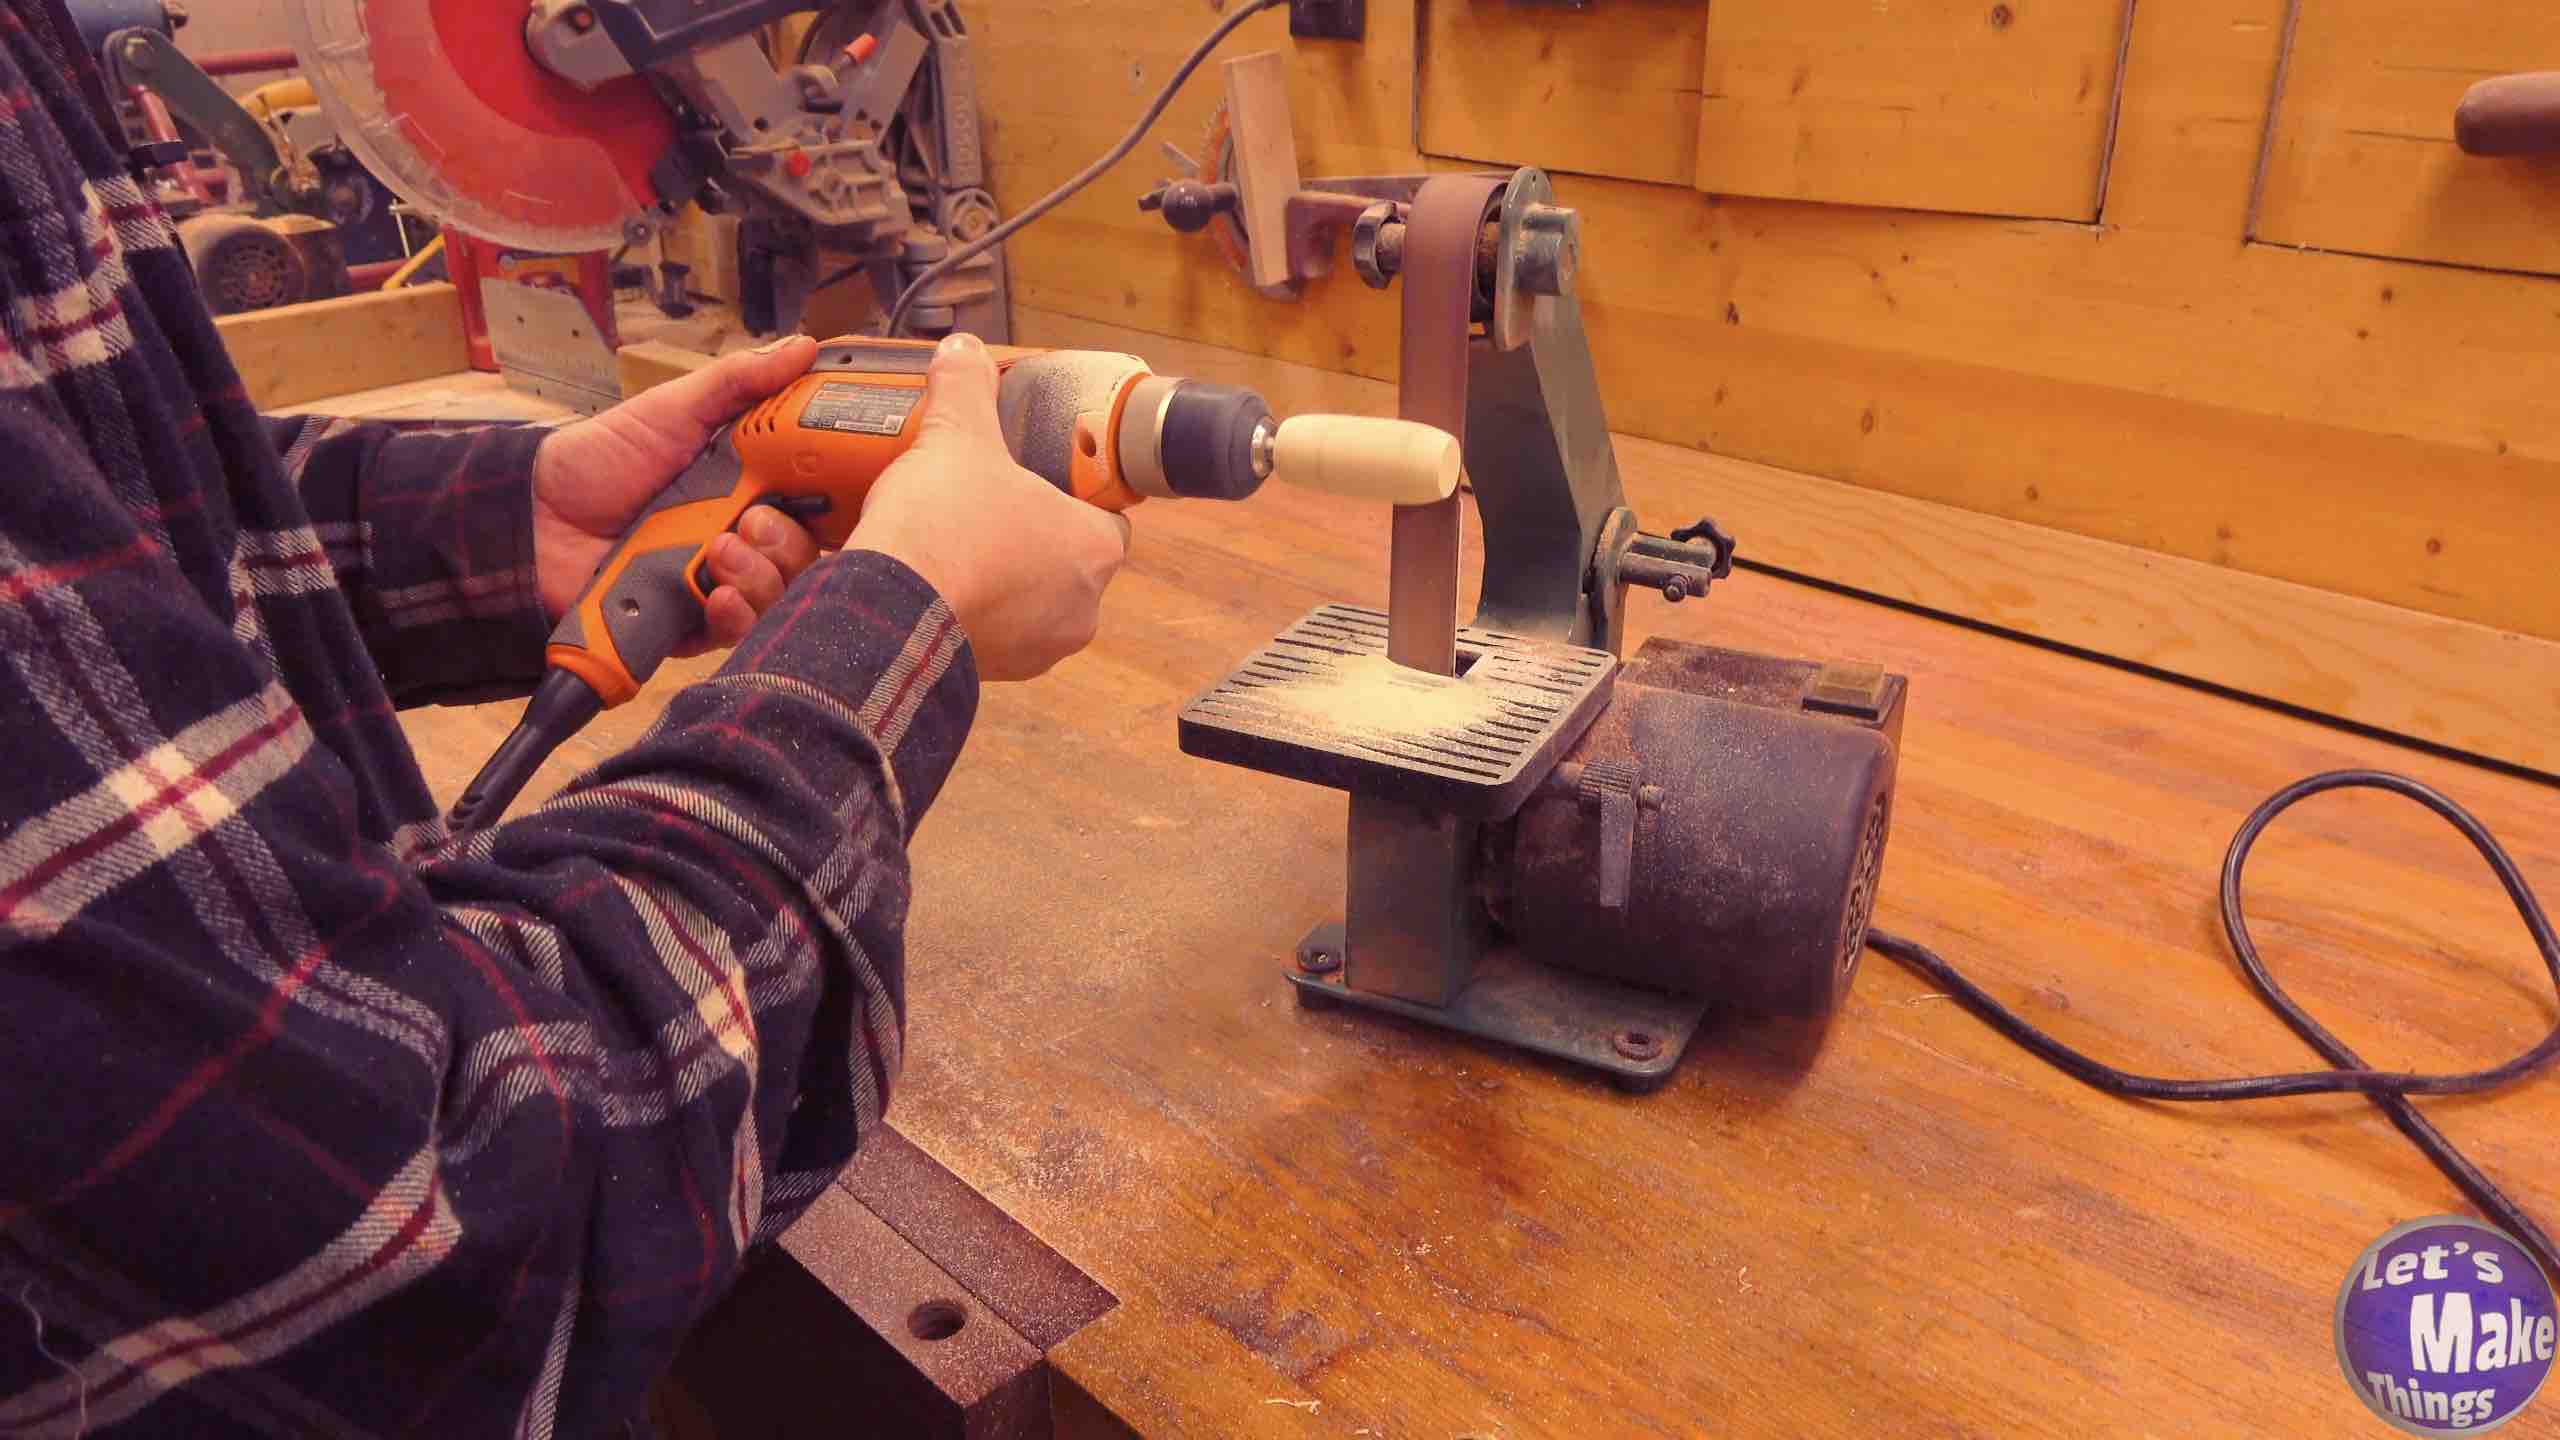
Step 4 (Both Methods)
If you’re one of those types of people that don’t mind the sting of a little pain or developing blisters on the underside of your hand, you don’t need to do this step. But for the rest of us ‘weirdos’, now we’ll want to remove the sharp corners of both types of awls. You could use a small hand plane (don’t cut yourself!), but I found chucking it up in my drill and using a sander did a great job. In the video I used a strip sander, but you can certainly use any other type of sander to round the corners.
Note: Clicking the picture on the right shows this step in motion at youtube.
Be Creative!
And finally…be creative! In both versions above I used boring pine and poplar to make my awls. But I encourage you to use exotic woods and create your own masterpiece. In the video to the right, I used the 2 square block methods to create 3 awls out of pauduk and hard maple. I personally believe that you will enjoy woodworking more and be a better woodworker, simply by using beautiful tools that you make with your own hands.

If you enjoyed these free plans and have a few bucks sitting around, why not help us keep the website going and feed the tip jar? Completely optional, but thank you so much if you do!