
Glue Box Build
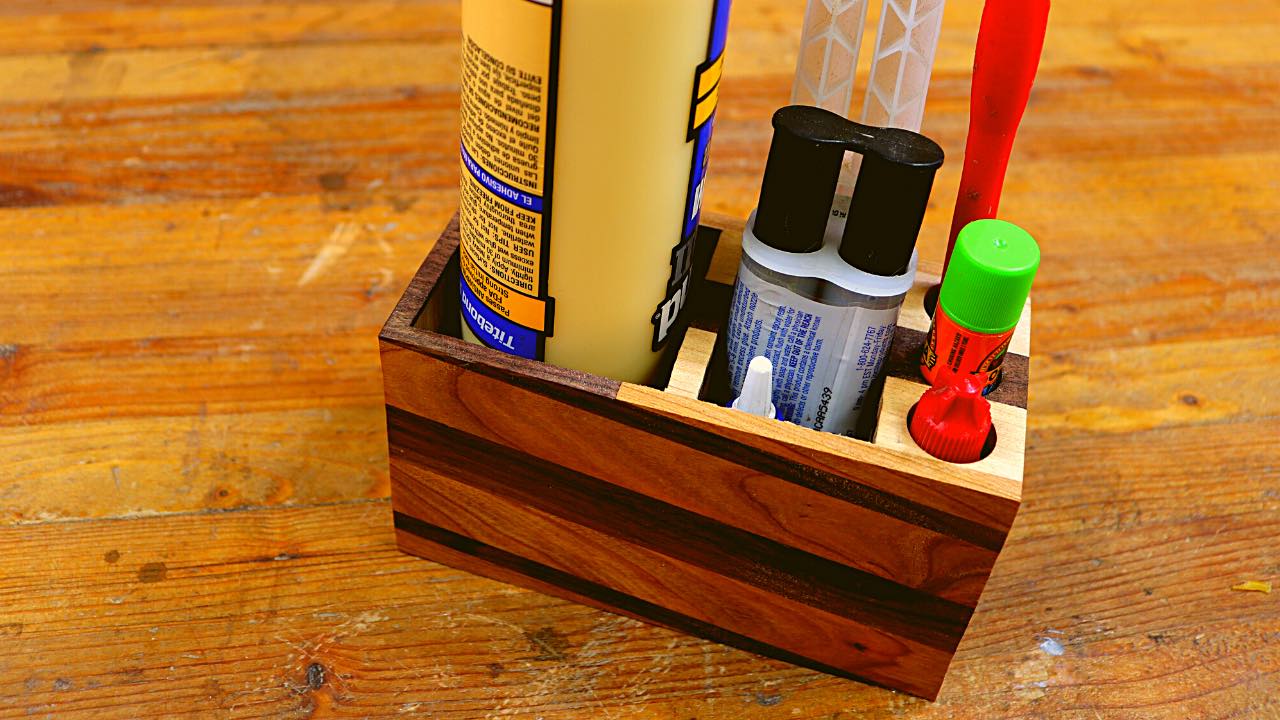
Ah the humble glue bottle. Today, we’re going to put it back on the top and make it, once again, the supreme way to apply glue.
We’ll be covering everything in this video, on this webpage.

Patterns
If you plan on making my glue box, you’ll first need to download the PDF. Clicking here will get you that file. I will note that you’ll want to check to see if your glue bottle has a diameter less than or equal to 2 5/8 inches (66 millimeters). If not, you could always pick up a 16oz bottle of titebond, and then refill it with your favorite glue later.
It’s important that you pick one of the diagonal squares on the page and measure it. It should be 1 inch by 1 inch.
Dimensions
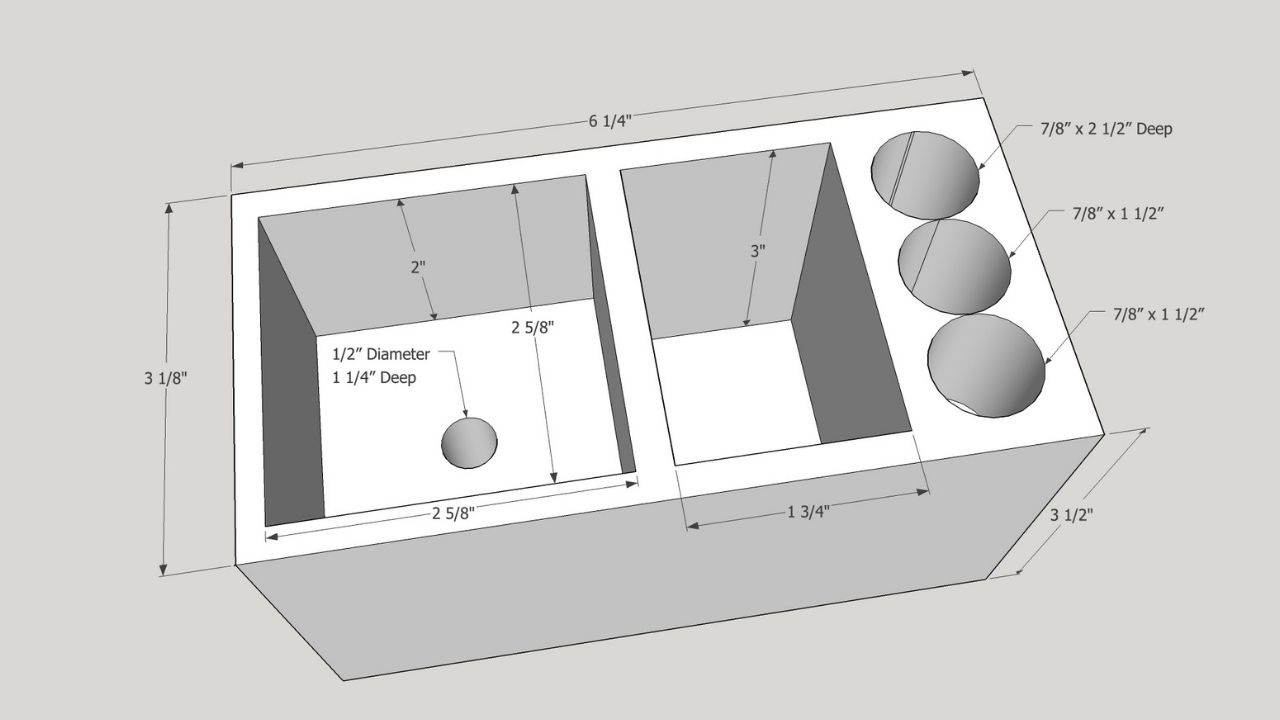
I tried to keep this as simple as I could make it. Because construction lumber is often times prefered by those making jigs or storage, I started with the idea that you could use a 4″ x 4″ (3 1/2″ x 3 1/2″ actual size) piece of lumber, 6 and 1/4 inches long. If you don’t want to run out and by a 4×4, just glue two 2×4’s face to face to get the same dimensions.
If you look to the right, you’ll see the dimensions I designed. “But wait, I thought you said this was designed for a 4×4 and the dimensions say 3 1/8”. If you do intend to use pine, you’ll be happy to have thicker walls. You’ll need to center the above provided PDF to your construction lumber. Another important thing to mention is depth of the inside floors and holes. You can adjust them to your hearts desire. I suggest doing a few measurements to see if what you want to put in the box will fit, as well as how far you want the depth to be for said items.
2 Methods
There are now two methods you can go about making this box. Of the 2 ways, I think I’d have to say that I like the bandsaw box version better as it is far easier. But that’s assuming you have a bandsaw and that that bandsaw does well at making square, accurate cuts. The second method is to use forstner bits to ‘hog’ out the large centers of the box, with a chisel to clean the parts a rounded drill bit leaves behind. I think in a pinch, hogging out the material could be done with a hand held drill. But if you do decide to do that, you MUST clamp that board down to a stable table. Using forstner bits with drills is perfectly acceptable, but you’ll need to make sure you use both hands with the drill.
In the follow steps I’ll list the step number, along with either the Bandsaw or Drill method. Because there’s a lot of obvious overlap, we’ll be jumping around the video.
Step 1 (Bandsaw and Drill)
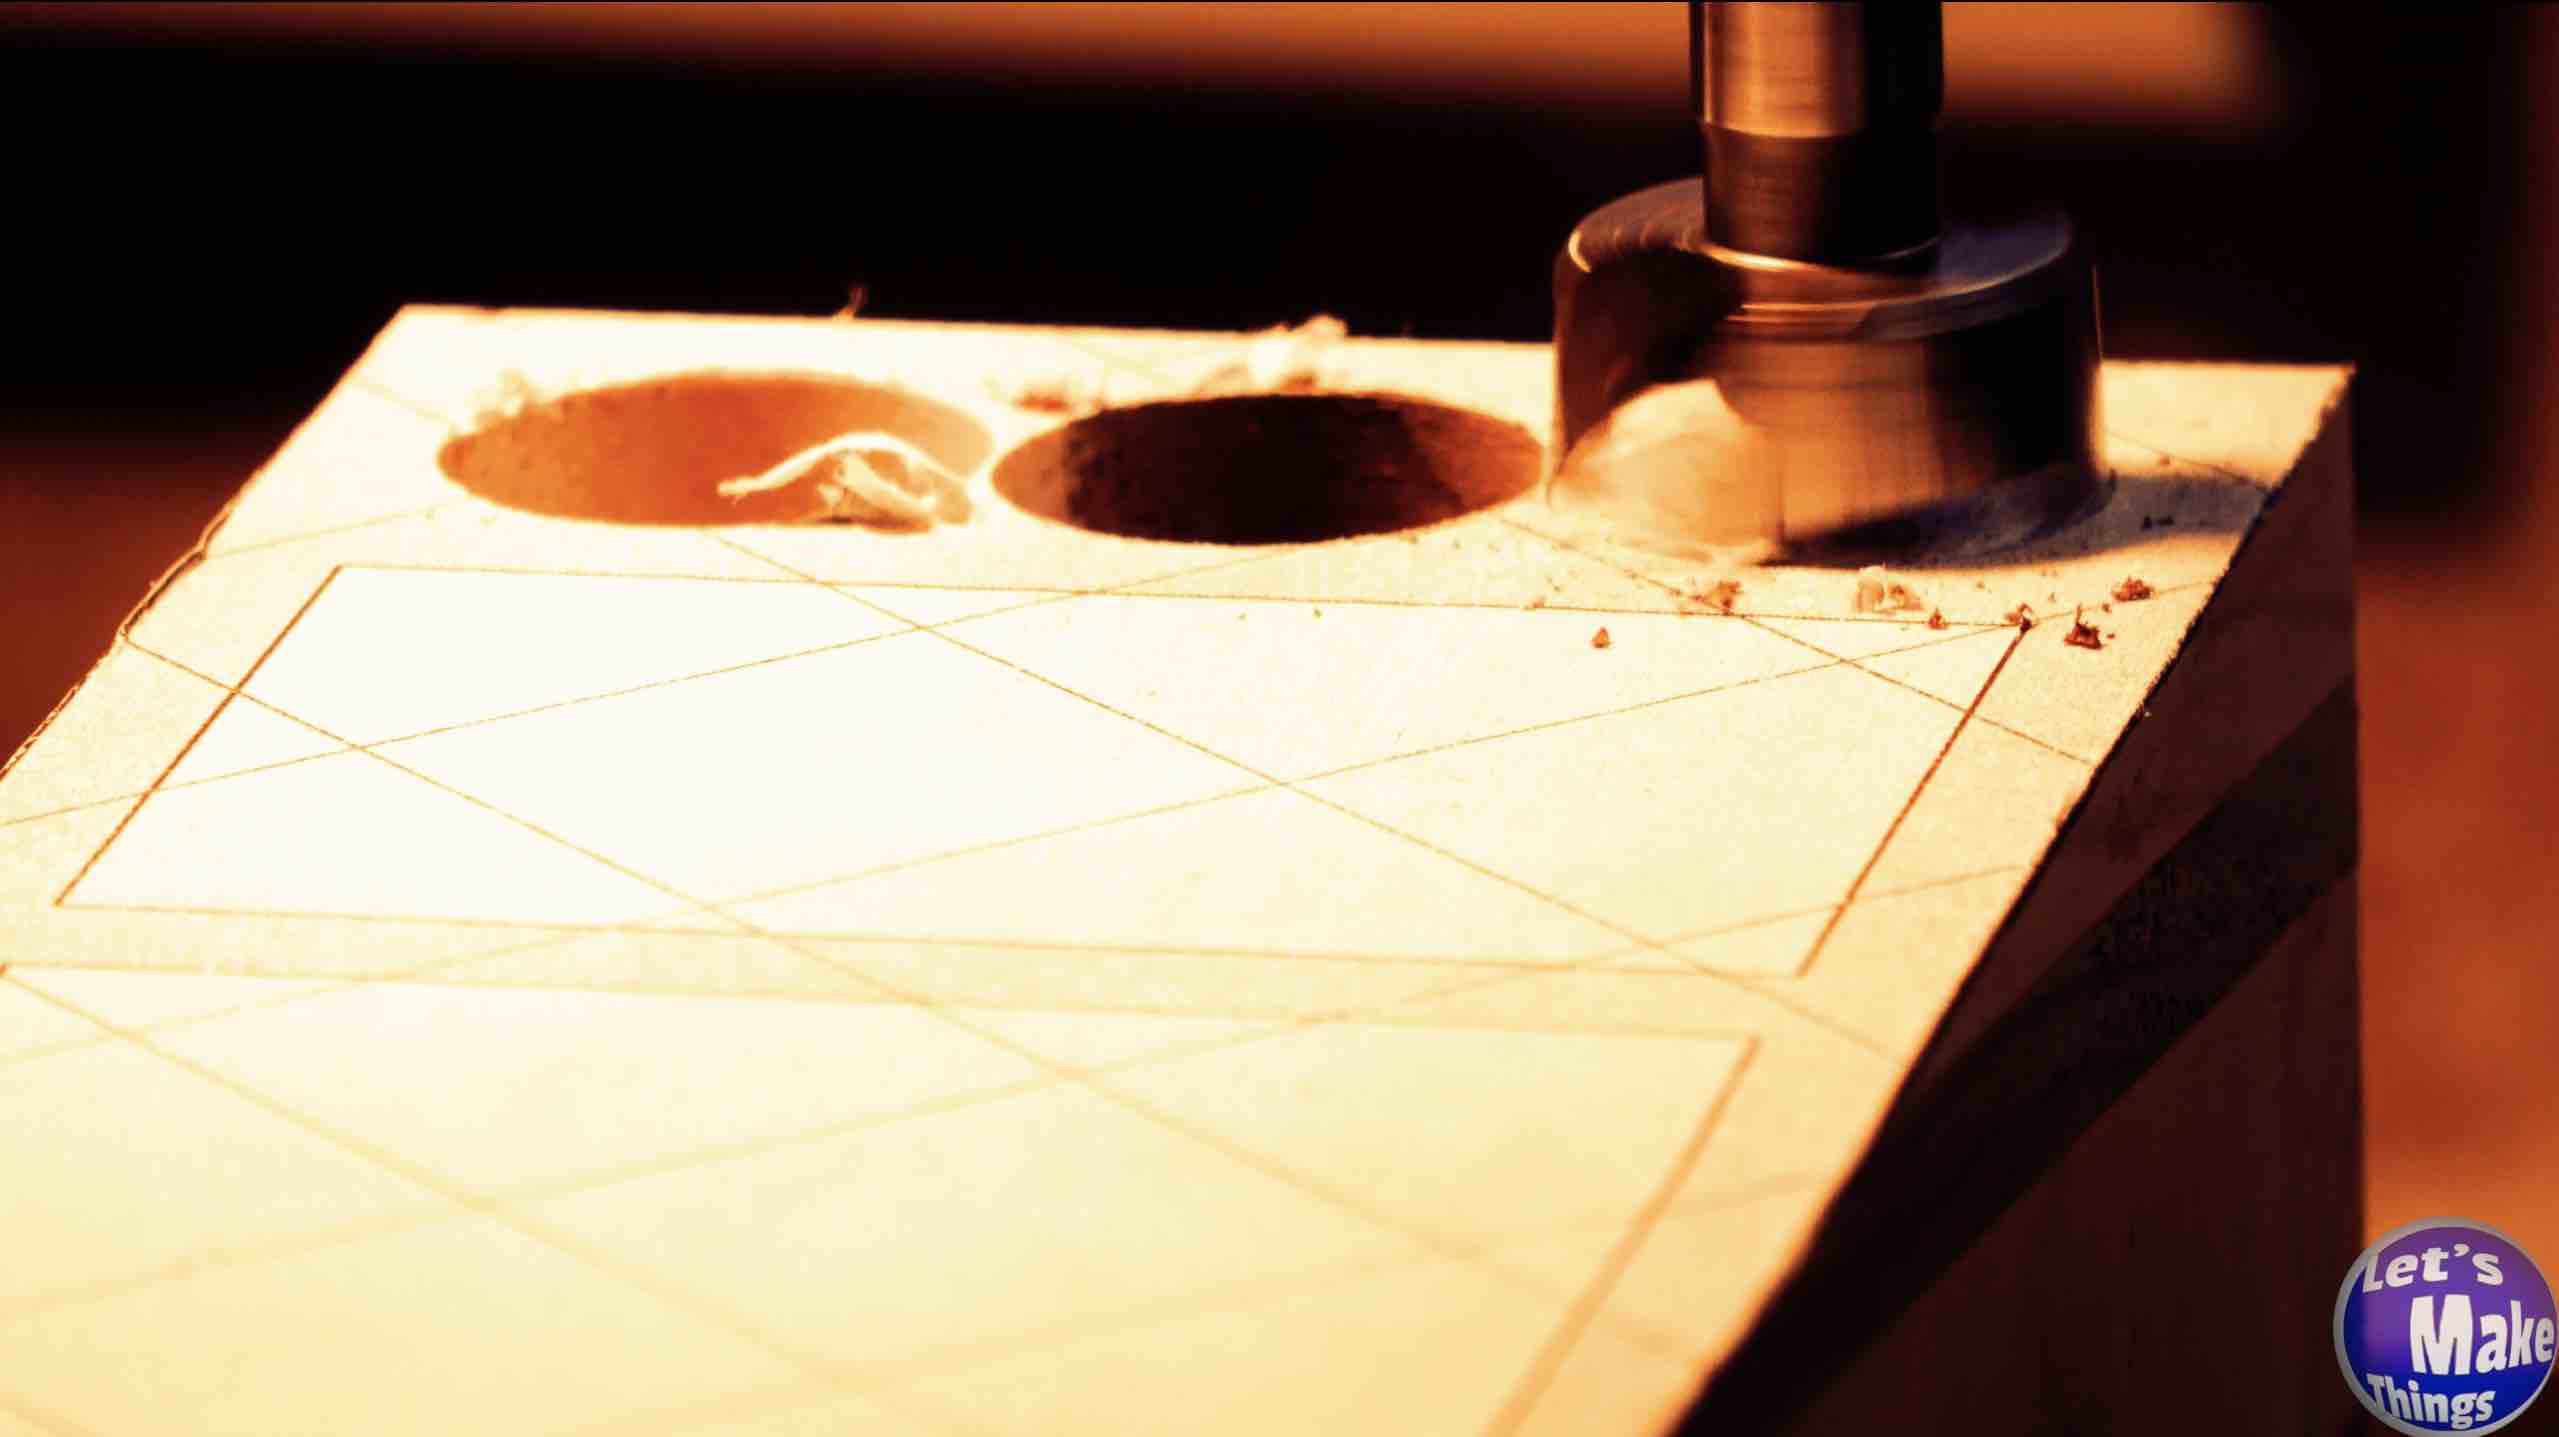
Alright, you’ve got your block of wood in front of you, you’ve cut and centered the provided PDF. Depending on the pattern you decide to use, the first thing we’ll do is to use an awl on all of the marked points on the top. You’ll need those exact points marked so that you can precisely set your forstner bits.
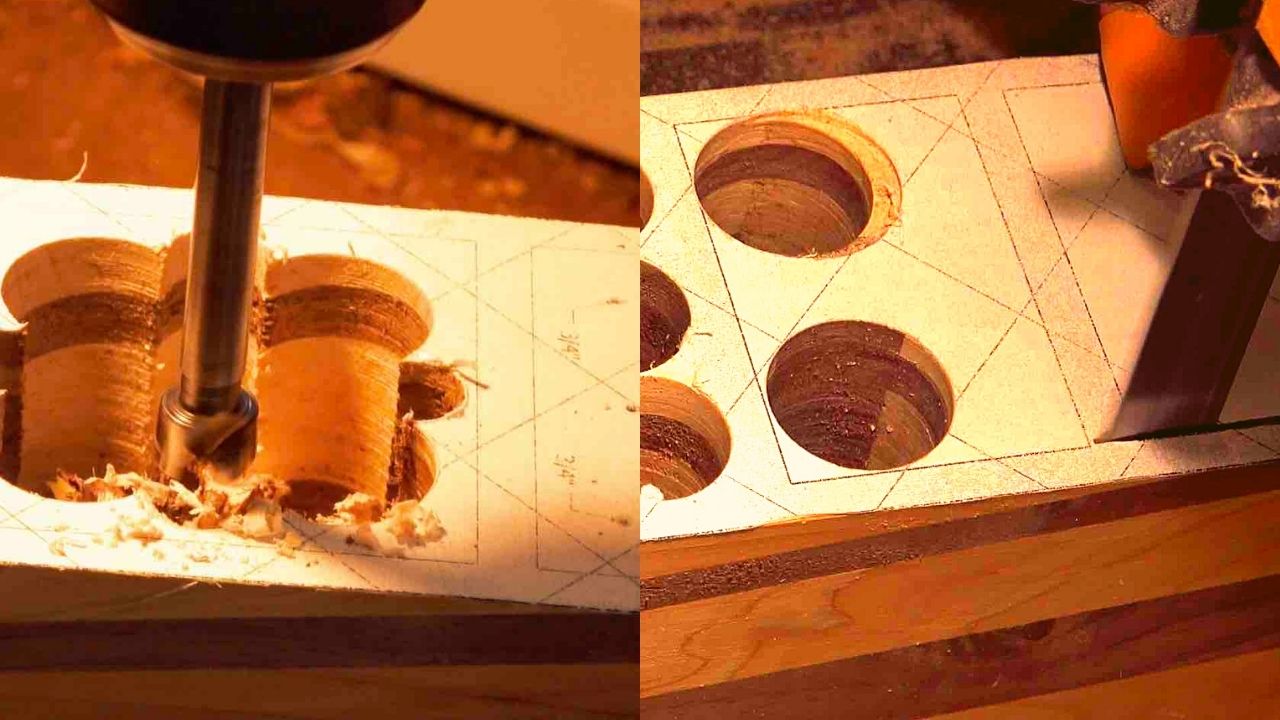
We’ll drill out the (3) 7/8″ holes. I have included measurements for the depths I used, the deeper of the 3 holes fits my glue brush very well. By the way, if you don’t have one of these wonderful glue brushes, I can’t recommend them enough, they are gamechangers.
Note: Clicking the picture on the right shows this step in motion at youtube. If you’re interested in how I built these glue boxes from scrap
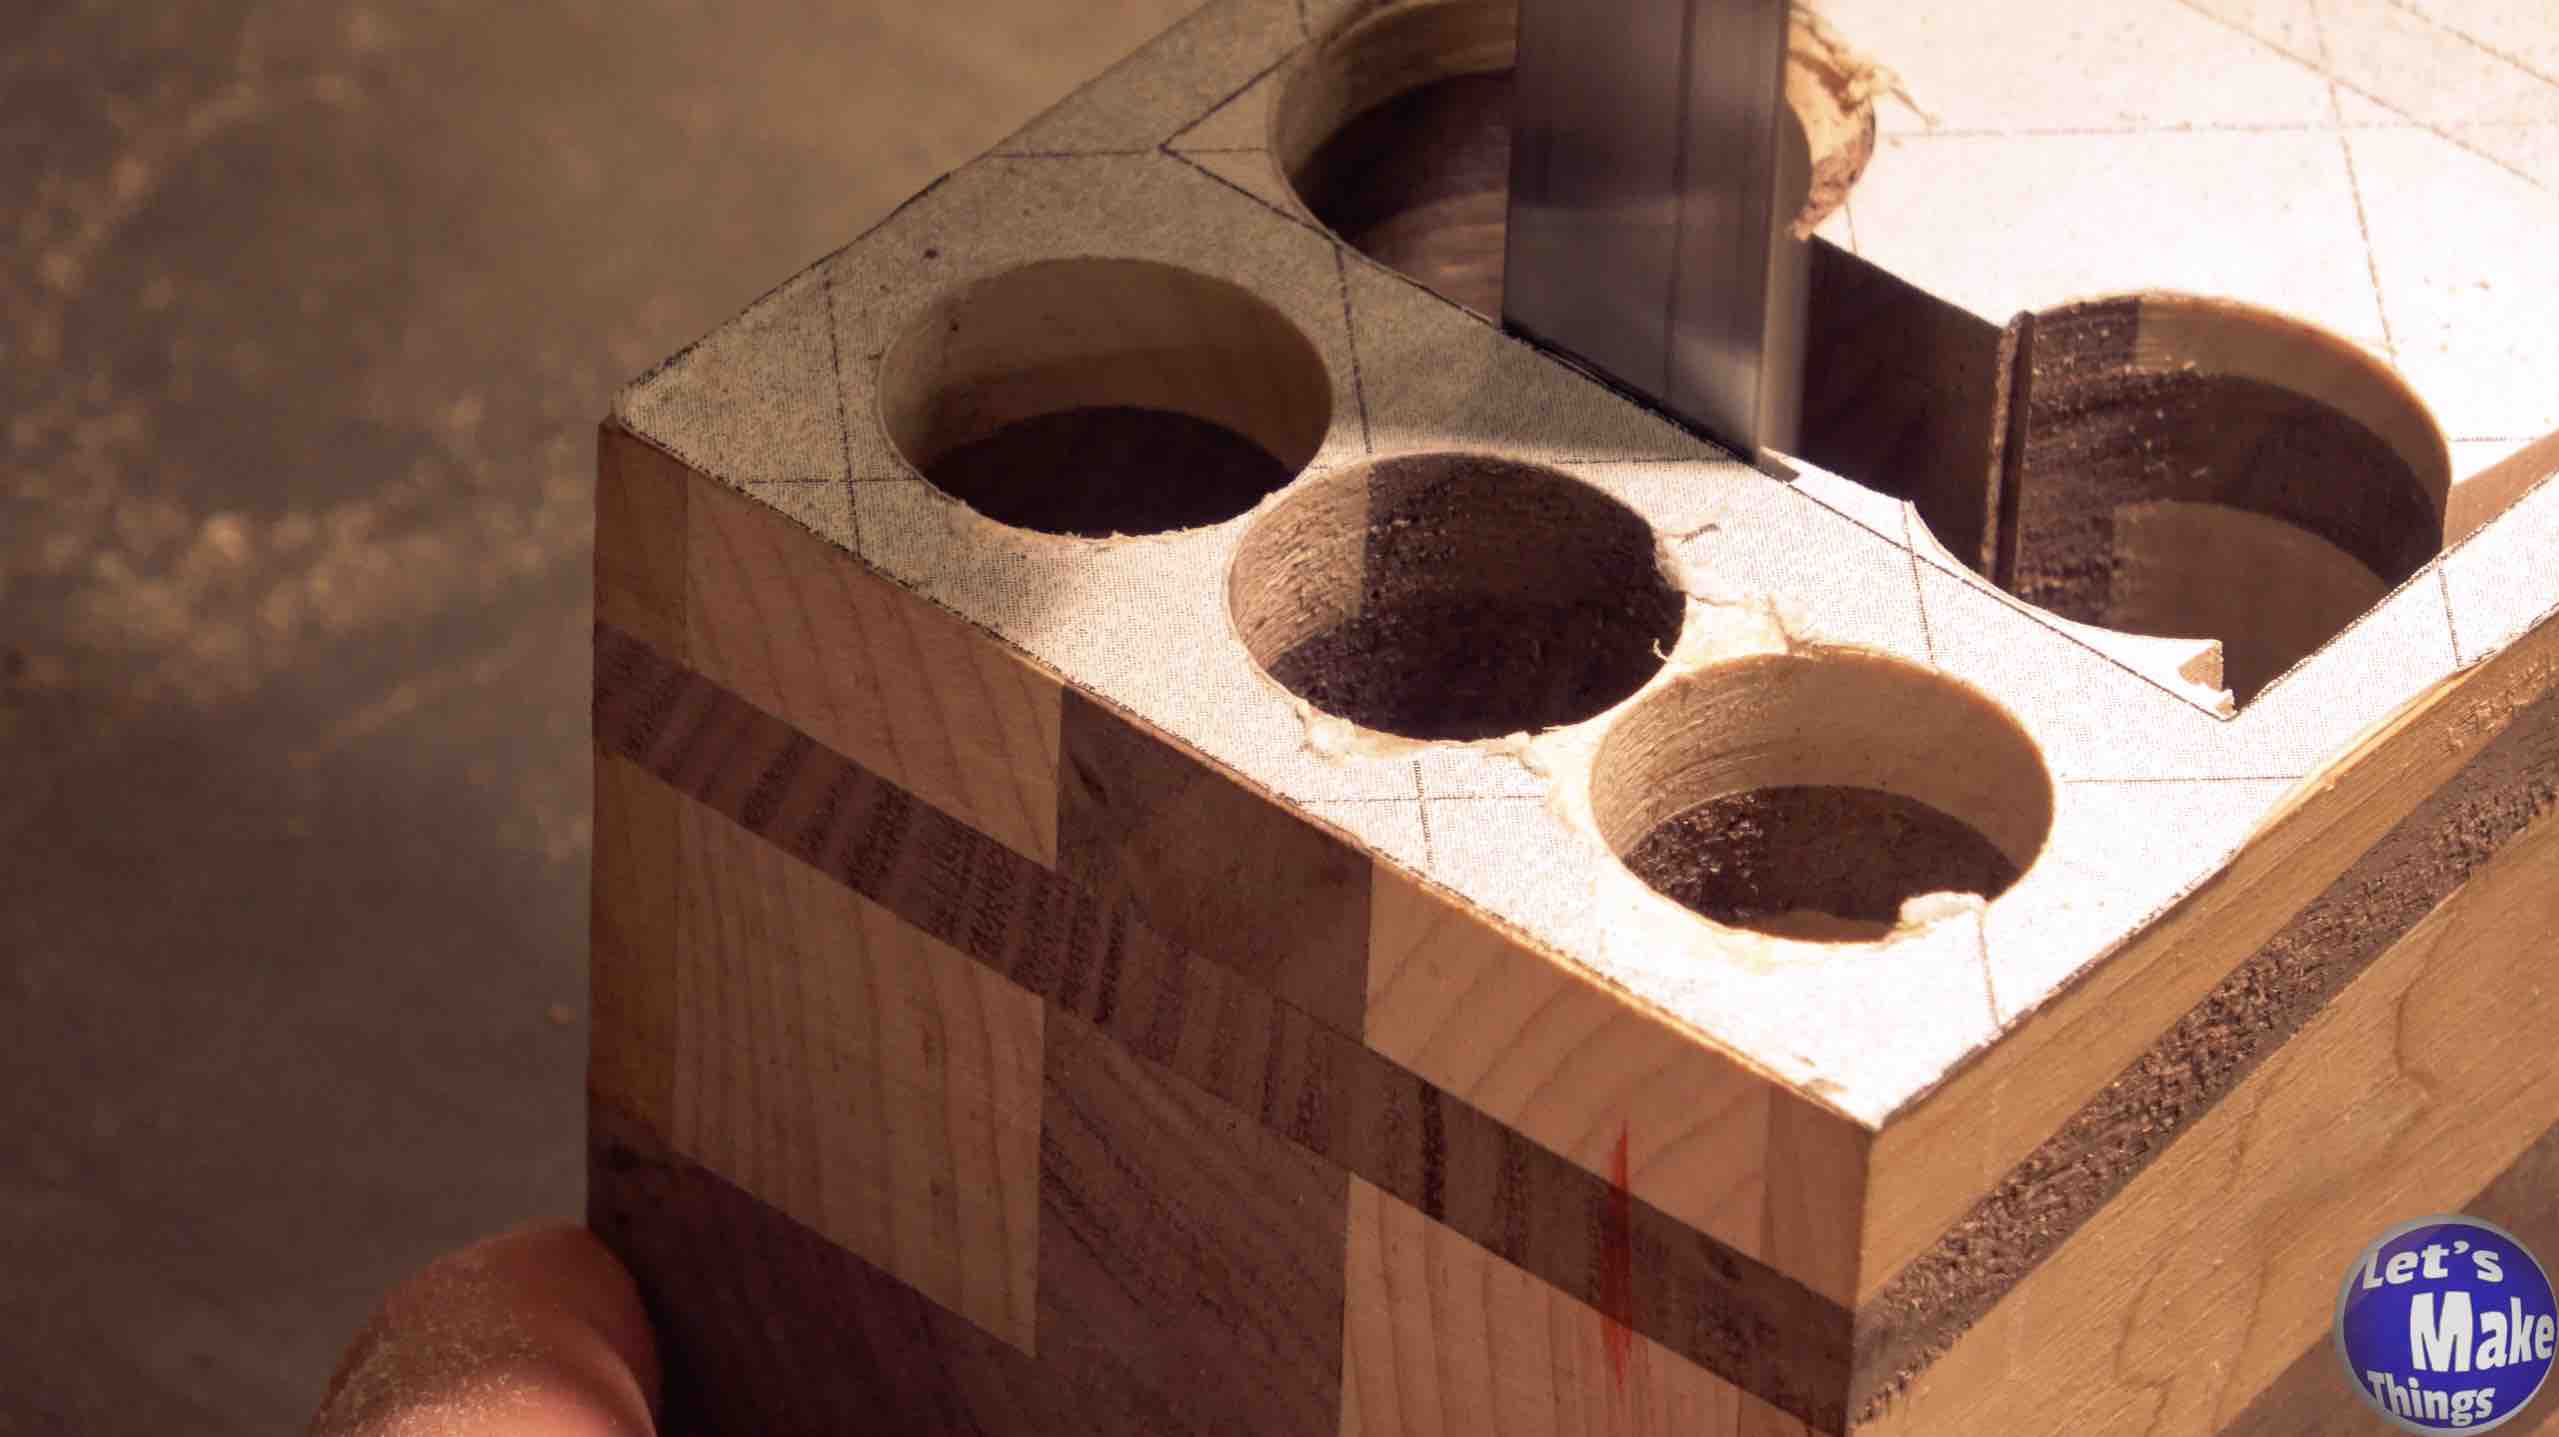
Step 2 (Bandsaw) After drilling 4 holes completely through the block of wood on the inside corners (picture to the right), we’ll cut through the side of the block, along the inside walls, being very mindful of the divider wall. It’s very, very important that you start your cut on the end, and cut with the grain with the first cut. If you cut a path the wrong way, you won’t be able to glue your box later on. If you’re confused by what I mean, click on the picture to the right to see how I made my initial cut.
Note: Clicking the picture on the right shows this step in motion at youtube.
Step 2 (Drill)
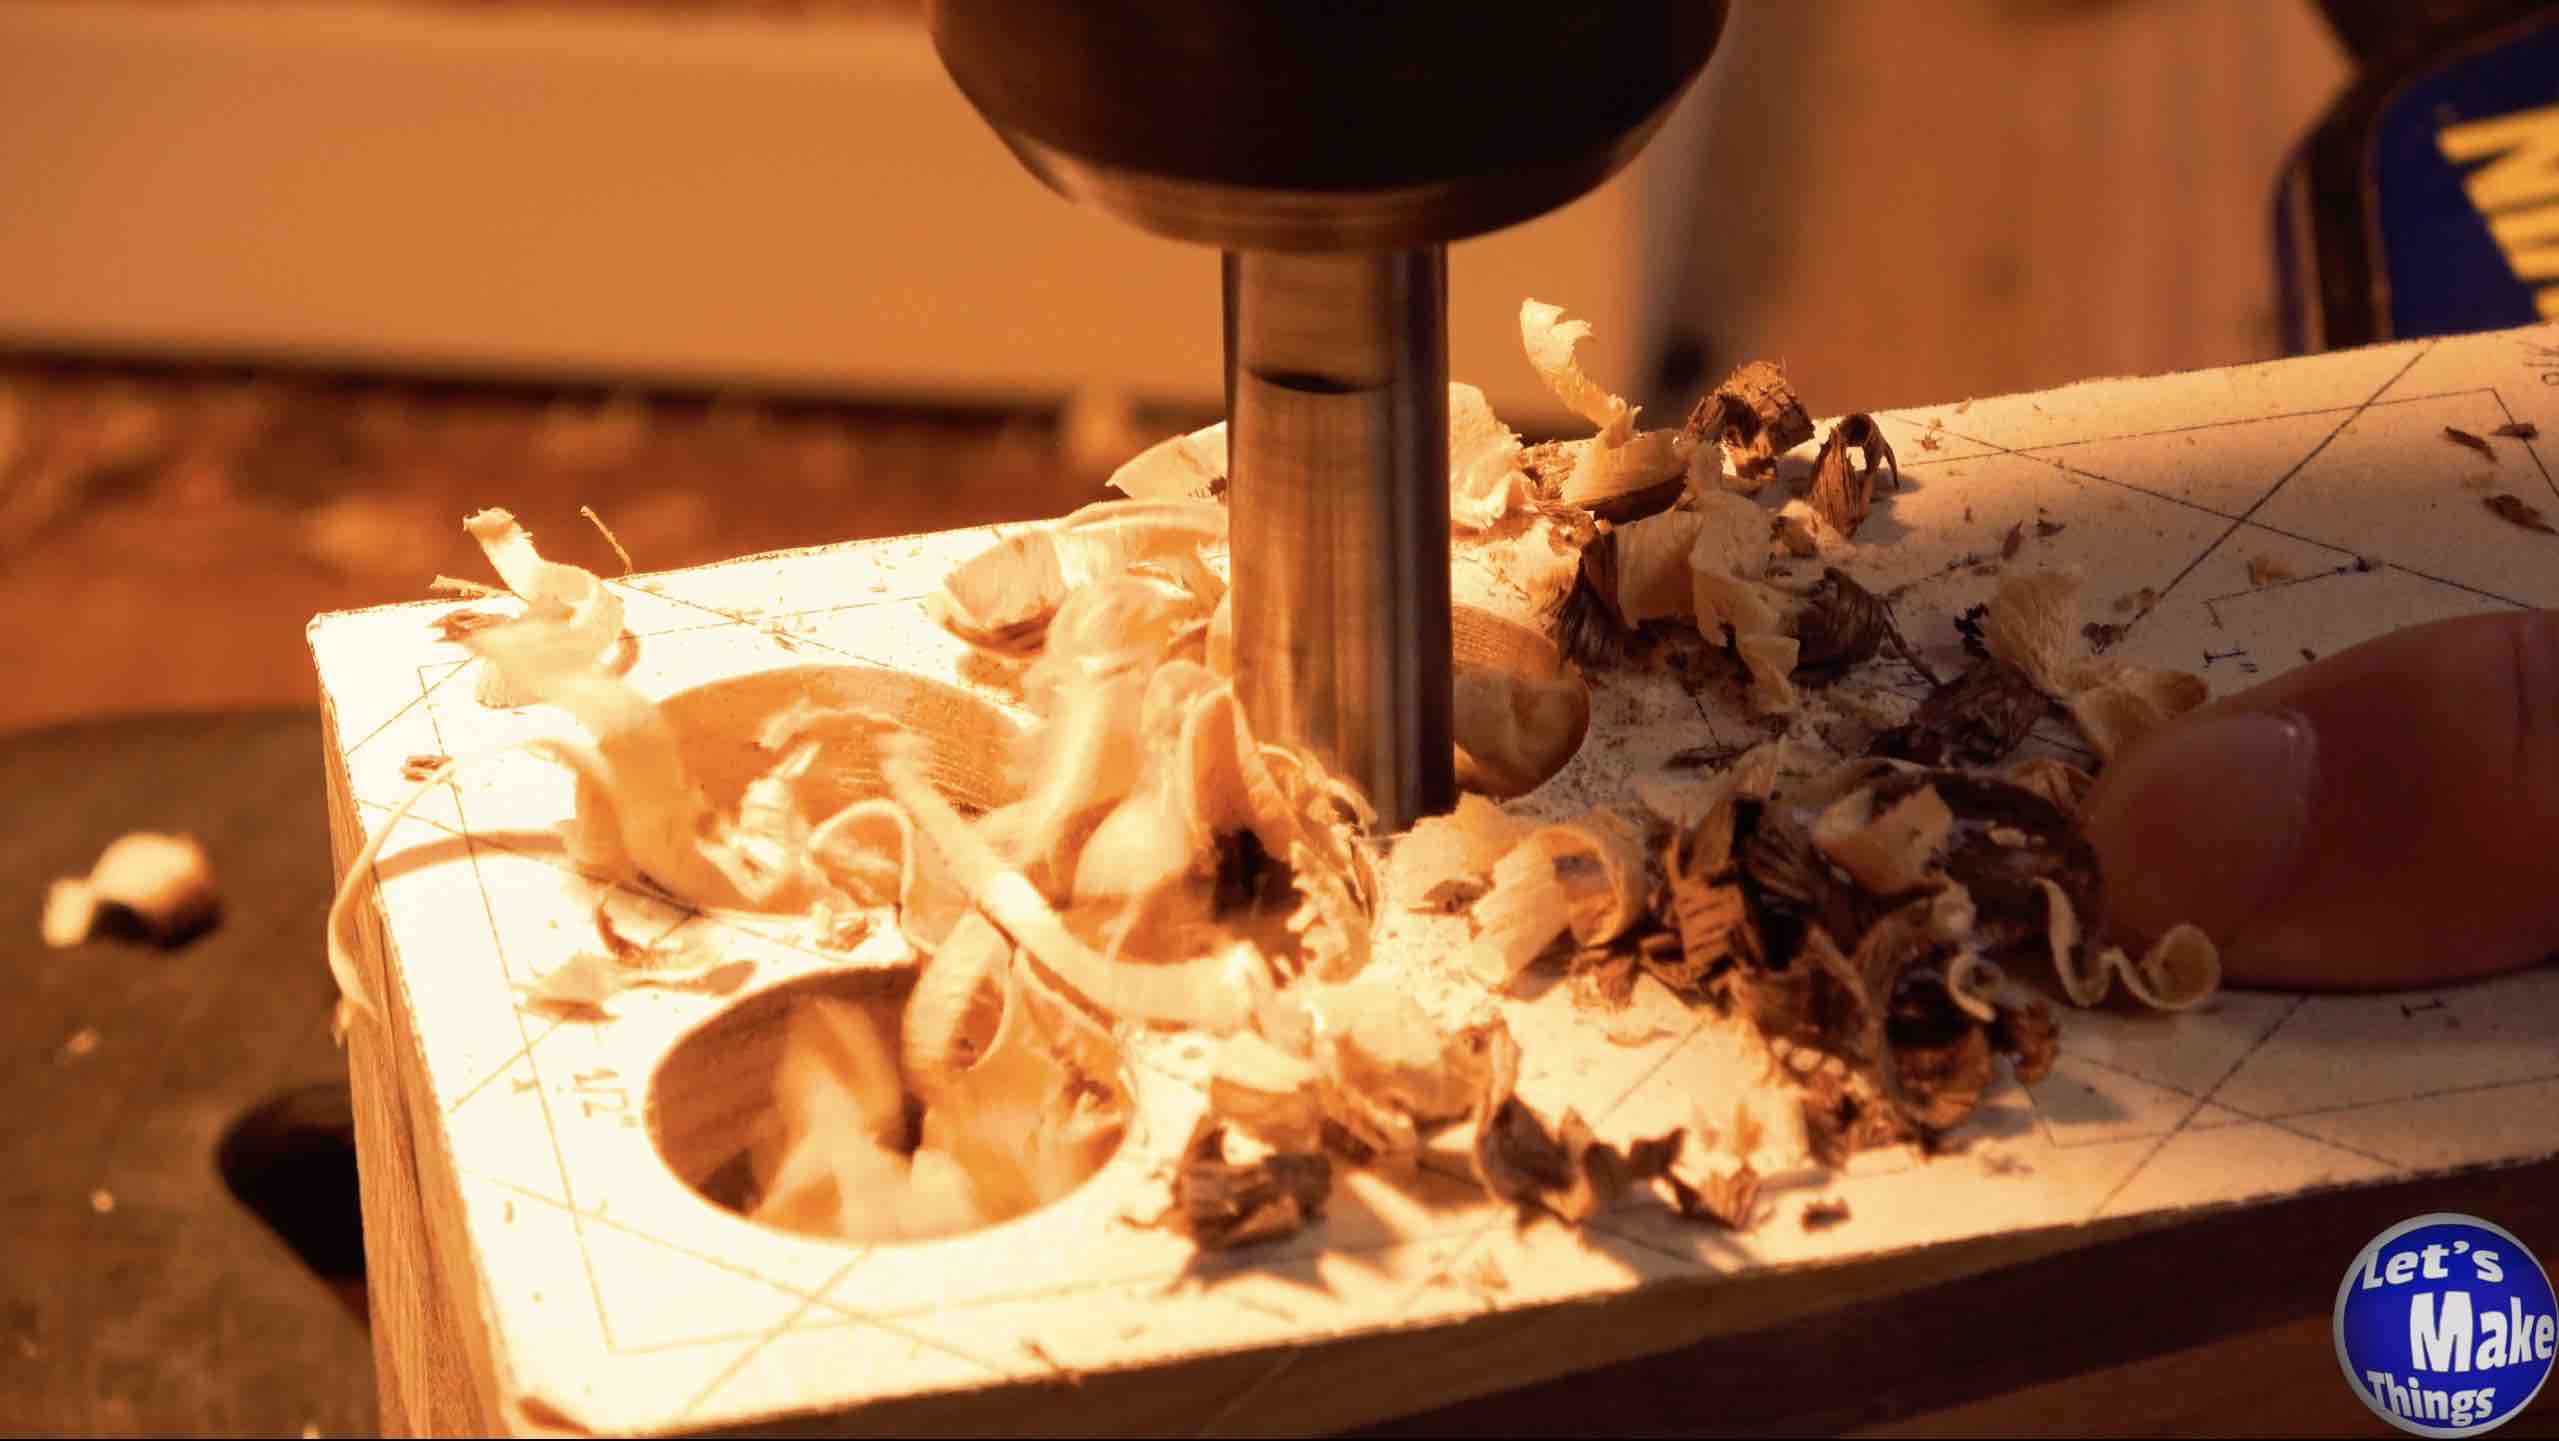
There are a series of holes that need to be cut out in both the large cavity, as well as the small. I strongly suggest going from the larger diameter forstner bit needed down to the smaller size. Doing it this way, I think, will prevent bit wandering. The depth of these holes, once again, needs to be determined by you. The video on the right shows this step and I do explain a little bit about the depth and what I chose to go with.
In the largest of the two cavities we’ll go to the center mark that was created by our forstner bit. There we’ll use a 1/2″ forstner bit and drill down about 1 and 1/4″ inches.
Note: Clicking the picture on the right shows this step in motion at youtube.
Step 3 (Bandsaw)
With the inside of the block carved out, we’ll now need to add some glue to the walls we passed through, reconnecting them once more. We’ll add clamps and close up the gaps. If you didn’t cut through the right wall as listed in Step 2 (Bandsaw), you’ll have a very difficult time gluing the box.
Note: Clicking the picture on the right shows this step in motion at youtube.
Step 3 (Drill)
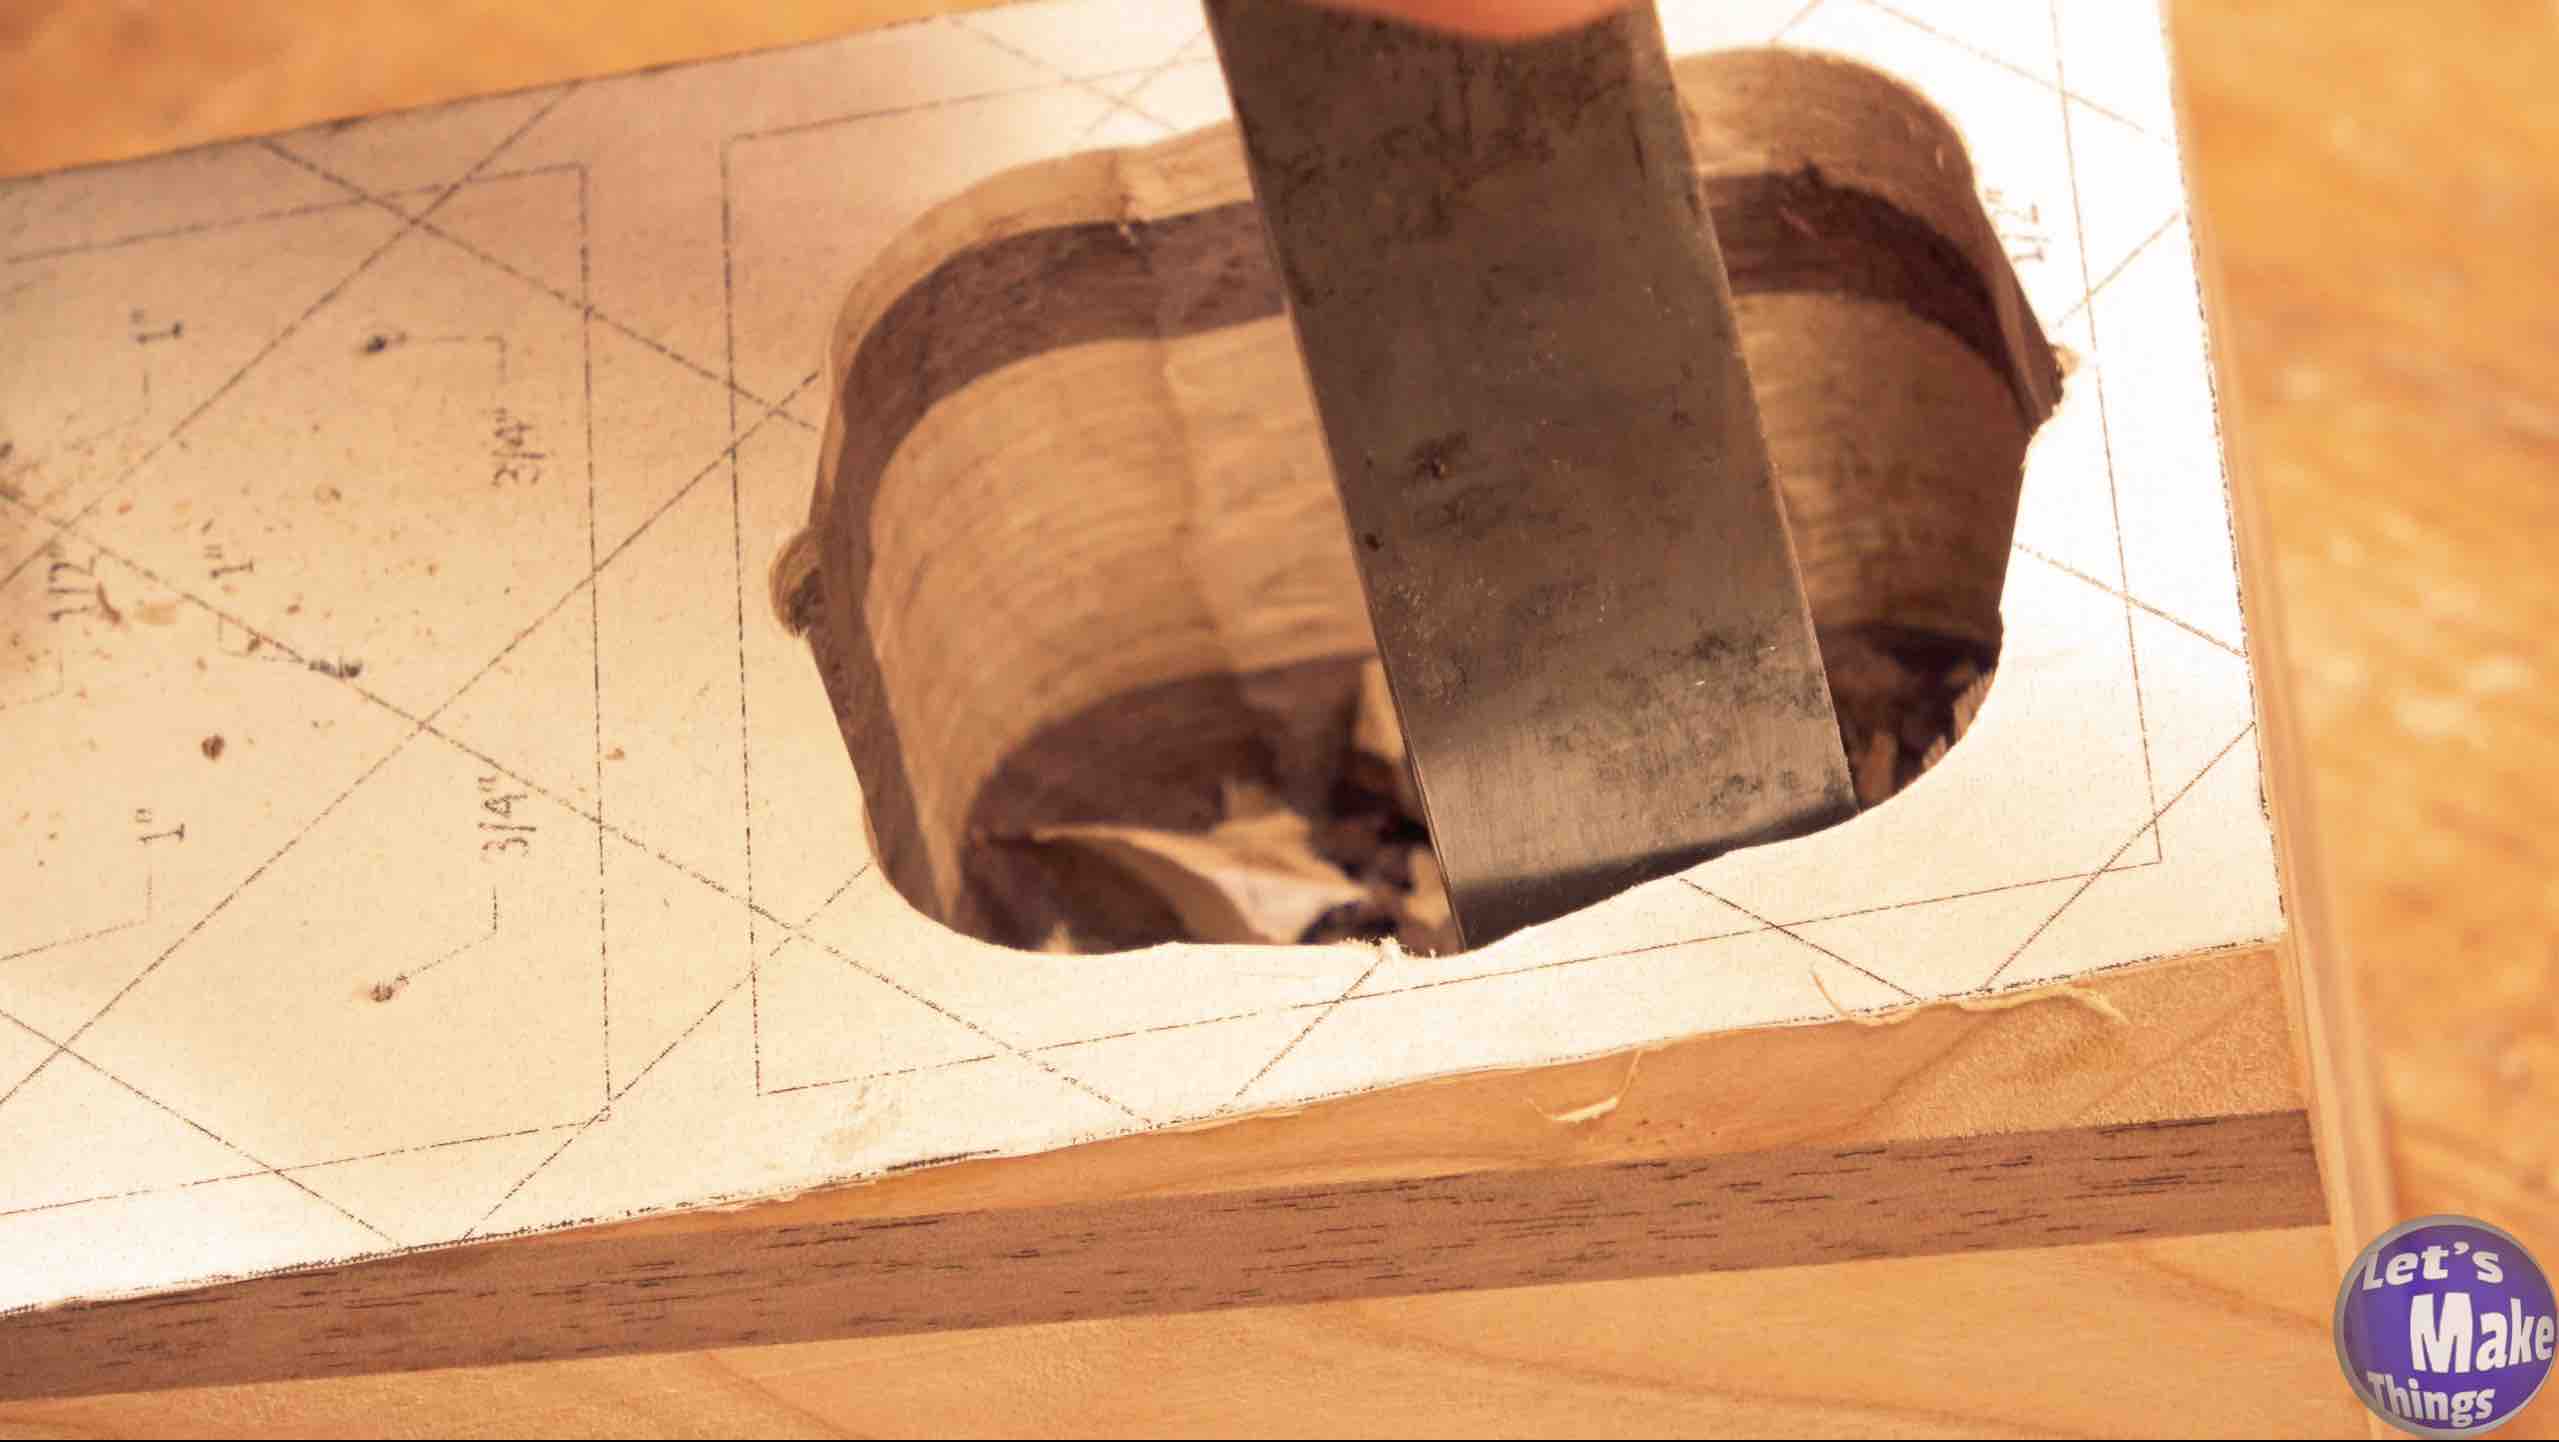
With drilling finished, we’ll use a chisel and cut out the bits left behind. I chose to completely carve out the box cavities completely, but really, it isn’t necessary if you’re not making a fancy box. What’s really important is to make sure your glue fits as well as the other items you choose to put in the box.
Note: Clicking the picture on the right shows this step in motion at youtube.
Step 4 (Bandsaw)
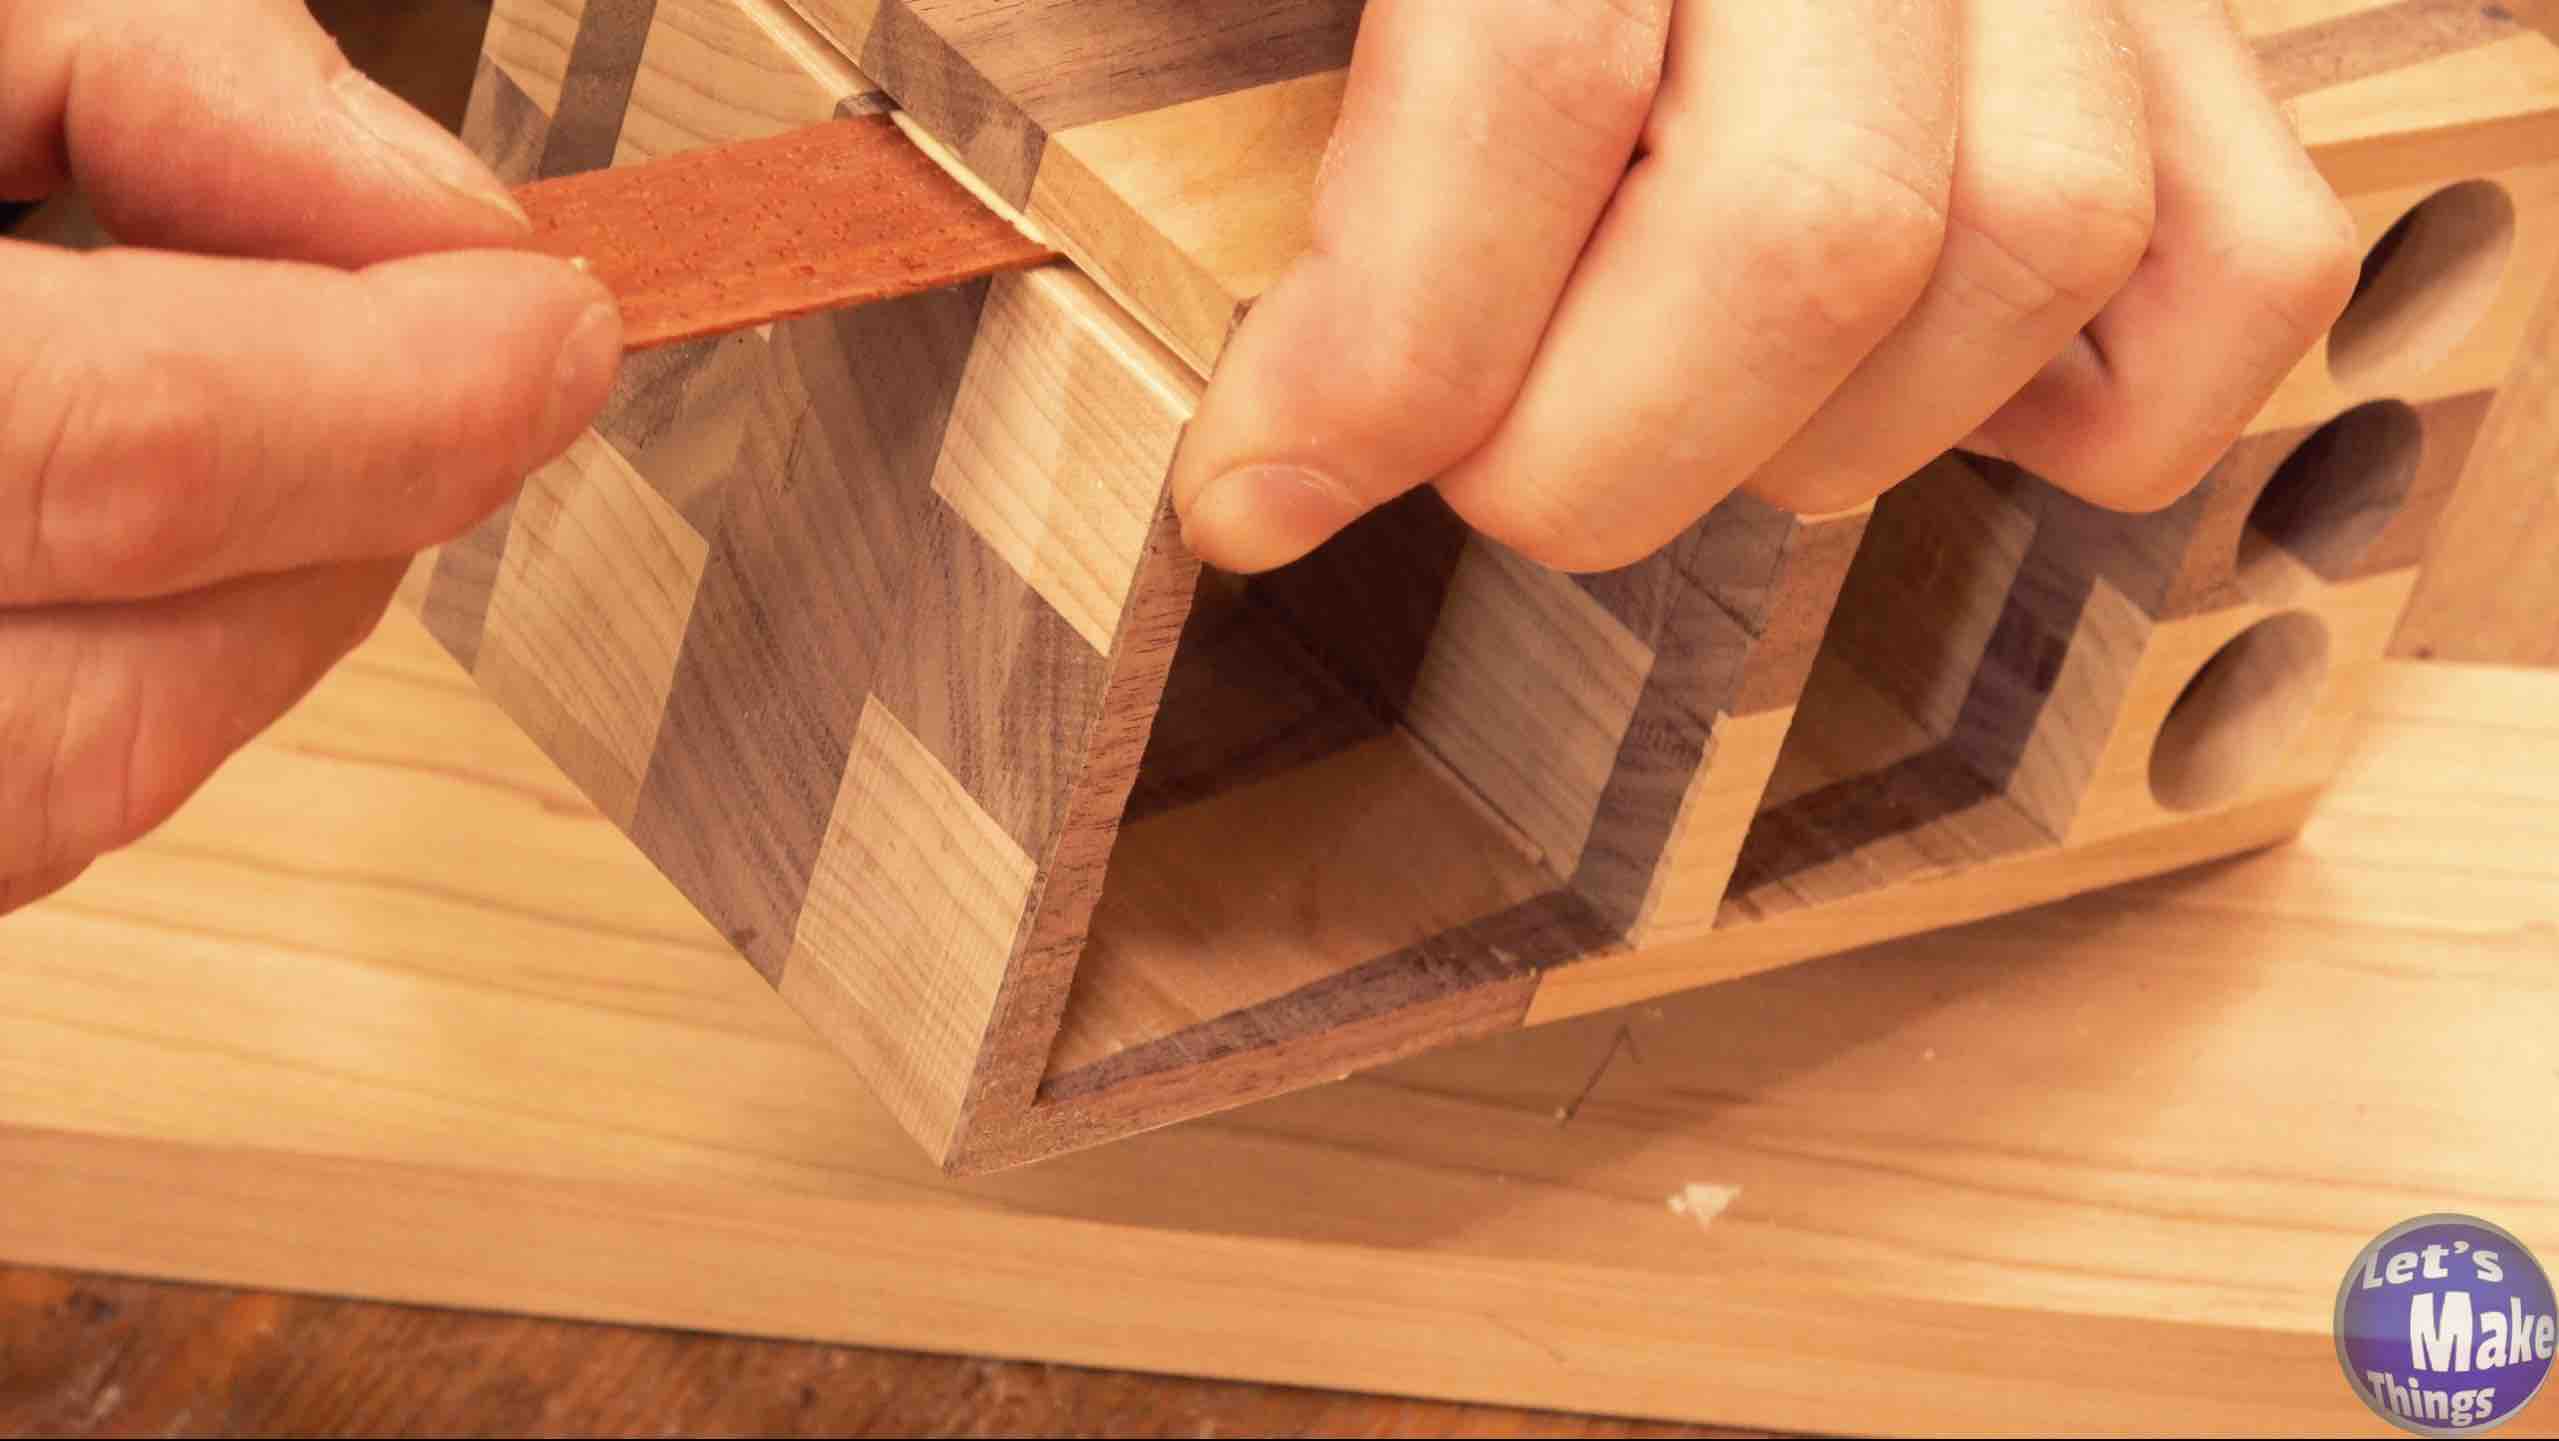
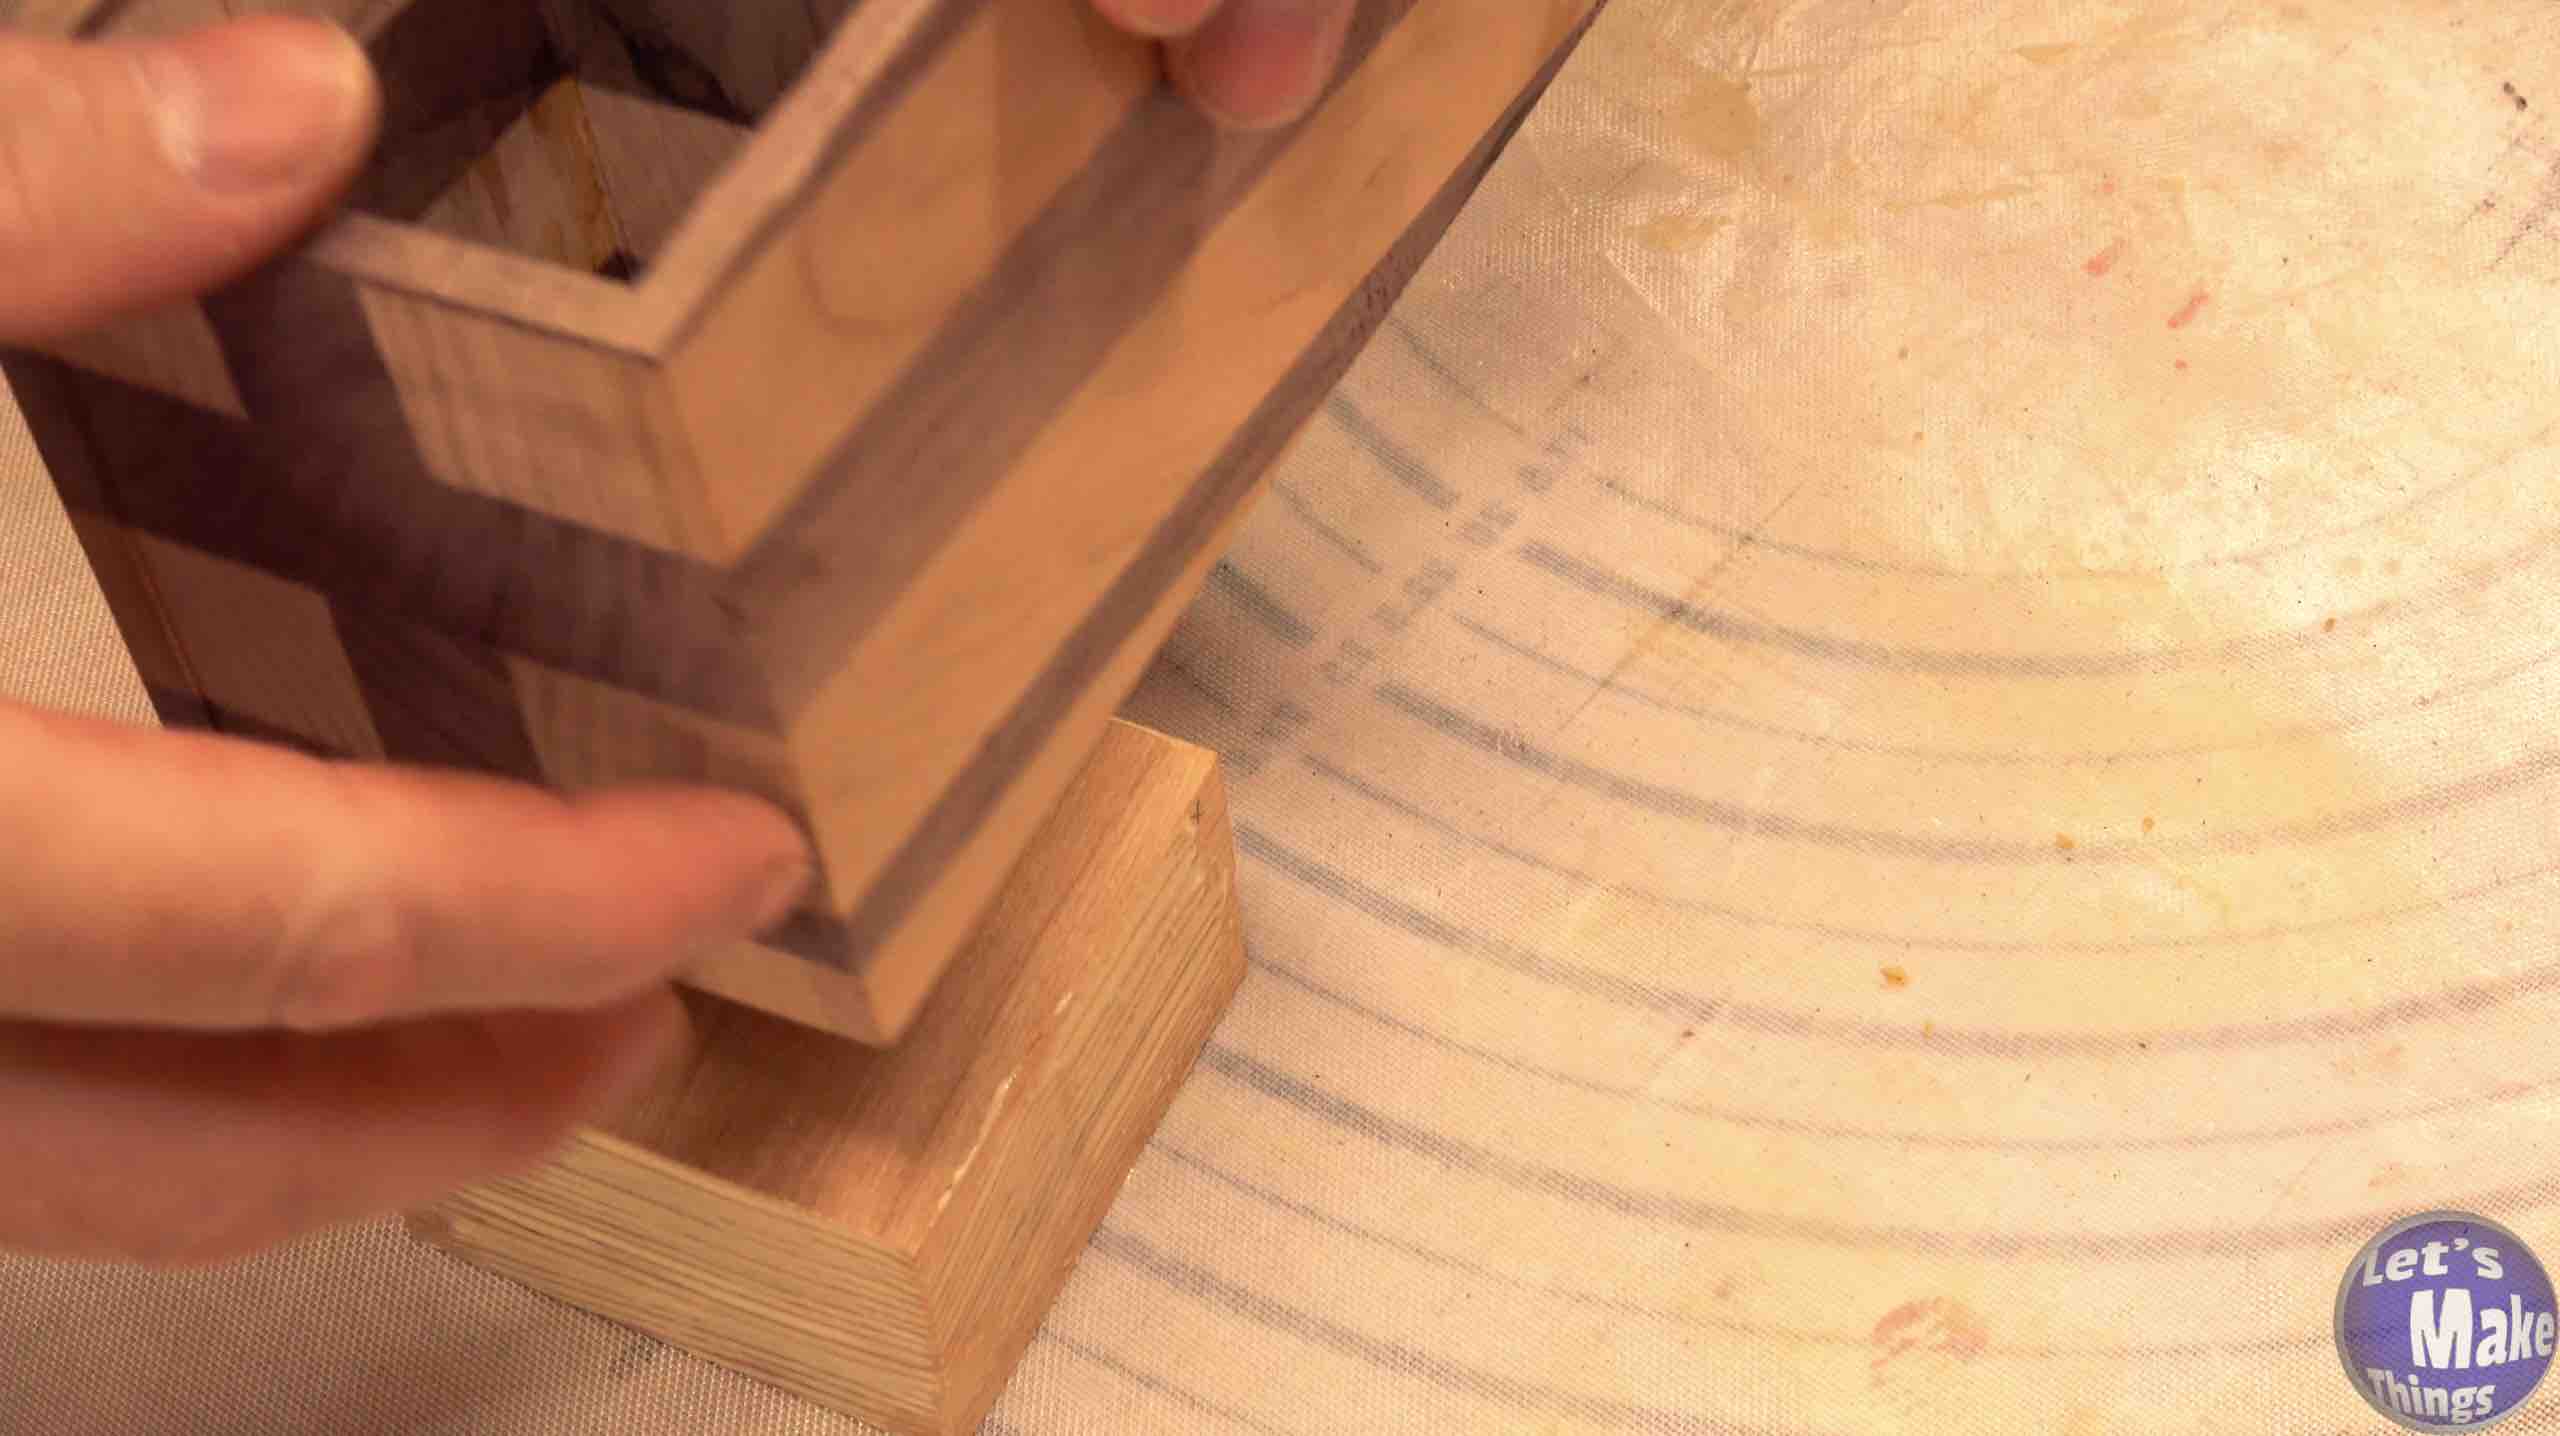
With the glue dried, we’ll now use a few blocks of scrap to remake the base. Thicknesses of those squares you use is, once again, up to you. The large cavity I used 1 and 1/2 inches for the base block. The smaller cavity got a 1/2 inch block. To determine the size of those pieces, we’ll simply place the blocks below the bottom and trace the inside with a pencil. To make sure I was able to line the pieces (after being cut) back to where they were originally marked, I created an X on the top of the block and then an X on the scrap wood corner that matches. Once the larger square is cut to size and fits, connect the corners and drill out the center. I chose to drill down 1 1/4″ deep with a 1/2″ forstner bit.
I added glue around the edges before pushing each block in. You may be able to put some side pressure with clamps, but I pushed them in without and allowed them to dry.
Note: Clicking the picture on the right shows this step in motion at youtube.
Step 5
Believe it or not, you’re done! If you had any problems or I haven’t explained things clear enough, please reach out to via email me at the email pictured to the right. If you enjoyed this, please click on the picture to the right and subscribe to my youtube channel. Thank you for visiting!
Note: Clicking the picture on the right takes you to my YouTube channel.
Click the video above to watch the box go from a stack of boards to a beautiful box.

Tip Jar
If you enjoyed these free plans and have a few bucks sitting around, why not help us keep the website going and feed the tip jar? Completely optional!