Fifteen years ago, I made this screw rack using quarter inch paneling. The jars, at one point, contained special formula for my preemie son. If I wanted to find these particular jars these days, I’m afraid I’d be a little out of luck.
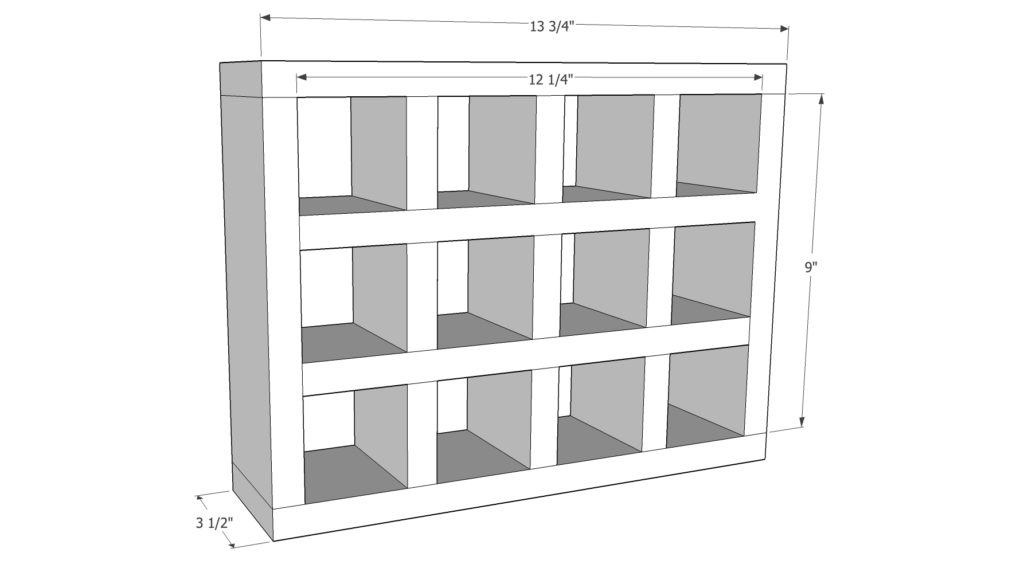
I decided to update this rack…but the cost of store bought screw organizers made me shudder! Below, I worked out a system that I’m very happy with. Of course, you can make it as large as you want. You could also scrap the 3/4 inch pine and go with something thinner. It’s all up to you!
watch all steps in this video before starting
Please use the material and tool list below as a guide to finding the products locally.
As an amazon associate I earn from qualifying purchases.
Step by step instructions
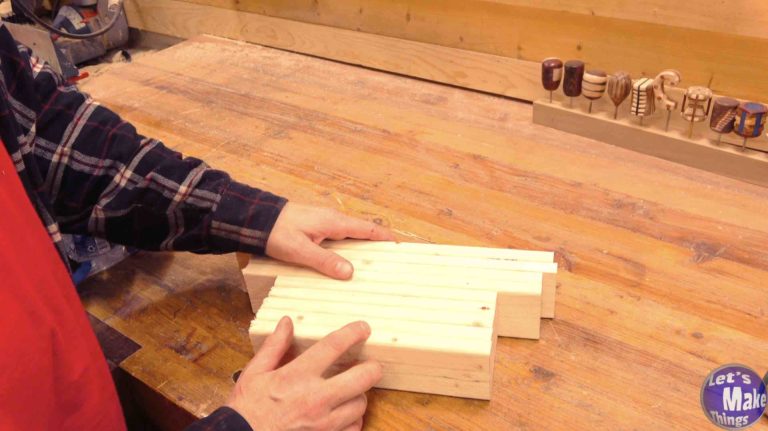
1. Cut to Length
Before we get into the thick of this, make sure all pieces are cut to length. In the video, I originally started with furring strips, not realizing that they were 5/8″ thick instead of the 3/4″ that I had designed my racks to be.
Click image to see this step on youtube
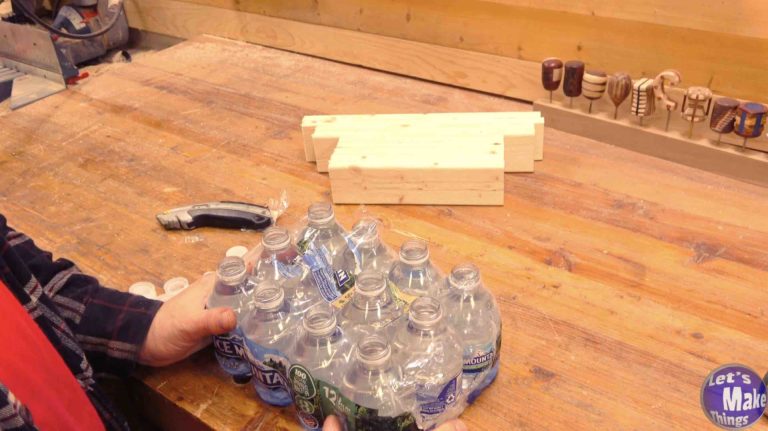
2. Water Bottles
I bought a pack of 8oz water bottles at the store that cost me a little over $3 for a 12 pack. For the same amount of money, I found a comparable screw container…just one!
Be sure to drain the water out of them and allow them to be upright overnight, preferably in a manner that will allow air to get inside the hole. In the video, I cut the top of the package allowing me to remove the caps so that I could store them ALL upside down at once.
Click image to see this step on youtube
3. Notching
We’ll notch out each of our five boards on the bandsaw, stacking them and measuring the tops. Be sure to download the “measuring chart” PDF in the printout section at the top of this page. or watch closely to the video.
I went a little over half the distance of the 1×4’s as I notched each of the channels out, ensuring that later on they wouldn’t bump into each other.
Click image to see this step on youtube
4. assembly
Assembly should be pretty straight forward at this point. Knock them together (carefully, 1×4’s can crack). No glue should be needed for these. Then we’ll add the frame and you can either screw or nail the boards in…but do not use glue! End grain and gluing is usually a very bad combination.
Click image to see this step on youtube
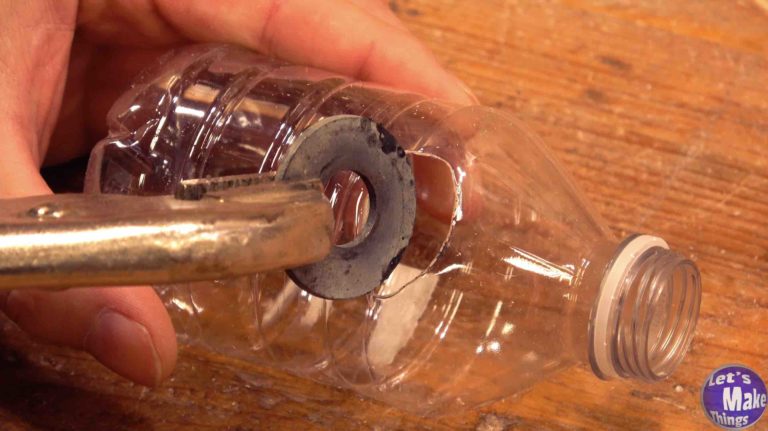
5. holes and tagging
I grabbed the largest washer that I had (it’s probably an inch and a quarter in diameter) and removed the zinc off the surface by heating it up outside of my shop. Be very careful when you heat up zinc that you don’t breath in the fumes. Outside is always the best place to remove it.
With the zinc removed, I heated the washer and gouged the side of the lid, closest to the top of the spout. Then I put the lid back on and added tags that you can download at the printout section at the top of this page.
And that…is pretty much it!
Click image to see this step on youtube
Tip Jar
I want to thank you all so much for checking out this webpage. This website is done out of a labor of love as I have dedicated it to help others that are new or looking to do newer, creative woodworking things. Unfortunately, there are a lot of expenses. If you’d like to add a few bucks to the tip jar or even sign up for patreon, it would help greatly to keep this website going.
If you’d like to support me through Patreon, you’ll get these benefits:
Weekly exclusive video
Early Access to both my Make Things and Let’s Make Things Channel
Get recognition at the end of each of my main channel videos for your contribution