Router dog-hole Table
January 15th, 2024
Working with small stock can be tricky without a router table, but not everyone has the space—or budget—for a full-size setup. That’s where this project comes in. This benchtop router table is a simple, effective solution designed to fit right onto your workbench using just a single bolt for secure attachment. All you need are a few basic materials: a piece of plywood, a couple of supports, and a bench with a hole.
This project is perfect for woodworkers who are short on space or looking for a quick, affordable way to get the precision of a router table without the bulk. We’ll go over how to make the jig and then center the base plate from plexiglass. Even better, this design leaves room for future customization. Want to add a fence…not a problem. Need to tweak the size to fit your bench…easy. It doesn’t matter if you’re a beginner or an experienced woodworker, this project is an easy and rewarding way to make your router even more versatile than it already is.
By the end of this you will have a compact, efficient router table that gets the job done—and also the satisfaction knowing you built it yourself. Let’s get started!
ATTENTION: These plans are provided as a gift from me to you. You are free to use them to create this project for yourself. However, please do not sell or distribute these plans as your own. I make no money from these, and I kindly ask that you respect basic copyright laws. If you share your build publicly, I’d appreciate it if you gave credit to Make Things for the plans.
watch all steps in this video before starting
Please use the material and tool list below as a guide to finding the products locally.
Materials
- 3/4″ x 12″ x 15″ Plywood (flat)
- (2) 3/4″ x 3″ x 10 1/4″ Hardwood
- 3/4″ x 6″ Hex bolt (This is stainless steel and unnecessary…buy this locally!)
- 1/4″ x 8″ x 8″ Cast plexiglass
- Salt (to taste)
Tools Needed/used
- Router
- Bandsaw
- Drill press
- Hacksaw
- Mallet
- Chisel
- Center drill bits
- 3/4″, 1 1/4″, 1 1/2″ Forstner bits
- 1/2″ Shank: V-groove, rabbet bit
- –OR–
- 1/4″ Shank: V-groove, rabbet bit
- F-clamps
- Machinist square (optional)
- Steel ruler (my favorite)
- Yardstick
- Marking gauge (optional, but oh so nice)
As an amazon associate I earn from qualifying purchases.
Step by step instructions
1. Materials
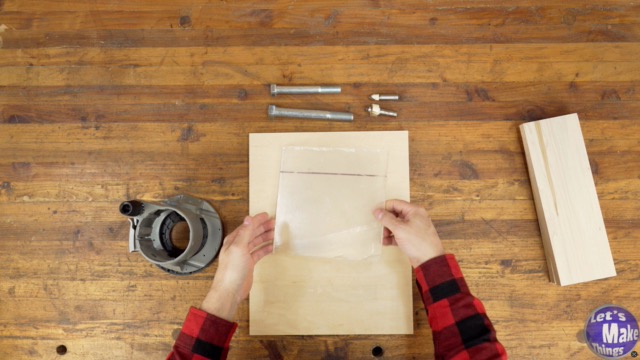
The great thing about this project is how simple it is to put together—you’ll only need a few pieces of stock. Of course, you’ll need a sturdy bench to mount it on. My bench is about 3 inches thick, but this should also work on a 1-inch thick bench, or even as thin as 3/4 inch.
I’ve kept the design as straightforward as possible to minimize tool requirements. However, if you have access to better tools, like a jigsaw or scroll saw, they can make the process even easier.
2. Base (profile)
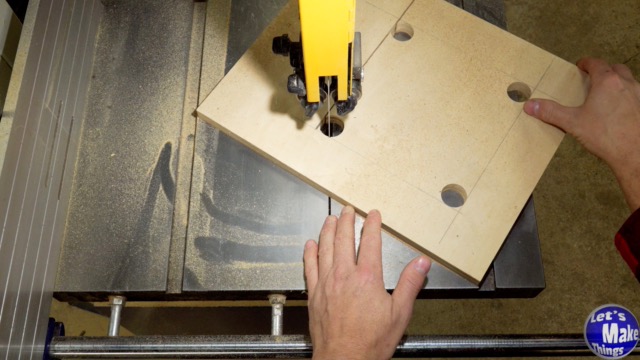
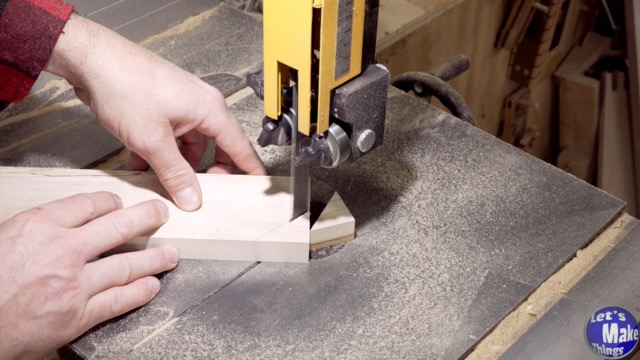
In this step, we’ll cut the plywood on the bandsaw to remove the center square. The square you remove should be half an inch shorter in both width and length than the size of the plexiglass.
To cut up to the corners, I used a 1 1/8″ Forstner bit—this was necessary because I’m using a 3/4″ blade. Once the holes were drilled, I cut through the edge and made the opening slightly larger than the plexiglass to ensure a perfect fit later.
3. adding a dog hole
In this step, I used a spade bit to drill a hole exactly 2 3/8 inches from the edge. You can adjust this distance to suit your needs—just make sure to adjust the length of the plywood accordingly.
I used a simple jig to ensure precision for this step. If you’re curious, I covered this jig in a Bitesize video tip, which you can check out here.
4. Base (dog hole)
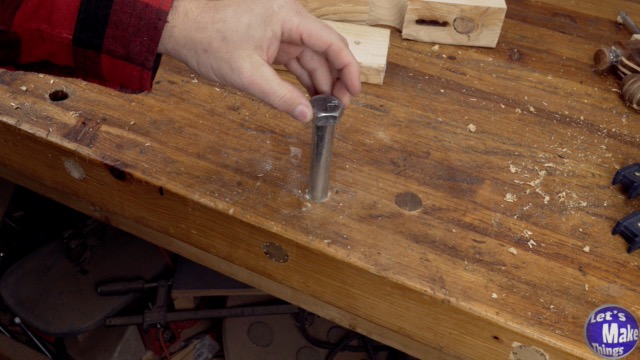
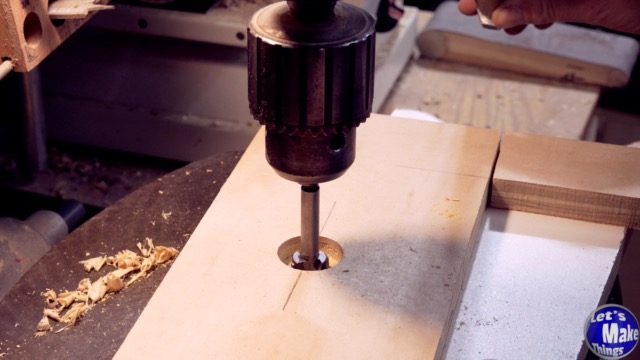
With the hole in the table done, the next step is to cut a hole in the jig for the bolt to thread through (no pun intended). To ensure more surface area on the top of the jig, you’ll want to countersink the bolt.
My bolt head, measured point to point, was just over 1 1/4 inches, so I used a 1 1/4-inch Forstner bit to countersink the hole. Afterward, I sanded the corners of the bolt head slightly to make it fit perfectly.
Finally, I matched the hole to my bench, cutting it to 3/4 of an inch to align with the bench hole.
5. Base supports
I cut angles on the fronts of both supports—not just for aesthetics, but also to avoid poking myself on sharp edges.
To attach the supports, I glued them in place and used a tiny bit of salt to prevent them from sliding around. Once positioned close to the table, I clamped them securely until the glue set.
I recommend adding weight directly above the bolt, as the weight of the clamps can cause the jig to sag slightly.
Since my bench top has a slight angle, I used wedges to fill in the gap and ensure a solid fit.
6.Plexiglass
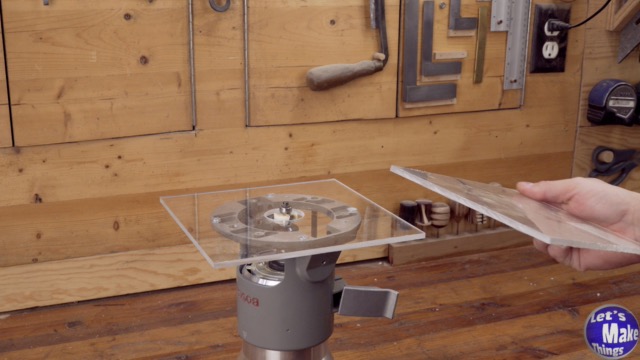
Everyone has their own method for attaching plexiglass to the bottom of their router—this is mine. It might seem a bit complicated or convoluted, but I’ve never ended up with a base plate that wasn’t perfectly centered on my router.
One essential tool for this process is a V-groove bit, which ensures accurate contact between the router and the plexiglass. You’ll find it listed in the tools above. Mine came as part of a set, but check your router first—it might already include a centering jig, so you won’t need to buy anything extra.
7. Base (rabbeting)
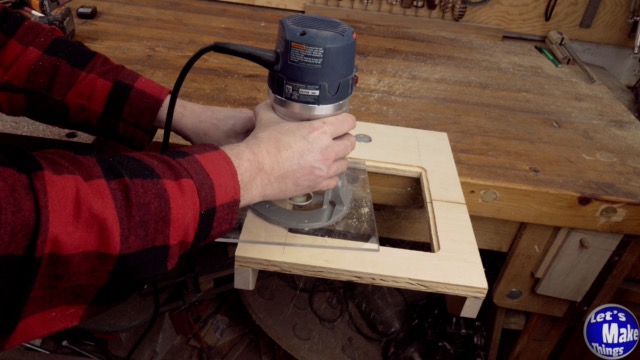
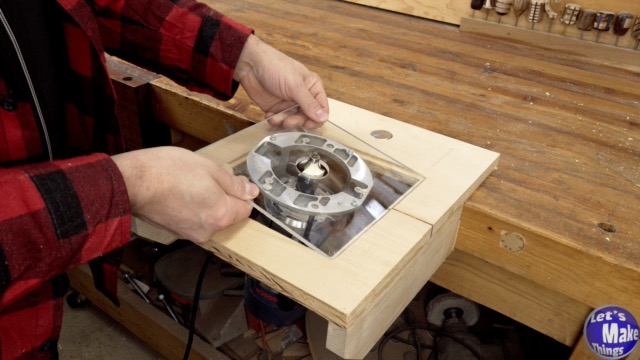
I used a 1/4-inch rabbeting bit and set it using the extra plexiglass from the square I cut earlier. Then, I routed a groove along the top and placed the router plate on top to mark the corners.
After marking, I used a chisel to clean out the corners and ensure the router plate fit flush against the bottom.
8. operation
I’m not going to dive into how to use a router in this step, but I will say this: you’ll need to use bearings exclusively unless you plan to add a fence to the top. The stock you’re cutting must have some kind of guide.
A simple solution is using a flat piece of stock on its edge, secured with clamps—that works just fine. But stay tuned—I might have some ideas for this in the future!
Tip Jar
If you found any errors on the page, please use my email below and contact me!

