Table and bandsaws have a lot in common.Both have miter gauge slots.Both have fences.Both…cut things.Both have sleds…
With all the similarities…bandsaws are often overlooked when it comes to sleds.The table saw has one, bandsaws generally don’t.On this page, let me show you one that I’m really happy with!
watch all steps in this video before starting
Please use the material and tool list below as a guide to finding the products locally.
As an amazon associate I earn from qualifying purchases.
Step by step instructions
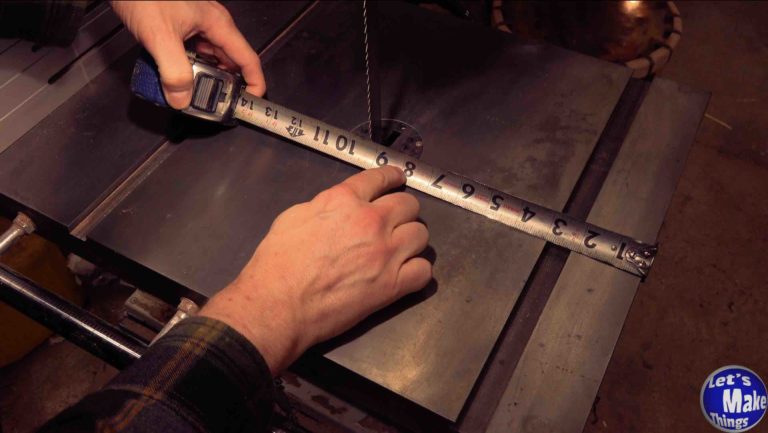
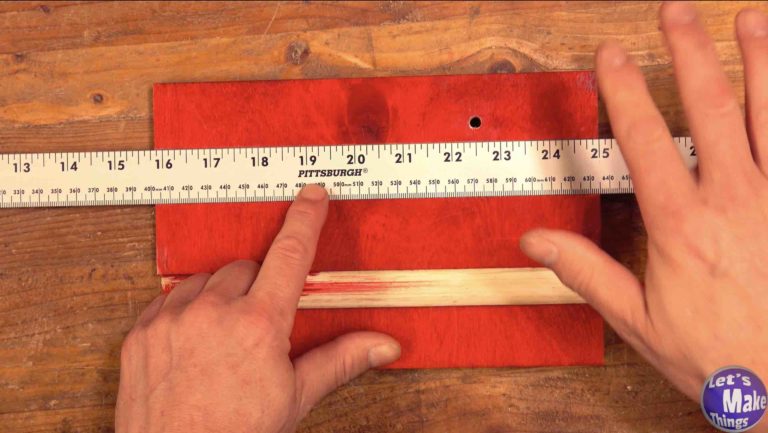
1. Measuring the bandsaw
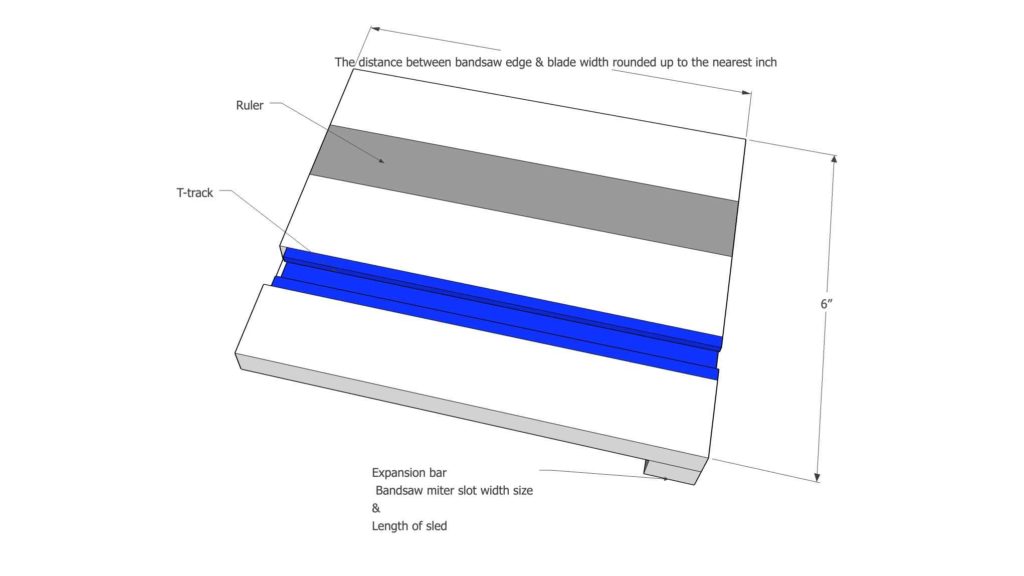
We’ll start off by measuring the bandsaw. A quick note, the bandsaw sled we are going to make is 6 inches in width from the blade to the front of the table. All the jigs will be based on this measurement. If this is something you interested in making but need it to be a different length, you’ll need to adjust accordingly.
The width from the end of the bandsaw to the blade isn’t as necessary. Mine came to be about 7 inches.
Click image to see this step on youtube
2. Expansion bar
Next I made an expansion bar that doubles as a sled runner, making it possible for our sled to slide or lock in place on the bandsaw.
It simply needs to be the width of your miter slot and 6 inches in length and should be made out of plywood. I cut the width down so that it doesn’t hit the bottom of the miter groove by adding washers and marking the edge with a pencil. I added a hole and cut it down the middle for the expansion part.
Click image to see this step on youtube
3. t-track channel
Two inches from the edge, I cut a groove large enough for a t-track to fit inside. Of course, the track needs to be thinner than the plywood you intend on putting it into. The groove was cut on a table saw…which I think is the best method.
Click image to see this step on youtube
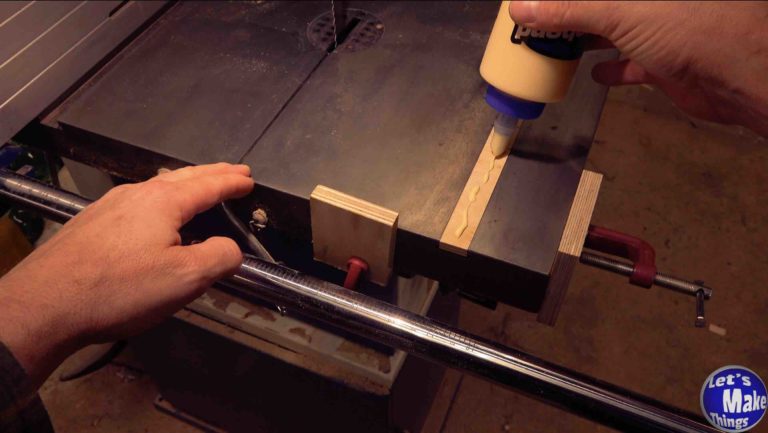
4. attaching the expansion bar
In this step I added the expansion bar to the bottom of the sled. First I added washers to lift the plywood to be flush with the surface of the bandsaw. I added wood scraps to the fence so that I was sure to get my bandsaw base square. I added glue and clamped it down. Be very careful you don’t get glue on the expanding part!
Note: I made a mistake the first time by leaving the counterside side up. It needs to be facing down as that’s how we’ll add a machine screw later. If you’re interested in my 2-part bleaching method (spoken about in the video), you can view that here.
Click image to see this step on youtube
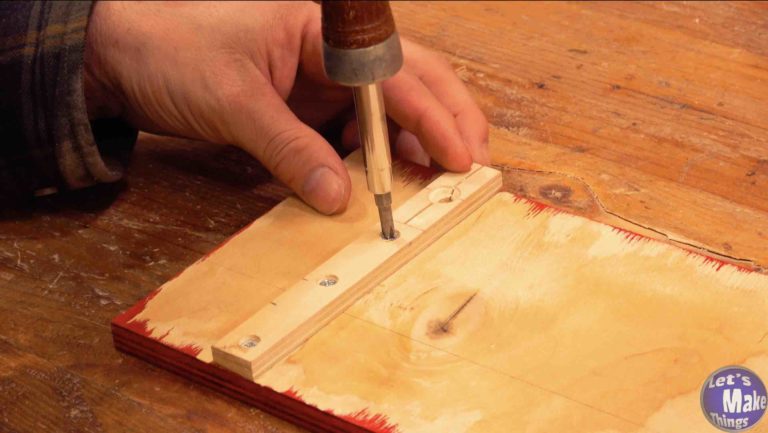
5. Reinforcing the expansion bar
We’ll now add 3 screws to the bottom miter expansion bar. While it’s not absolutely critical where the screws go on the underside, it is important that they don’t go inside the t-track.
With those installed, drill through the 1/4″ hole into the base. It’s important to make sure that the expansion bar works and your base locks in place.
Click image to see this step on youtube
6. Adding the ruler channel
Next we’ll add the ruler channel, which must be parallel to the edge. I used a table saw to cut the channel perfectly, you could use a router.
Before cutting into the plywood, be sure to check for any screws that might be on the opposite side and remove them. We’ll add them back after the ruler channel is cut out.
Click image to see this step on youtube
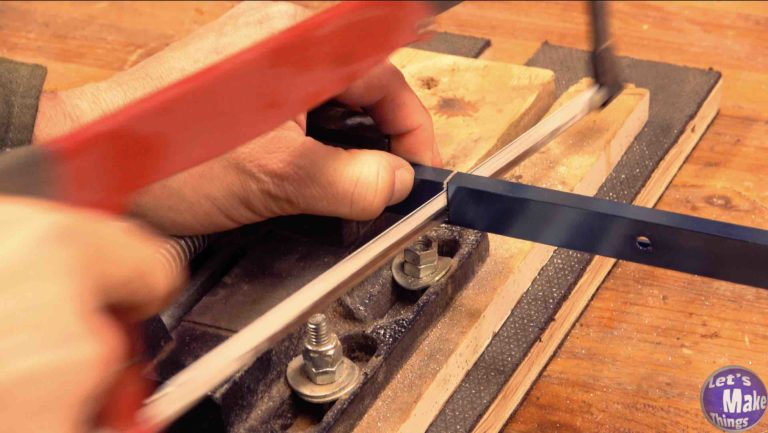
7. cutting metal to size
Both the t-track and ruler will need to be cut to size. The t-track should be cut at an 1/8th inch from the edge of your sled (mine, again, was 7 inches, I cut my t-track at 6 7/8 inches). The ruler should be cut to fit the length of the sled.
Click image to see this step on youtube
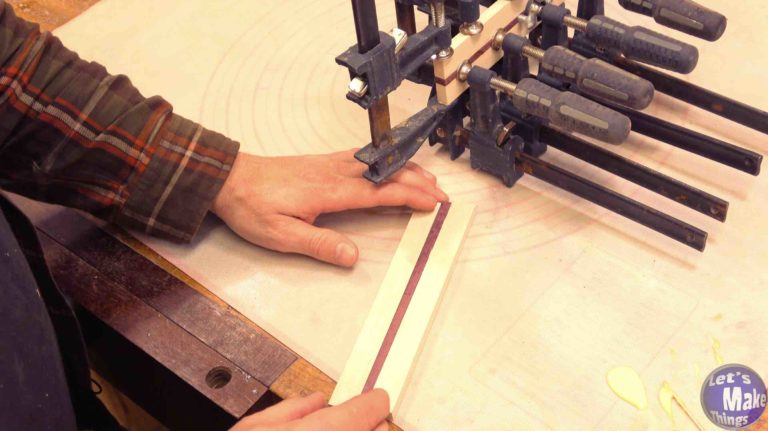
8. Filling the channels
In the video, I mentioned that you don’t have to epoxy in the ruler. I would, personally, as it’ll take one less complication out of future jigs. Whatever you do, both jigs should be aligned with the bottom edge.
To line up the ruler, place it as far as you can so that the outer tooth of your bandsaw blade barely misses it.
Now we’ll add epoxy and clamps, being careful to make sure that there isn’t any epoxy on the surface that would permanently bond to your clamps.
Click image to see this step on youtube
9. Gluing the sliding miter arm
We’ll create the sliding miter arm now. There are two ways to make this. If you don’t plan on making the circle jig, choose the bottom measurements (labeled “Miter Arm”). Otherwise you’ll cut the pieces (on that same page labeled “Circle Jig”) that make up the arm.
Gluing the pieces is simple. You’ll push the middle pieces together after they’ve been glued and use 1/4″ bolt(s) as spacers.
Click image to see this step on youtube
10. Second arm
The second arm is pretty much the same as the last, as far as dimensions go. Later on in the video, I updated it so that there were two holes in the center. I designed a detailed sheet showing this new change…which you can find in the printouts at the top or here.
Click image to see this step on youtube
11. adding bearings
Now we’ll add bearings to both ends of our sliding miter arm. We’ll first make sure the arm is at a perfect 90˚ to the edge before clamping the arm down. Then we’ll use 4 bearings adding a bit of duct tape between both sets as spacing. With both sets of bearings pressed up to the bandsaw base, we’ll use hot glue to temporarily keep them in place. We’ll use a 3/8″ brad point bit on each bearing hole to mark the arm…remove the bearings and drill all 4 marks out. We’ll finish by epoxying dowels in both the bearing hole as well as the sliding arm.
Click image to see this step on youtube
12. Fine tuning
In this step we’ll trim the edge of the second arm, first making sure that it is parallel to the edge. Back in step 10 we added the second hole, but in the video, this is step where I came up with idea.
Click image to see this step on youtube
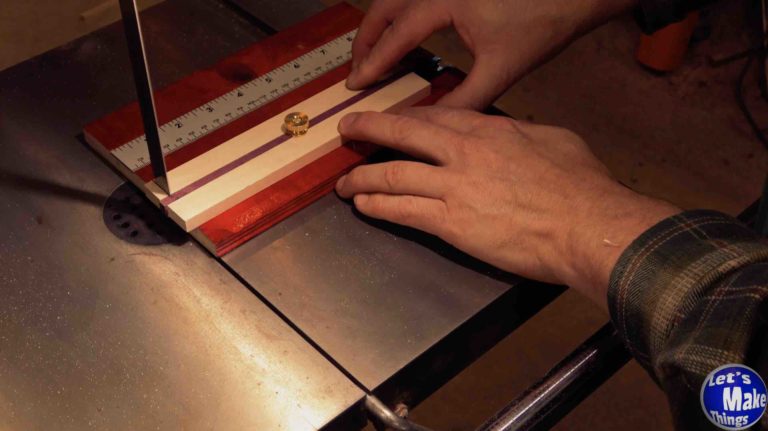
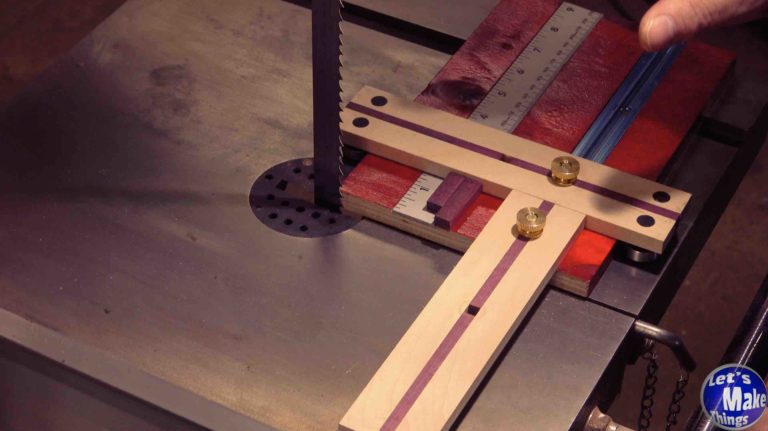
13. Operation
Operation is a bit self explanatory, but we’ll move the sliding miter arm along the ruler until we get it where we want it, and then lock it in place. The second arm can be used with the sliding miter arm or just by itself. If it’s being used by itself, be sure to use two bolts to lock it in the track.
I want to thank you all so much for checking out this webpage. This website is done out of a labor of love as I have dedicated it to help others that are new or looking to do newer, creative woodworking things. Unfortunately, there are a lot of expenses. If you’d like to add a few bucks to the tip jar or even sign up for patreon, it would help greatly to keep this website going.
If you’d like to support me through Patreon, you’ll get these benefits:
Weekly exclusive video
Early Access to both my Make Things and Let’s Make Things Channel
Get recognition at the end of each of my main channel videos for your contribution