A dovetail joint is a type of woodworking joint known for its strength, durability, and aesthetic appeal. It is commonly used in furniture making, cabinetry, and joinery to create strong and attractive connections between two pieces of wood, typically at right angles to each other, such as in drawer construction or box assembly.
They can be quite tricky to make with a hand saw, so I’ve developed a bandsaw jig system that I think makes it much easier.
ATTENTION: These plans are yours to use…they are offered as a gift from me to you. You have every right to use them to make this project for yourself, but please, do not sell or give these plans away as your own! I make absolutely no money off of these so I would appreciate those who view these plans to abide by basic copyright laws.
As an amazon associate I earn from qualifying purchases.
Step by step instructions
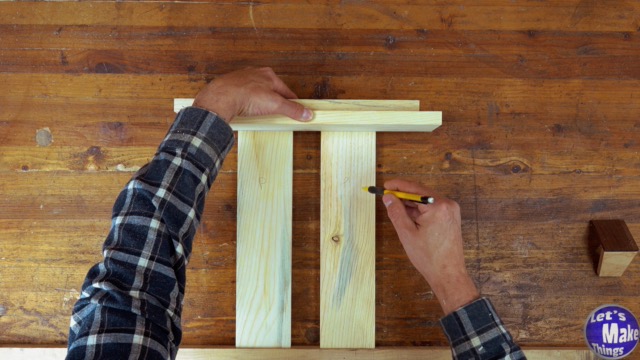
4-1. Marking thickness lines
The boards being dovetailed should be dimensioned so that the widths of the stock are the same (the thicknesses do not matter).
In order to know where to stop cutting when we make both the cuts for the pin and tails, we’ll need to know the thickness of the accompanying stock. There are better methods to leave an exact mark for the thickness of the stock, but adding a mark is a simplified process. It’s just a matter of adding a stock block to the end of the stock and then the piece we plan on mating, finishing by drawing a line.
Click image to see this step on youtube
4-2. Tail taping and marking
Bandsaws are great for stacking stock and making multiple cuts with a single pass. If you plan on making a box, you can use double sided tape to attach both tail boards…but it only works for the tails and not the pins as the pins are at a different angle.
We’ll need to use a dovetail marker that we made earlier to mark the half tails on each edge and then divide the center with a caliper.
I highly recommend making and using the Quad Vise, but the same can be done with your bench top, a dovetail hold down as well as a vise.
Click image to see this step on youtube
4-3. Tail cutting
The tails will need to be cut, but it’s important to understand the cutting movement to make it happen. We’re not sliding the board across the top of the tail jig, but with the tail jig set in place on the base jig and the base jig sliding forward in the miter slot. Trying to slide the board forward without moving the base will cause it to create a wide kerf in the end of the board (it’s also impossible to make the cut).
After one side has been cut, the stock will need to be rotated width over width to cut the opposite side.
Click image to see this step on youtube
4-4. Mating ends
With the tails cut, it’s important to label the pieces that will connect to those tails. With the box I made, I used a dual lettering system to identify each corner.
Click image to see this step on youtube
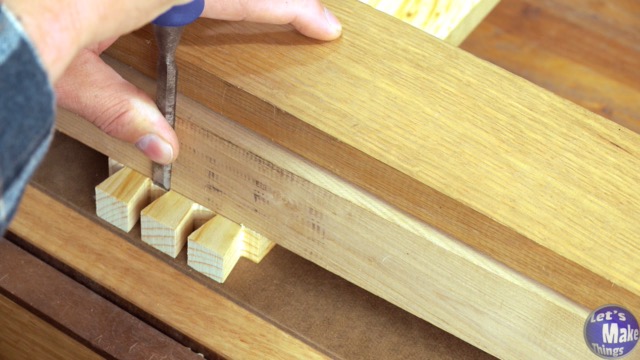
4-5. tail cleanup
The tails will also need to be cleaned up by using a chisel to cut up next to the line we drew in step 4-1. You’ll need a good, sharp chisel to make the 90˚. I find it really helpful to use a 90˚ jig that the chisel can rest upon as I place downward pressure. I have a bitesize video explaining the process here.
Click image to see this step on youtube
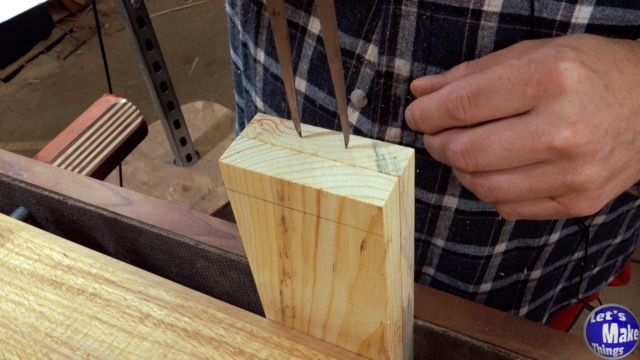
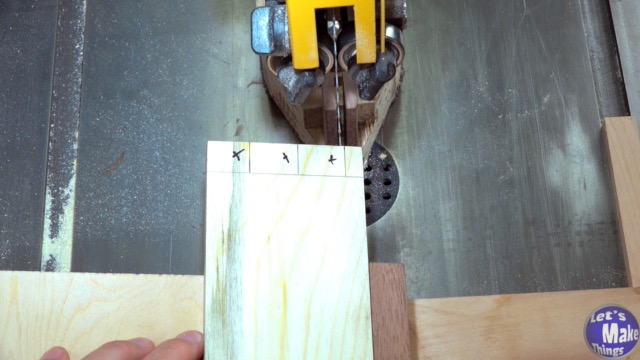
4-6. Marking pins
Marking the pins is easy with a sharp knife. I have personally been very impressed with the flexcut brand knives, but even a utility knife will work, so long as you continue the tail’s edge directly into the pin section. Because we are flipping the stock later, we’ll only need to measure half of the pins on each side by starting from the right side, and moving from the first mark we added with our caliper by moving in odds to the end of the stock. On each of those odd marks we’ll use a square to draw a line. The stock will need to be rotated and the same marks will need to be made on the opposite face.
Watching the video for this step will make it much easier…just click on the picture to the right.
Click image to see this step on youtube
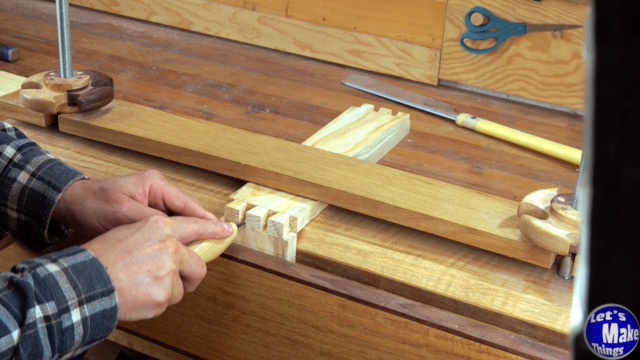
4-7. PIN CUTTING AND HOGGING
We’ll use the pin board jig to cut the pins we marked in the last step. You’ll need to cut on the left side of each line that was added. When one side has been completed, rotate the jig so that the angle is opposite to the first, as well as your stock. To hog out the middle, make sure that the widest part of your pins are placed upright.
Just as mentioned in the last step, watching the included video makes this a little easier to understand.
Click image to see this step on youtube
4-8. cleaning up pins
Just as in step 4-5, the pins will need to be cleaned up. Use the same method to clean the pins.
Click image to see this step on youtube
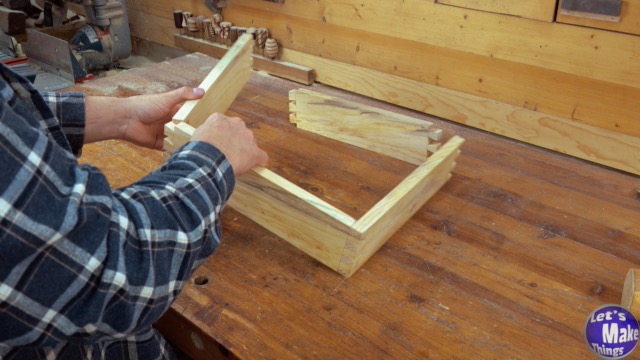
4-9. Box assembly
At this point, you’ll only need to put the ends together. In my case I made a box and mated the ends I marked in 4-4 together.
I will add that using a bandsaw stop makes it much easier to make cuts for the pin and tail boards. I’ve included that video below.
Click image to see this step on youtube
Optional bandsaw magnetic stop block
Tip Jar
If you enjoyed or found this useful, throw me a tip →
To support me with patreon, click here → Patreon
Click here to Subscribe to me on youtube → Youtube
If you found any errors on the page, please use my email below and contact me!