One excellent function of a table saw is making precise cuts parallel to the fence, whether they’re long or short. But what if you need to make a thicker cut? While a stacked dado blade is an option, removing and reinstalling it can be cumbersome, and dado blades can be costly and require sharpening or replacement with frequent use.
An easier solution is to make a series of cuts, adjusting the fence after each pass to achieve the desired thickness. This method, though, often involves a tedious game of ‘bump the fence’ to get the exact width you need, which isn’t very efficient. Achieving fine adjustments can be especially challenging.
These are all great reasons to build a Creeper Fence Jig. So, let’s get started!
ATTENTION: These plans are yours to use…they are offered as a gift from me to you. You have every right to use them to make this project for yourself, but please, do not sell or give these plans away as your own. I make absolutely no money off of these so I would appreciate those who view these plans to abide by basic copyright laws.
As an amazon associate I earn from qualifying purchases.
Step by step instructions
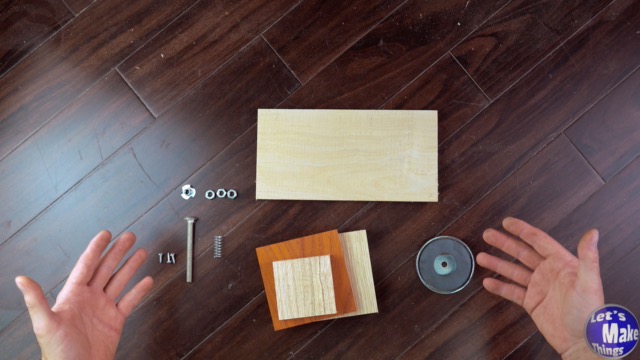
1. Materials
I added a few materials, like washers, and removed one of the nuts, but check the materials area for the full list. If you find something is missing, email me at the address at the bottom of this page.
Click image to see this step on youtube
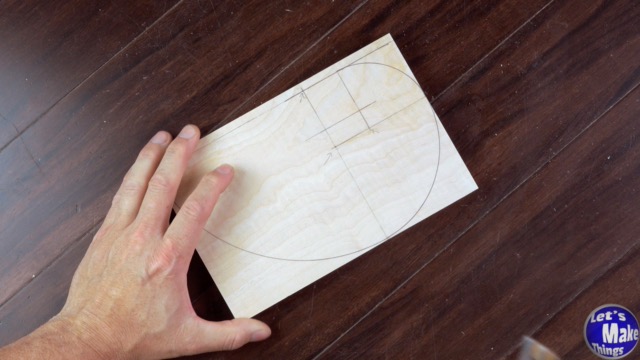
2. Making the creeper spiral
In this step we’ll make a less detailed version of the fibonacci spiral–we’re only going to use 3 squares altogether. I have a premeasured mark for the center so that it rotates on the arcs just right (check the instructions or click the image with this step).
Click image to see this step on youtube
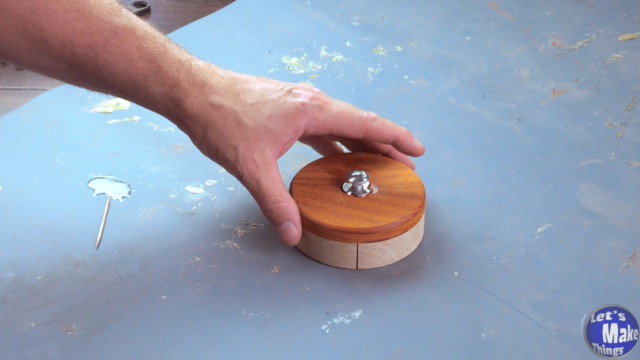
3. Magnetic base and lid
Those 3 inch magnets are a pain to remove from the table top, so we’ll use a bolt to pull it up and to set it back down. This involves creating a base with a upper and lower compartment. I made it circular and just slightly larger than the magnet due to it needing to be close to the fence.
Click image to see this step on youtube
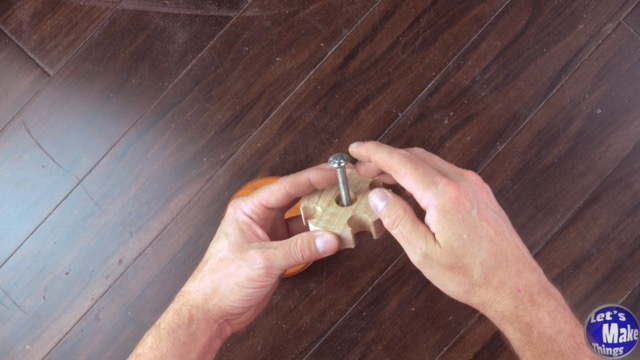
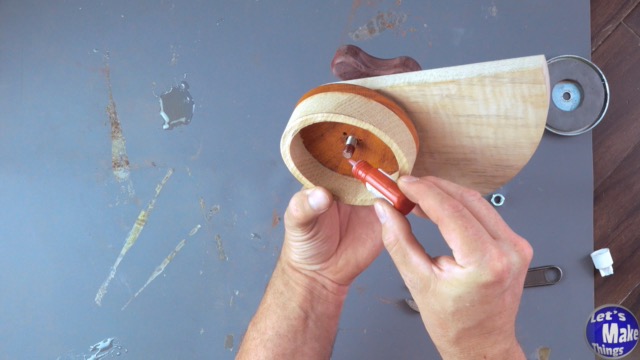
4. Simple studded knob
We’ll make a very simple studded knob. I showed how to make a simple version, but from here on out you’ll see a three sided knob that I switched it with to match the look I was going for. I encourage everyone to make knobs look beautiful, you’ll love to use them!
Click image to see this step on youtube
5. Magnetic plunge assembly
The magnetic plunge assembly needs to be assembled just right for it to work. I used a bolt that fit the length of my spring, but you may have to alter a spring. Speaking of spring, it is slightly necessary. As the table saw runs, it might try to cause it to spin away from the fence, so you’ll constantly be putting it back to use it. A spring keeps it tight in place.
Click image to see this step on youtube
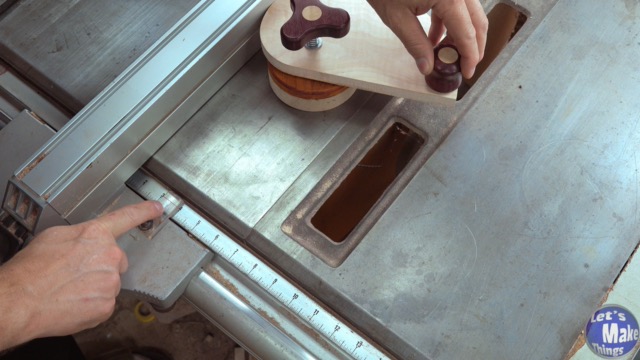
6.Operation
Operation is simple: it rolls on the opposite side of the fence from the blade and spins towards the back of the saw. When one cut is made, the fence is unlocked, the spiral is turned by looking at the tape on the saw and adjusting by a few micro measurements. The fence must be locked again (this does NOT hold the fence in place) before use, and the stock is passed through the blade again. Repeat until the desired width has been created.
Click image to see this step on youtube
Tip Jar
If you enjoyed or found this useful, throw me a tip →