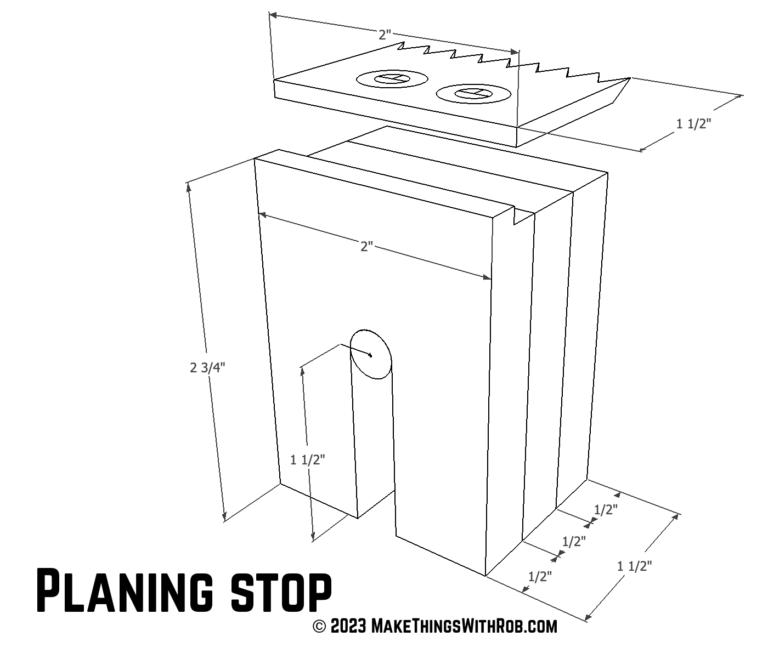
A planing stop is a very old bench appliance. It’s use is to hold your stock in place on the table so that it won’t twist as you plane it. If you do a lot of planing or plan on using one in the future, you’ve got to check these plans out. This is the simplest method that doesn’t involve cutting into your bench as it sits off to the side of it. A knob will slide it up and down which will keep it out of the way when you’re not using it.
In the video, I do show using o1 steel and hardening and tempering it with a forge, but a piece of mild steel will work just as well.
watch all steps in this video before starting
Please use the material and tool list below as a guide to finding the products locally.
Materials
(2) 1/2″ x 2″ x 2 3/4″ (Hardwood, the end grain side is 2″ long)
1/2″ x 2 3/4″ x 2″ (Hardwood, the end grain side is 2 3/4″ long)
Glue
1/8-1/4″ x 1 1/2″ x 2″ Mild steel (I used O1 steel)
(2) #10 x 3/4″ Flat head screw
3/8 x 4 1/2″ threaded bolt OR 3/8’s hanger bolt (long enough for the threads to go in 2″ and machine thread to be 2″)
There are a couple things we need to be mindful of in this step. First, we need to make sure that the grains in the block of wood we use are going to be at their strongest. Since a lot stress is put on the block as we plane, we want the the grains to run up and down.
The second thing we need to think about is how we’ll attach the steel to the top. Since the grains will be sitting on the top, we’ll want to be able to drill into them for the bolt to not damage the stop. We’ll do that by mixing the grain.
Click image to see this step on youtube
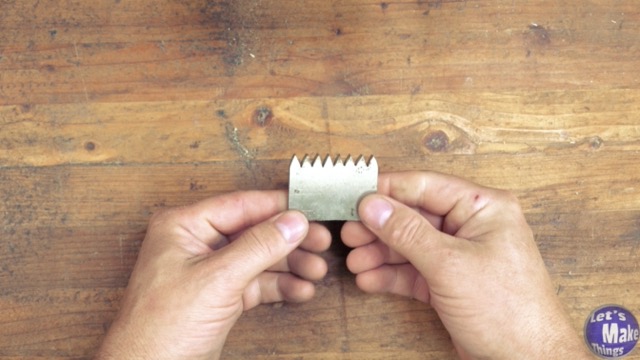
2. create teeth (shaping)
Creating the teeth is a lot easier than it looks. Section of a piece of steel that’s the width and thickness of our block. We’ll draw a line at a 1/4 of an inch in and mark a 1/4 of an inch till we get to the end. Mine came to 7 lines in all.
Next we’ll use either a file or a thin strip sander to create the teeth.
Click image to see this step on youtube
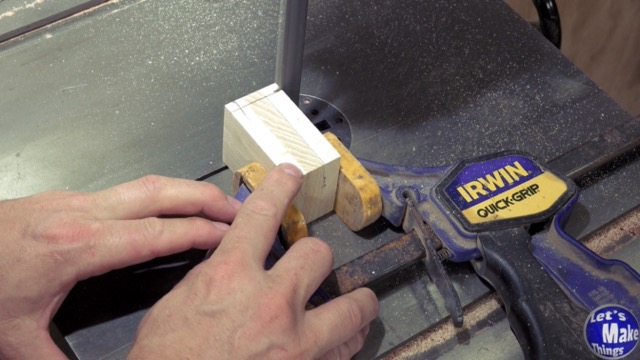
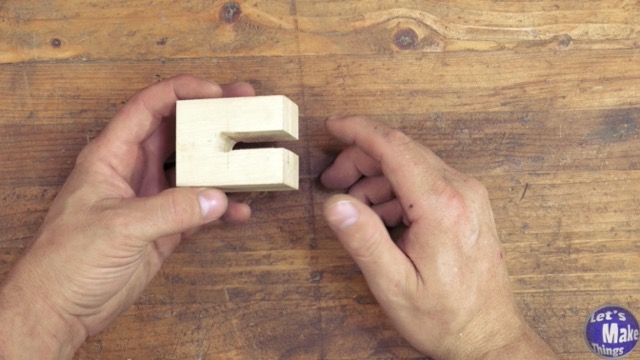
3. Stop Block notch
To create the notch for the steel to go into, you’ll want to cut the thickness of you steel out on the top of the block. Since the thickness of my steel is a 1/4 inch…yep, I cut a 1/4 inch out. I left a 1/4 inch lip at the end that will add strength to the screws. I used a bandsaw, as you can see, but you can use any other method to cut it.
Click image to see this step on youtube
4. Creating teeth (screw holes)
To drill the holes out, I switched to the metric system to divide my steel into 3 parts and measured in on both sides by about 16mm (which is 5/8’s). I used center punch to mark and drilled with a 3/16″ hardened steel twist bit. Afterwards, to countersink them, I used a 1/2″ hardened steel twist bit.
Click image to see this step on youtube
5. Hardening and beveling the teeth
Because I used O1 steel, I hardened it with my forge, which is completely unnecessary. I used my oven for 3 hours and let it cool. Then I used the my thin strip sander to create a bevel.
Click image to see this step on youtube
6. Finishing the body
I finished the block by drilling out a hole half way in the block and cut a valley from the edges. I used my table saw with a jig, but you could use a bandsaw very easily.
Click image to see this step on youtube
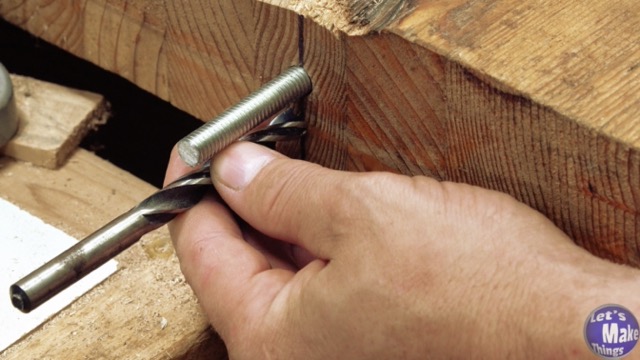
7. Attaching it to the table
There are a couple ways to attach this to your bench. If the edge it’s going into is face grain, you could get away with a hanger bolt, provided that it’s long enough to go into the table and through the block. I used a technique where I drill a hole into the end grain and a hole from the bottom. I added a square nut into the hole and tightened the bolt, adding epoxy later.
Click image to see this step on youtube
8. Adding the vertical pin
To keep my planing stop from spinning, I added a second dowel below the threaded rod. This allows it to only travel up and down.
Click image to see this step on youtube
9. In action!
In this step, if you click on the picture, you can see it in action. I will want to add a doe’s foot later, which will be linked to this article.
Click image to see this step on youtube
Planing Knob
If you’d like to see how I made the knob, I’ve left a player open for the build…just for you!
Tip Jar
If you enjoyed or found this useful, throw me a tip →
To support me with patreon, click here → Patreon
Click here to Subscribe to me on youtube → Youtube
If you found any errors on the page, please use my email below and contact me!