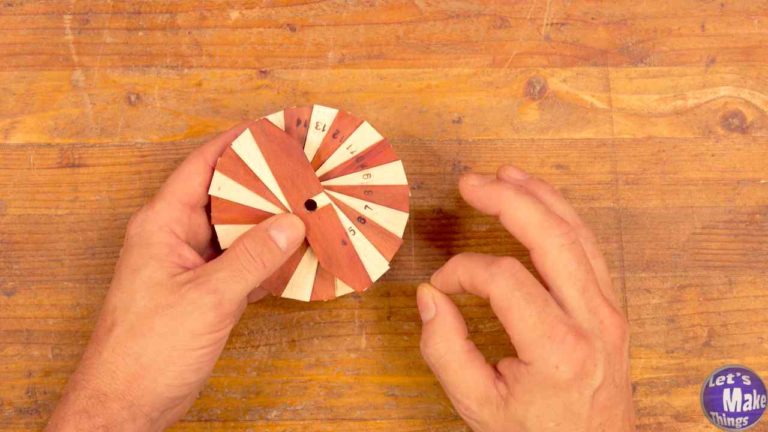
I love a good problem solution. This little gauge is my solution to the drop down thickness gauge type router pads. With this gauge, each blade is a 16th of an inch, which is a 1/16″ farther from the top of the pad as you descend down. Dial the spiral to get to the height you’re looking for and set your router on the top of it and adjust the bit and the base. For a visual example, watch this video.
watch all steps in this video before starting
Please use the material and tool list below as a guide to finding the products locally.
As an amazon associate I earn from qualifying purchases.
Step by step instructions
1. Cutting Blades
To make each of the blades, we’ll take a 4 inch block of wood and cut 1/16 inch pieces off of it. Since we’re looking to make a full 3/4 inch depth across the full spiral of blades, we’ll want to cut off 12 pieces with a 3/4″ thickness.
Click image to see this step on youtube
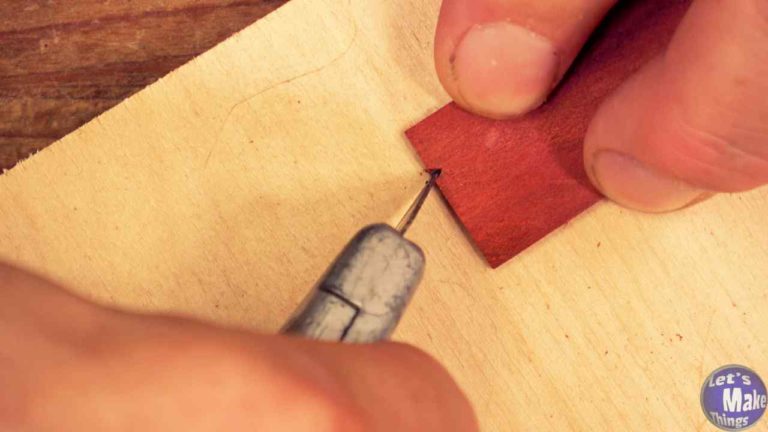
2. Templates & Marking each blade
Each of the blades need to be offset from the next. To get an accurately spaced offset, we’ll take one of our blades and create a template by adding a couple notches on each end. We’ll measure from each edge at a 1/4 inch.
Now it’s a matter of lining each of the other blades up to the template we created and marking them. When all blades have been marked, we’ll take the blade with the notches and cut off angles.
Click image to see this step on youtube
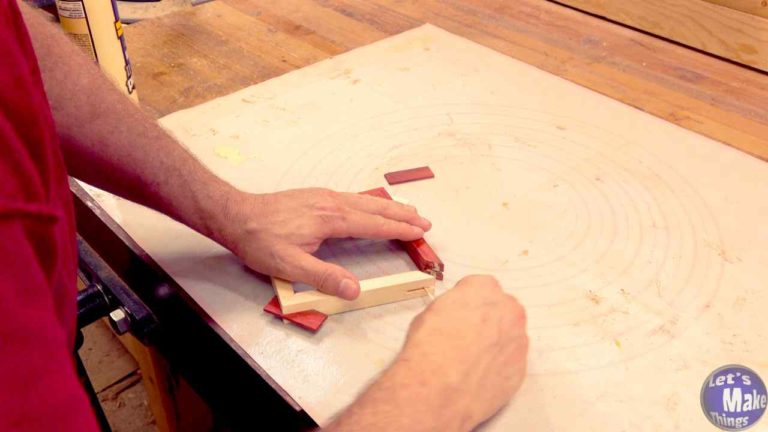
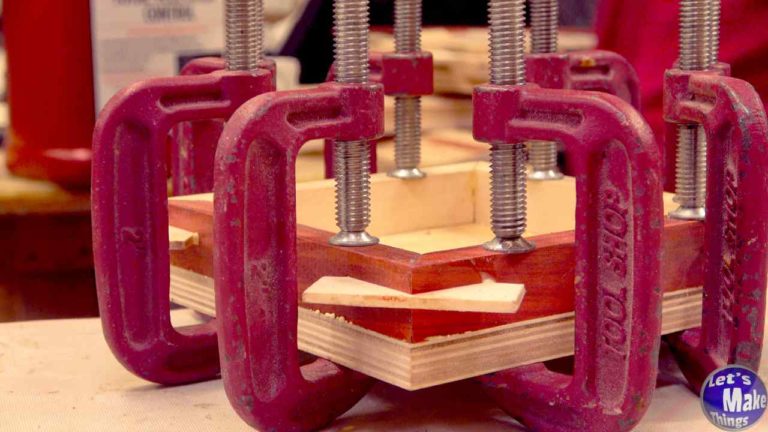
3. Blade Gluing
You’ll want to glue in stages, starting by pairing each piece, adding clamps and giving each a chance to dry. Then you’ll glue those pairs, rinse and repeat. I glued each blade to the next blade, offset by the quarter inch we talked about in the last step.
Click image to see this step on youtube
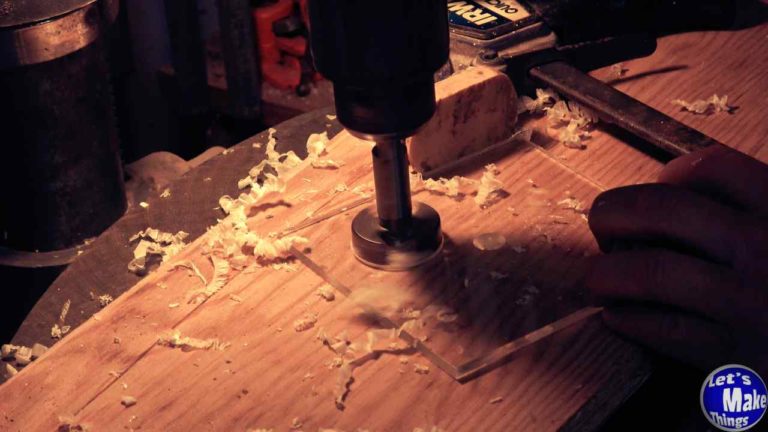
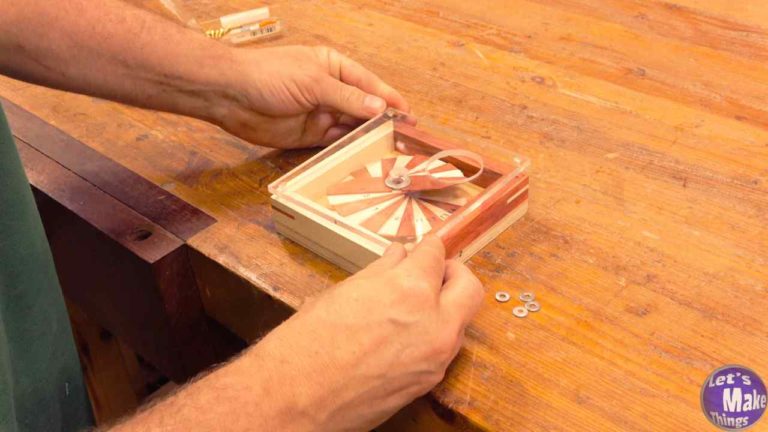
4. Baseplate and Acrylic Center
We’ll take the 5 1/4″ x 5 1/4″ plywood piece and connect the diagonals to find the center and then clamp the acrylic piece and drill both out with a 1/4″ brad point bit. Since we’re using a quarter in machine screw, we’ll want to use a countersink bit to create that cone shape in our acrylic.
Click image to see this step on youtube
5. Base Enclosure
In this step, we’ll create a spacer wall. This spacer wall will correct the thickness of your acrylic. For a more detailed explanation of fixing the inaccuracy of the acrylic, watch the video that goes with this step.
We’ll take 4 sections of wood and create a box. I mitered mine and added splines but this is absolutely not necessary. To be clear, joints are unnecessary as the pieces may be butted up to each other.
Click image to see this step on youtube
6. Attaching the Enclosure
However you chose to make a box in the last step, we’ll now glue those pieces onto the plywood. I used several clamps but forgot to protect each of the pieces of wood when I clamped. To fix this, I used a clothes iron and steamed each of the blemishes out. Click here to see the process.
Click image to see this step on youtube
7. Access Window
We’ll add an access panel to the acrylic with a 1 1/2″ Forstner bit, along one of the diagonal lines of the acrylic square. You’ll have to decide where that is. Next, I cut the hole out on my drill press. It’s important to use a clamp of some sort to offset the torque that this large bit we’ll put on the acrylic as it spins.
Click image to see this step on youtube
8. Adding Measurements
Now each blade will need to be labeled. I used a number punch and heated it up. Looking back, I would have rather used a fine tipped marker.
Click image to see this step on youtube
9. Attaching the plexiglass
I taped the acrylic and the plywood together with painter’s tape. We’ll measure in on every corner 3/8’s inches and drill a hole that’s slightly smaller than the 1/4″ x 3/4″ wood screws. Afterwards, we’ll remove the acrylic and countersink each of the holes we just made so that the wood screws can fit in and below the surface.
Click image to see this step on youtube
10. Assembly
We’ll assemble the box in this order:
box and plywood are laid flat on the table
add the spiral
add the flat washer
place the acrylic over the top of the box
run the 1/4″ x 2″ machine screw through the top
add a nut to the back side of the jig
Click image to see this step on youtube
11. Operation
Operation is more easy to show than explain. Watch the video in this step.