If you’re planning on doing resawing, single point bandsaw sleds are where it’s at. Because they allow your stock to open up, you’ll be less likely to damage your blade and you’ll get a straighter, cleaner cut. Resawing lumber or cutting bookmatched lumber is a job for bandsaws and this method is one of the best methods I’ve found.
watch all steps in this video before starting
Please use the material and tool list below as a guide to finding the products locally.
As an amazon associate I earn from qualifying purchases.
Step by step instructions
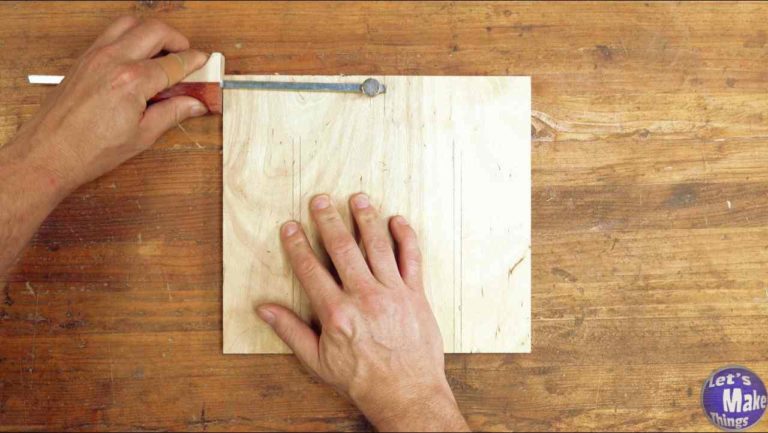
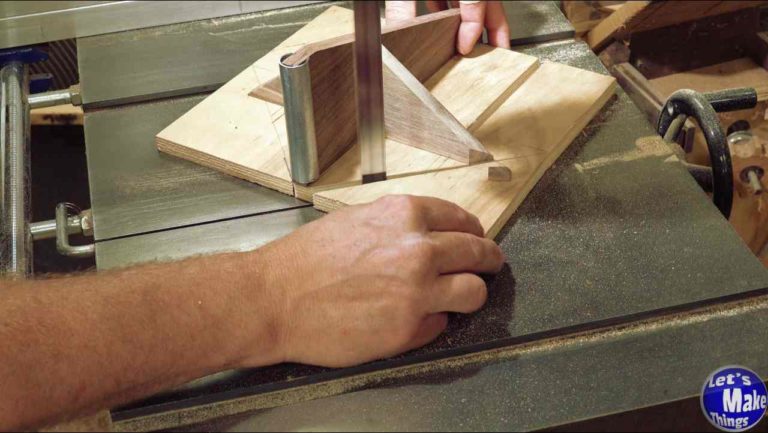
1. Mapping out
Since the base of the sled needs to have both a certain shape as well as slots that will slide in the bandsaw’s miter slot, we’ll quickly mark it out. The video explains everything, but I’ve left the dimensions in sketchup, above in the “Printout” section. I use my marking gauge…which is incredibly handy to lay things out. Check that out here.
We’ll also mark the brace and center column for lap joints.
Click image to see this step on youtube
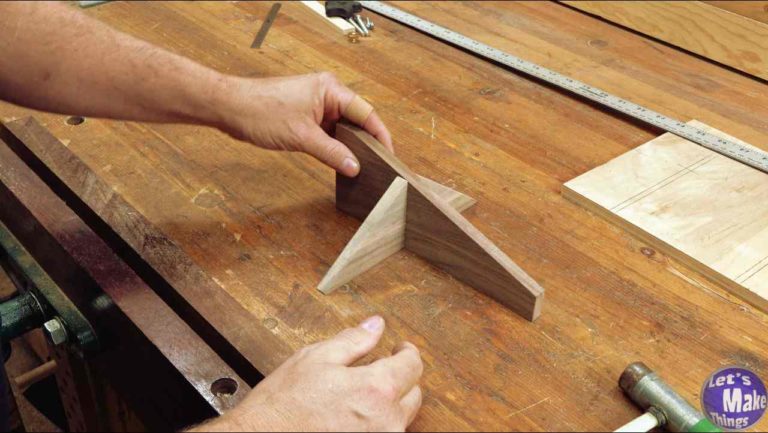
2. Lap jointing the braces
The braces give the jig support. Since I used 1/2″ plywood at the base, there wasn’t a lot of wood to cut out for a channel for the center support.
Lap joints are easy. In the last step we measured up half way on both the brace and the support. I suggest using a knife of some sort to get a more accurate measurement for a nice clean joint.
Click image to see this step on youtube
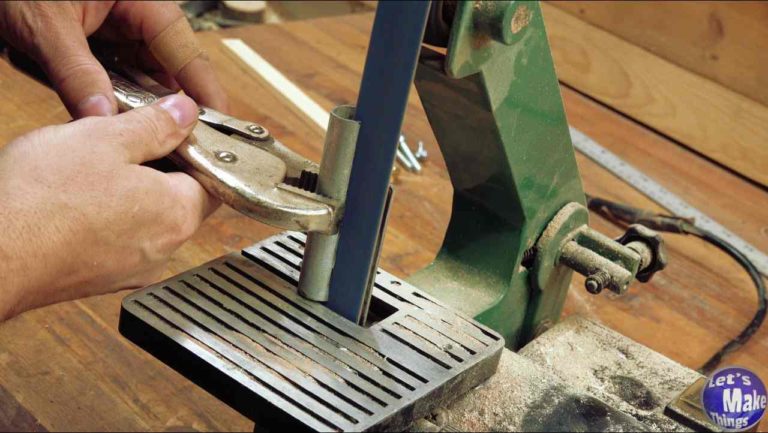
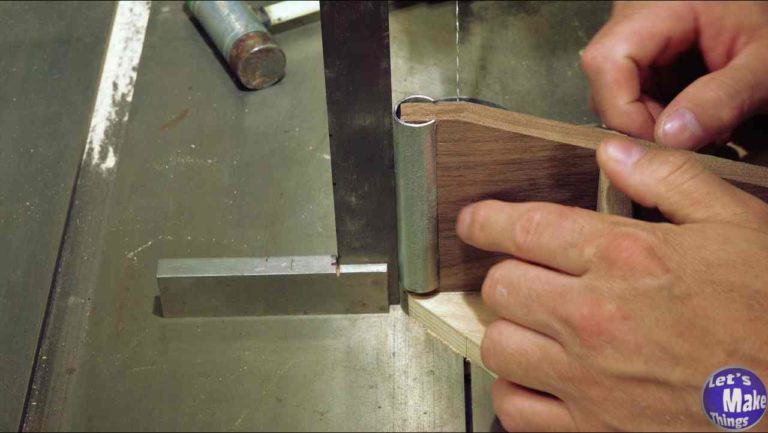
3. Conduit nose
The steel nose section is just a piece of 1/2″ conduit with a section cut out. I used a strip sander to clean it up but it can be done easily with a steel file. The opening of the cut needs to be slightly smaller than the center column thickness so that it cuts a little channel out on the column.
Click image to see this step on youtube
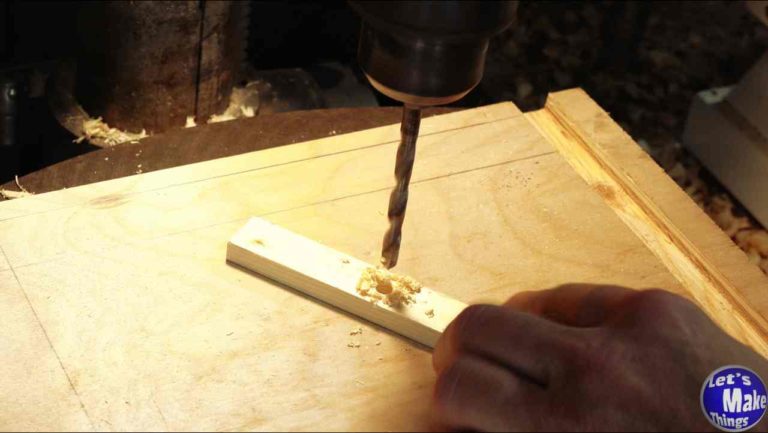
4. Miter expansion bar
Miter expansion bars are made to ‘open’ up as you tighten. This is good as it’ll lock our jig inside of the slot preventing any type of movement. I’ve created several of these in the past, but this is the simplest. Two countersunk holes, and a cut will make it so that your jig sits tight.
Click image to see this step on youtube
5. Finalizing the jig
To finalize the jig, we’ll attach the cross brace and column to the base by using screws. Mechanically joining this brace is far better than relying on glue. I did make sure to cut the nose area first before attaching the base to make the final cutting easier. But it’s done at this point.
Click image to see this step on youtube
6. Troubleshooting & precision
The nose needs to be square to the table. My steel nose was tight getting it on and I’m not so worried about it moving. If yours is loose, add a few drops of epoxy on the edges to keep it from moving.
If you’re unable to keep your bolt from spinning in the expansion bar, I have a tip with a hacksaw and a cotter pin that will fix that problem quick.
Click image to see this step on youtube
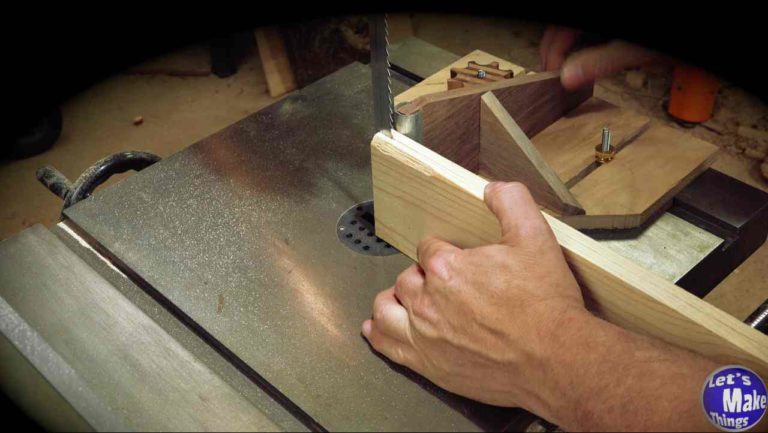
7. Operation
Operation is easy. We’ll cut partially into our stock, turn off the saw and place the nose at the teeth or slightly in the middle of the blade and tighten it down, finishing the cut.
Click image to see this step on youtube
Tip Jar
If you enjoyed or found this useful, throw me a tip →
To support me with patreon, click here → Patreon
Click here to Subscribe to me on youtube → Youtube
If you found any errors on the page, please use my email below and contact me!