Let’s face it, if you’re going to use t-tracks, if you’re going to make jigs, you’re going to, at times, need to hold things down.A hold down clamp does just that: it holds things down.In order to get pressure to hold things down, we need a little bit of spring.We can create that spring with a hold down clamp made from laminating wood.Don’t worry, this is an easy thing to do, so long as you have the right kind of mold or form to do it.In this article, we’re going to go over the steps needed to make a very basic hold down clamp out of oak and walnut. This is going to be a fun one!
watch all steps in this video before starting
Please use the material and tool list below as a guide to finding the products locally.
As an amazon associate I earn from qualifying purchases.
Step by step instructions
1. buttering the bread (glue up)
We’ll glue up our four pieces (two oak, two walnut). I used a little bit of salt to keep the stock from moving around. A few clamps and we’re ready to go!
Click image to see this step on youtube
2. Mapping out the form
The form is very simple. We’ll use the 2 x 6 x 12″ construction lumber as well as a few measurements to make this simple mold. I used a peanut butter lid to make the curve but any other lid that’s about 2 7/8’s will work. Refer to the included schematics above.
Click image to see this step on youtube
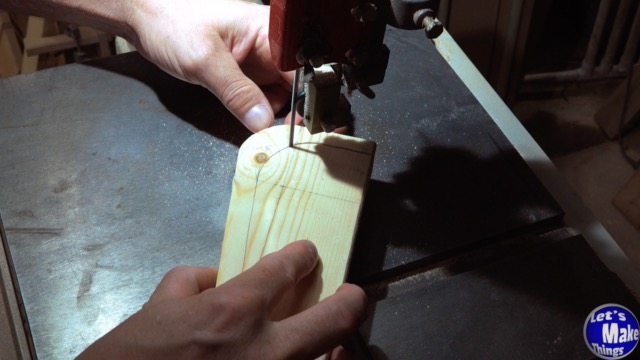
3. Carving the form
We’ll carve the larger form and then the smaller form that will squeeze our stock together. Because we’ll need a half inch of inside space, we’ll cut that off by adding our cut off blank to the original and marking in a half inch. Then it’s back to cutting as we clean that section out.
Click image to see this step on youtube
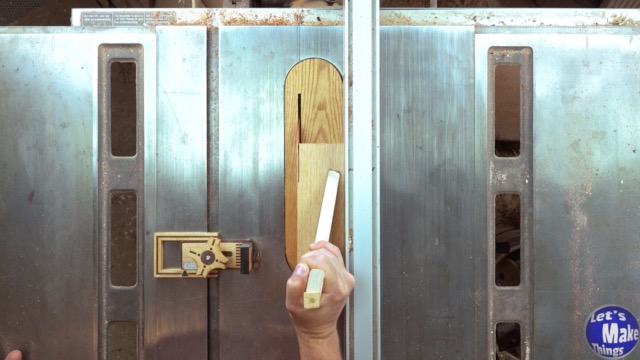
4. cutting bendable thin strips
I kept the width thick for our pieces so that you can get a good grab with your push block. Then I cut the strips into 1/16th inch slices using my thin strip jig. Be careful, use a push block or sticks.
Click image to see this step on youtube
5. finalizing the form
To finalize the form, I cut off a section of the edge that’s the part beyond the thin strip and added a scrap piece of wood. I used 3 drywall screws. I used a shim to straighten one side of the thin strips together…it didn’t work as well as I wanted and I could have probably done without, but I still liked how it turned out, nonetheless.
Click image to see this step on youtube
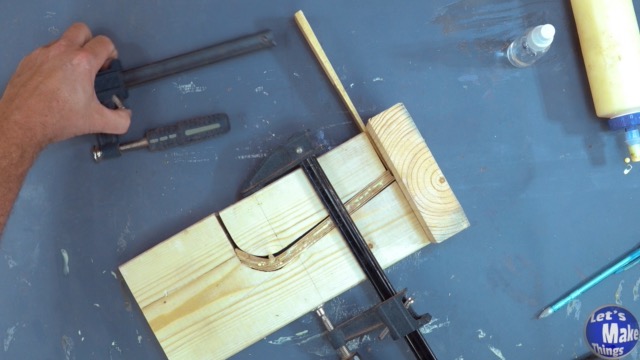
6. bent stock glue
Each piece will need to be trained before any glue is added. When gluing up, each piece will need to have glue added to the front side of it, of course, except the last piece. I used a water spray bottle to keep the glue from drying too quickly. I also used a 3/16″ dowel and a shim to get the shape more even. A few clamps and you’re ready to squeeze this up.
Click image to see this step on youtube
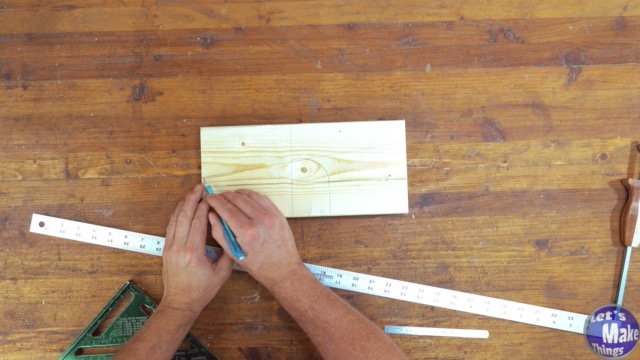
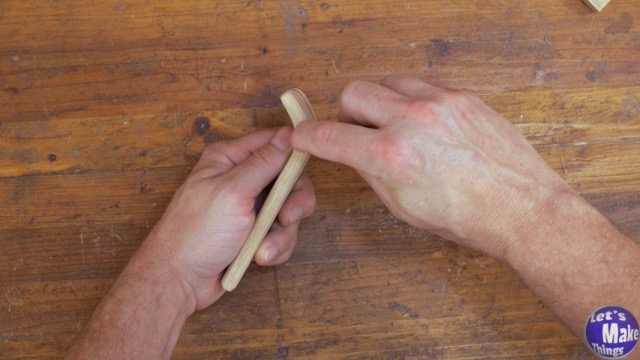
7. rounding and shaping the ends
You can make your clamps as long as you want, but I ended up making them about 5 1/2″ in length. I trimmed up the ends so that they’re rounded which will prevent the pieces from possibly becoming delaminated. We want solid corners.
Click image to see this step on youtube
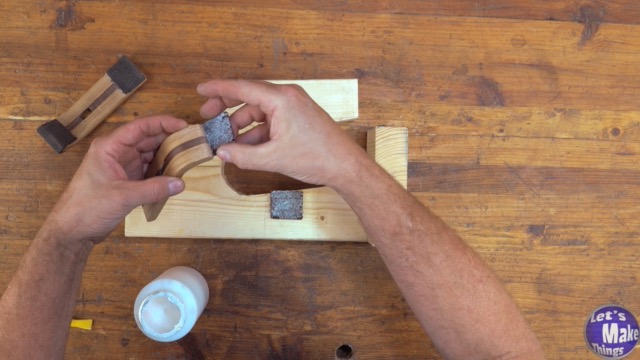
8. better friction
Since we don’t want to use a lot of pressure to hold stock down, adding a little bit of tracker runner goes a long way to better hold downs with less pressure. It’ll also prevent any marring of your stock.
Click image to see this step on youtube
Tip Jar
If you enjoyed or found this useful, throw me a tip →
To support me with patreon, click here → Patreon
Click here to Subscribe to me on youtube → Youtube
If you found any errors on the page, please use my email below and contact me!