The double screw vise, more recently known as the Moxon vise, is a very old invention that’s used to hold stock, primarily for joint creation. Unlike our modern single screw vises with pins to line up the jaws, these vises have an open throat in the front that’s accepting of large stock. They also serve their masters well with the ability to clamp uneven stock.
The original creator has been lost to time, but the vise has been documented as far back as 1676 by André Félibien. There’s controversy as some will say that the images used in Joseph Moxon’s Mechanick Exercises book are copies from André’s work. While this juicy bit of gossip is fun to write about, I think it’s far from the truth. Watch the video for a bit more understanding of the legacy of the double screw vise.
ATTENTION: These plans are yours to use…they are offered as a gift from me to you. You have every right to use them to make this project for yourself, but please, do not sell or give these plans away as your own. I make absolutely no money off of these so I would appreciate those who view these plans to abide by basic copyright laws.
In this article, we’re going to make a very basic, mostly true to form, version of the double screw vise of yesteryear. The only thing that it doesn’t use are the old wooden handles…which, of course, can be created if you have a screw box and tap, which are expensive alternatives. Instead, we’ll use carriage bolts and homemade knobs to easily replicate this tool. If you like the handles, check out my advanced build, the Quad Screw Vise.
watch all steps in this video before starting
Please use the material and tool list below as a guide to finding products locally.
Materials
Suggested:
(2) 1 1/2″ x 7″ x 30″ Construction pine (2×8)
(2) 3/4″ x 4″ x 4″ Hardwood
(2) 3/4″ x 2″ x 2″ Hardwood
3 1/2″ x 3 1/2″ x 34″ Construction pine (4×4) (See step 1)
As an amazon associate I earn from qualifying purchases.
Step by step instructions
1. Two methods to attach
Depending on how this will connect to your bench you’ll need to make the decision as to which length is best. A shorter 4×4 can be used if you’re using dog holes as it will be behind the vise. If you plan on using clamps to hold it in place, you’ll obviously need a longer 4×4.
No, you don’t need a 4×4 here. You could use a 2×4…but I love the wider surface area.
Click image to see this step on youtube
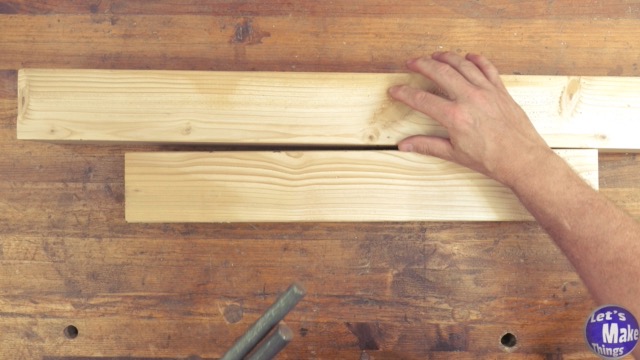
2. adding vise holes
Common builds I’ve seen rely on doubling up their jaws and drilling in. Since we’ll be using a racking method, this isn’t as important. I drill the holes for my first half, getting them exactly where I wanted them. Spade bits are perfect for this as it makes flipping the stock over and drilling from the opposite side a little easier.
Click image to see this step on youtube
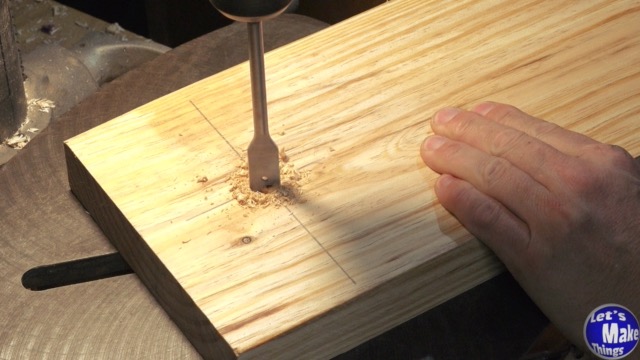
3. Transferring holes
I transferred the marks in the last step over and used a 15/16 spade bit to drill them out.
Click image to see this step on youtube
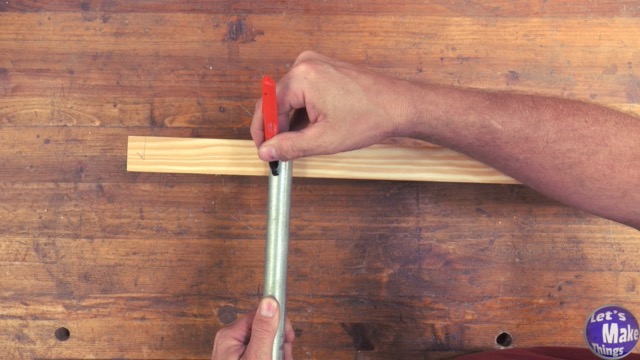
4. Conduit for racking (Optional)
When I was designing this vise, I was really skeptical (at first) of the conduits ability. I’m really happy with it turned out, though and can’t recommend it enough. A 15/16 spade bit was the perfect sized hole for a 3/4″ piece of EMT conduit.
Click image to see this step on youtube
5. Snugging each post
Carriage bolts have a square insert on the back of the head that must be driven into the stock. I prefer to cinch it down first and add my epoxy as I feel like you’re not squeezing all of it out. These 8″ carriage bolts have a non threaded neck that won’t matter with our project except they’re difficult to snug down. Using a wood ‘spacer’ from a piece of scrap drilled at 5/8’s helped.
Click image to see this step on youtube
6. Epoxy, glue and screws
We’ll attach the 4×4 to the back of our vise with wood glue as well as adding epoxy to the back of our carriage bolt heads, and the front throats of those bolts. A few long screws (countersunk in) keeps things secured tightly during glue up and after completion.
Click image to see this step on youtube
7. Creating simple knobs
Our knobs are simply two pieces of 3/4 hardwood that captures a 5/8’s square nut. Yes, spend a few extra cents on the square variety and toss the hex head bolts which are really only good when you need to use a ratchet. Square bolts are the real deal and have more surface area guaranteeing you a much long life span with less stripping of the wood.
The method of using both pieces of wood is simple. Cross the diagonals, find the centers and drill them both out half way. Use a chisel to cut the corners. Done.
If you’re interested in an advanced set of knobs I built (and talked about in the video linked to this step) watch the video below this step. I can’t recommend it enough to make beautiful looking knobs. You’ll enjoy your work so much more!
If you enjoyed or found this useful, throw me a tip →
To support me with patreon, click here → Patreon
Click here to Subscribe to me on youtube → Youtube
If you found any errors on the page, please use my email below and contact me!