Quad screw vise
(the Advanced Moxon Vise)

The double screw vise, more recently known as the Moxon vise, is a very old invention that’s used to hold stock, primarily for joint creation.  Unlike our modern single screw vises with pins to line up the jaws, these vises have an open throat in the front that’s accepting of large stock.  They also serve their masters well with the ability to clamp uneven stock.

The original creator has been lost to time, but the vise has been documented as far back as 1676 by André Félibien.  There’s controversy as some will say that the images used in Joseph Moxon’s Mechanick Exercises book are copies from André’s work.  While this juicy bit of gossip is fun to write about, I think it’s far from the truth.  Watch the video for a bit more understanding of the legacy of the double screw vise.

In this article, we’ll build an updated version that I’ve personally designed.  I call it the “Quad Screw Vise” as it uses two sets of jaws instead of the original single, tightened by not two but four screws.  The video below shows the entire process and you’ll find steps that will give you quick reference to the video so you’re not searching for the next step to follow.  If you are a content creator and share my work, please credit me.  I make absolutely no money off of these plans: they are a labor of love for this fantastic hobby.  I hope they’ll serve you well.  Please be sure to email me (link at the bottom) if you found any mistakes.

watch all steps in this video before starting

Please use the material and tool list below as a guide to finding products locally.

Materials

Suggested:
  • 1″ x 6″ x 32″ Hardwood (Jaw: front)
  • 1″ x 7″ x 32″ Hardwood (Jaw: Back)
  • (2) 3/4″ x 4″ x 32″ Hardwood (Body)
  • 1″ x 3 1/4″ x 32″ Hardwood (Jaw: Top)
  • 3/4″ x 5″ x 32″ Hardwood (Jaw: Bottom)
  • 1″ x 4″ x (Distance your dog hole is away from the edge and adding an inch and a half) hardwood
  • (2) 3/4″ x 2″ x 4″ hardwood (to act as braces for the back)
  • (2-4) 5/8″ SQUARE nuts
  • (2-4) 5/8″ x 8″ Carriage bolts
  • Wood glue
  • Epoxy
  • Hot glue
  • Double sided tape

Optional (making handles instead of using knobs):

Tools Needed/used

Suggested:
 

As an amazon associate I earn from qualifying purchases.

Step by step instructions

1. Mapping out the body

The “Body” consists of both the 3/4″ by 4″ by 32″ pieces.  One is slightly different than the other due to needing to create a relief for the carriage bolt heads that jut down from the bottom of the bottom jaw.

We’ll also mark out the 4″ slot that will later be hogged out on the table saw.

After notching out the reliefs for future carriage bolts, we’ll glue both pieces of stock together.

Click image to see this step on youtube

2. prefacing the top and bottom jaw

The top and bottom jaw share the same distance from the edge for both of the vertical holes.  The first part of this step is easy as we’re just mapping and drilling both holes.   The second step, before any epoxy is added, is to cut a 90 on the bottom jaw, along the length of the board.  This is important as it’ll prevent glue from sticking to our vise during glue ups as well as allowing our stock to come together without bumping into that corner.

We’ll set both carriage bolts before adding epoxy and allowing it to cure.

Click image to see this step on youtube

3. notching the body (dog hole)

With the body dry, we’ll cut out the four inch space that we marked out in the first step (again, you don’t have to add this if you don’t plan on using your dog hole on your bench).

Click image to see this step on youtube

4. Drilling out the vertical holes

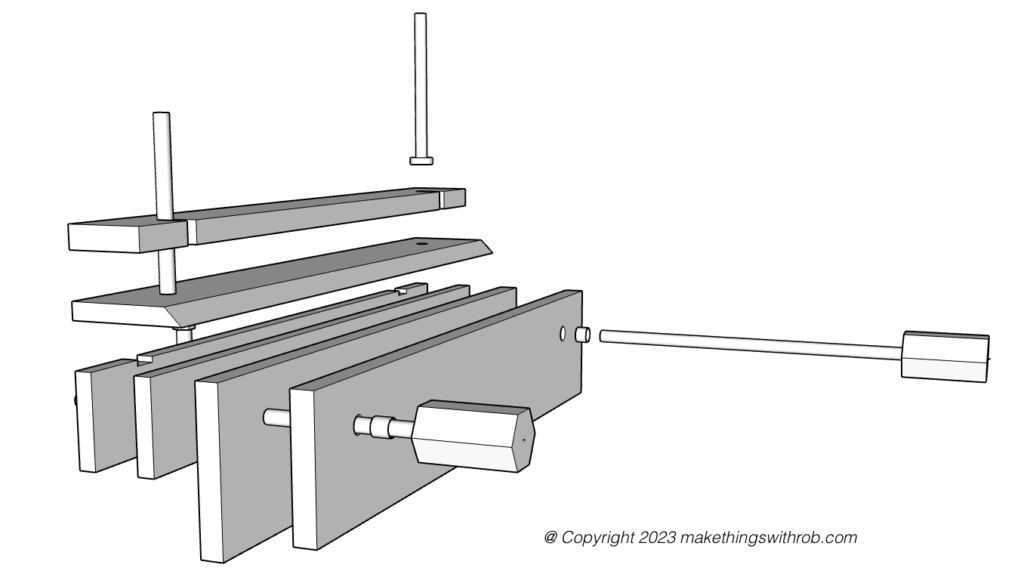
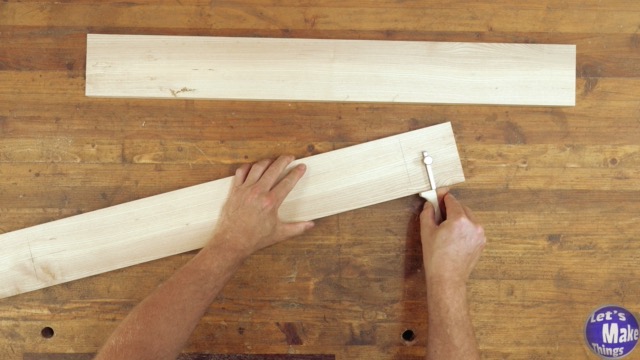
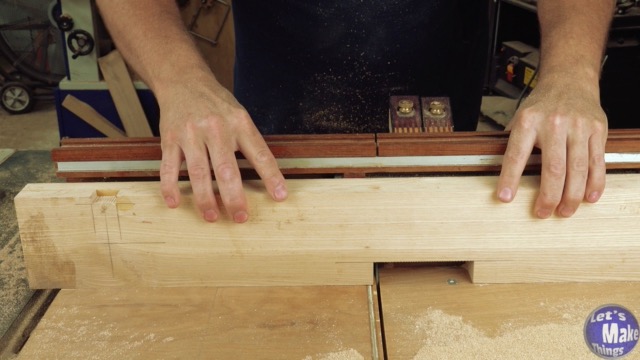
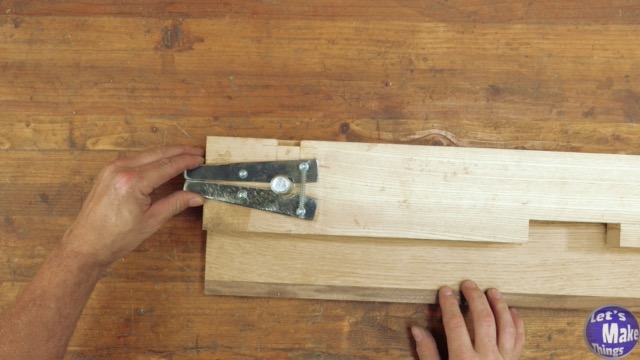
In this step we’ll drill out the holes for the two body pieces we glued earlier.  Using the marks we added on the back will give us the location for the holes.  Glue the body and both the front and back jaws together, with the front jaw the farthest below.

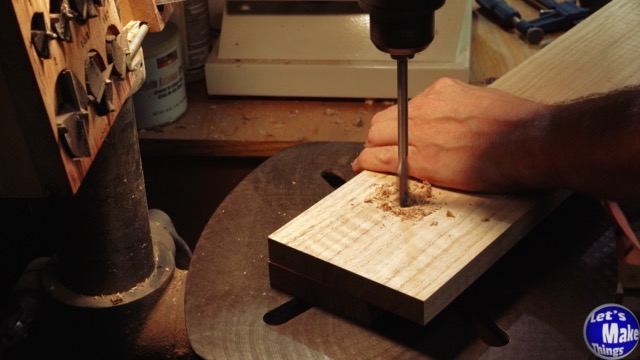
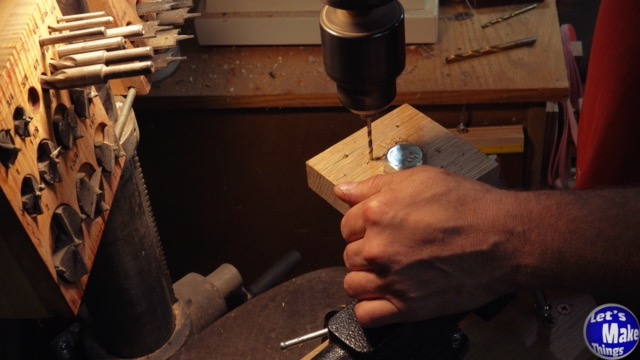
We’ll drill out the holes with a combination of bits.  We’ll start with the 5/8’s drill bit and drill through the body and back of the jaw, leaving an indelible mark on the backside of the front jaw.  Then I switched to my 15/16″ drill spade bit and drilled it the rest of the way.

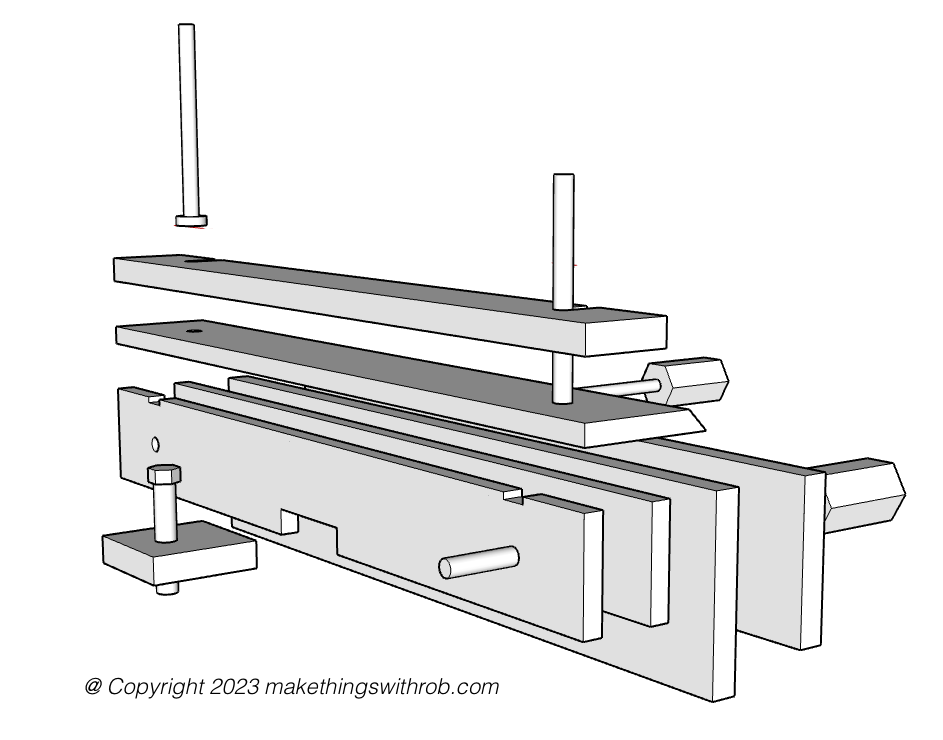
Afterwards, glue the back jaw to the body.


* Not talked about in this video but I used an 11/16’s drill bit instead of a 5/8’s drill bit so that I could add 1/2″ conduit through the body and the back jaw.  It’s a very difficult thing adding the conduit to 11/16’s holes which is why I omitted it (as well as the fact that some might not use the latch and handle part anyway), but I used a 1/2″ conduit to further enlarge the hole after I drilled it.

Click image to see this step on youtube

5. Latch and handle (optional)

The latch and handle are a very unnecessary thing to add to this vise.  I personally love it.  I wouldn’t use it without it.  It allows me to use longer handles and I’m not running into the ends as much as I was with the simpler vise.

If you’d rather use carriage bolts, like step 2, don’t feel like your downgrading this project: You aren’t.  It’s just a different way to do it.  It’s also a more expensive route as you’ll have to buy a tap and die set.  Again, for me, this was a lot of fun to make and I love using it.

The latch is nothing more than a piece of steel, cut in half and then attached with a few screws and a spring.  Click on the image that’s attached to this step to see the full build for it as it is quite long to explain.  This step will also quickly go over how to make the handles.

Click image to see this step on youtube

6. Attaching the bottom jaw

We’ll add the bottom vise to the base and the back jaw using wood glue and clamps.  It’s kind of an awkward shape so you might try adding a piece of stock to get a better glue up (as shown in the video).

Click image to see this step on youtube

7. finishing the upper and front jaws

One thing that I can’t stress enough is to use tracker runner, which can be found in any department store.  This will give your vise an excellent grip and you won’t be dependent on thick jaws to hold onto things.  Friction is sometimes better than brute force.

I also cut out the hole on the upper jaw to allow this to slide into the carriage bolts.  All very important things to do so you’re not taking the knobs off each and every time to remove the jaw.

Click image to see this step on youtube

8. Dog hole connection

If you chose to add a block of wood with a hex bolt in it to attach this to your vise, you’ll finish that process in this step.  The block of wood needs to be 4″ wide (to work with the cut out we made earlier).  The length of it needs to be the edge of your table and about an inch past the outer diameter of the hole.  The hole will also be dependent on the dog holes on your bench.

Click image to see this step on youtube

9. Knobs

You’ll either use two knobs if you chose to make the handle or four if you chose to just use carriage bolts for the vertical clamp.  Either way, I’ve prepared a video showing how to do it.  You’ll either need 4 pieces of scrap stock or 8.  This is the same knob used in the simpler version and I’m referencing the other video for this build.

Click the image to watch it.

Click image to see this step on youtube

Related videos

The bench knob

Quad Vise handle

Tip Jar

If you enjoyed or found this useful, throw me a tip →
To support me with patreon, click here → Patreon Click here to Subscribe to me on youtube → Youtube

If you found any errors on the page, please use my email below and contact me!