In December of 2021, I found this amazing material that I promised would revolutionize my workshop. Below is a project that I made with a scrap piece of plywood that allows me to cut really thin pieces of wood, safely. Much like the Grrripper push block, I’m able to hold material down easily, but this is a far cheaper, inexpensive alternative. And if I cut into the tracker runner carpet, I can very easily and cheaply replace it, unlike the expensive gripper push block.
The added bolt on the side allows me to raise the edge up so that, like the gripper, I can safely keep the push block parallel to the table top. But unlike the gripper, I don’t need to go through a series of twists and pulls to position things just right.
watch all steps in this video before starting
Please use the material and tool list below as a guide to finding the products locally.
As an amazon associate I earn from qualifying purchases.
Caring For Your Grippy
Before we get started, learn a little bit about the “Tracker Runner” that I talk about. You’ll want to know this before you pick up your own “Tracker Runner” at the store.
Step by step instructions
Step 1
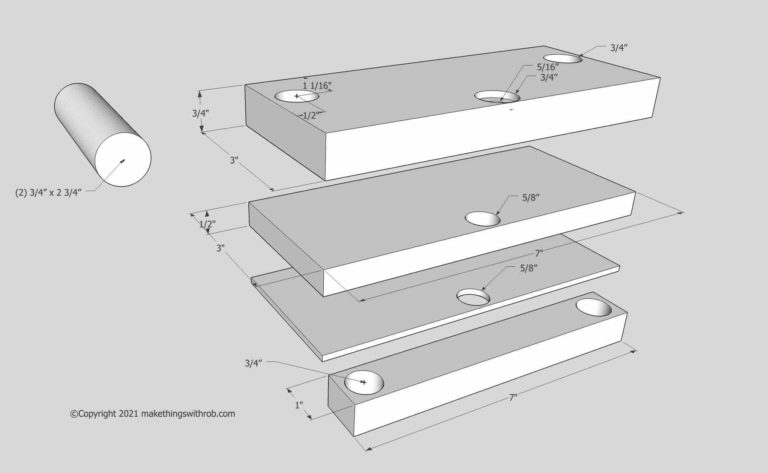
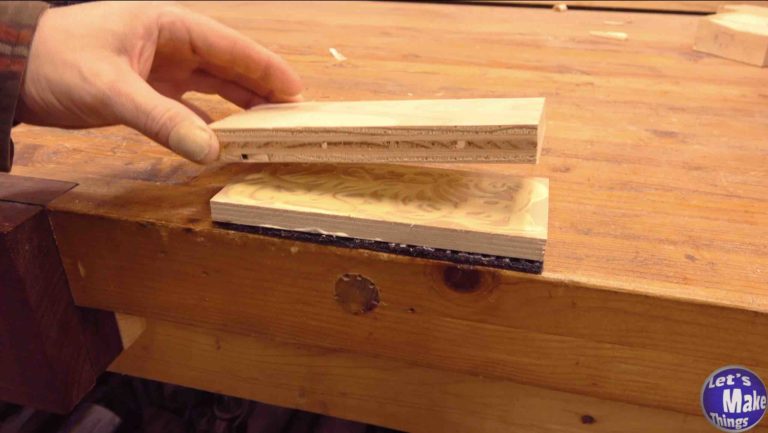
In this step, we’ll glue our 1/2″x 3″ x 7″ plywood piece to both the Tracker Runner as well as the 3/4″ x 3″ x 7″ plywood piece. We’ll be using Mod Podge glue to attach the fabric side of the Tracker Runner to the 1/2″ plywood piece.
Click image to see this step on youtube
Step 2
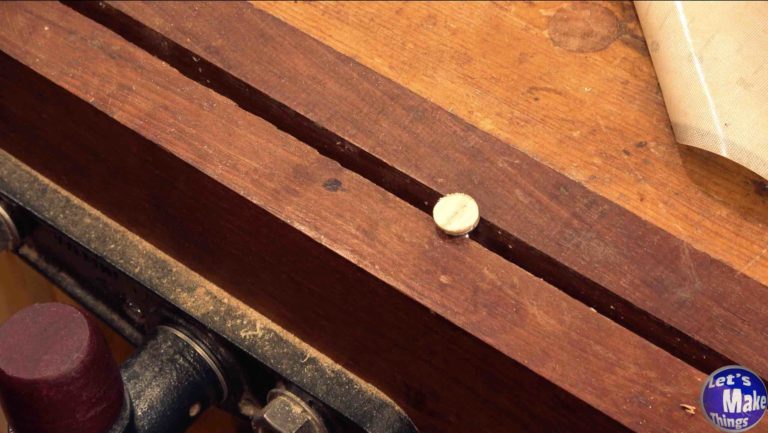
We don’t want our bolt head to scratch up our table saw, so we’ll add a thin wooden disk to the head of the bolt. I used a carriage bolt for this and needed to grind the coned head flat. You might be able to do the same thing with a hex head, just make sure the bolt is fully threaded. After ground, I used a little 2 part epoxy to attach it.
Click image to see this step on youtube
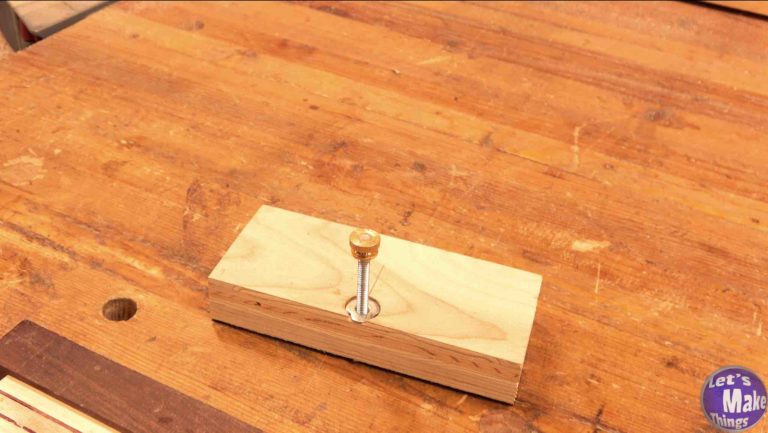
Step 3
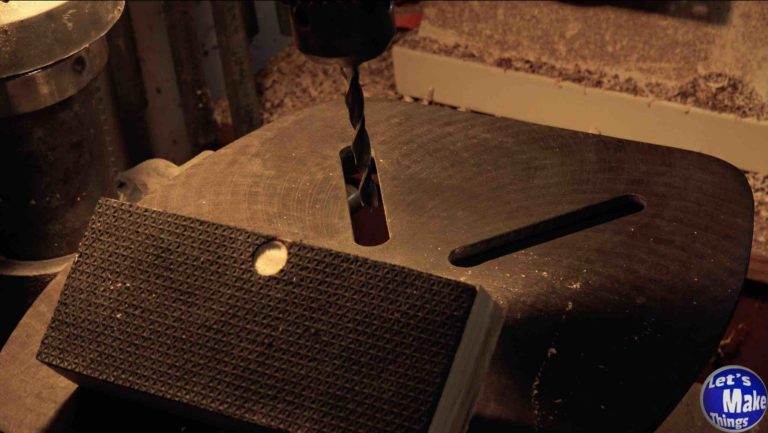
Once our block of wood is dry, we’ll find the center of the block on the long edge and add a mark at 3/8″. We’ll use a thin drill bit that’s no bigger than a 1/16″ wide and drill straight through the block at the 3/8″ mark. We’ll use a 5/8″ forstner bit to drill through the hole we made on the pad side of the block. You’ll need to drill in only enough with the forstner bit that the bolt we created in the last step will be able to fit, fully retracted.
Click image to see this step on youtube
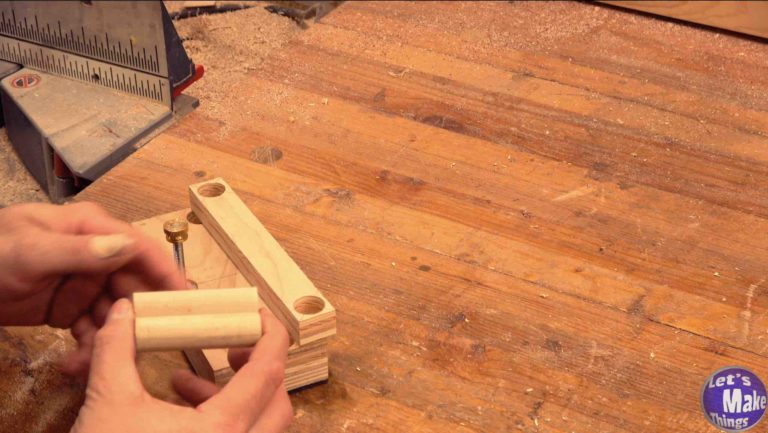
Step 4
On the opposite side of the hole you made (the wood side), we’ll use a 3/4″ forstner bit and drill enough in that we can fit a 1/4″ t-nut head. Of course, we’ll need to drill 3 holes out for the tines of the t-nut. Finally, we’ll drill the rest of the hole out with a 1/4″ brad point bit. We’ll use a little 2 part epoxy for the t-nut and turn the bolt so that it is pulling the t-nut into the block.
Click image to see this step on youtube
Step 5
You can make the handle a number of ways, or you could buy one. In this video, I used a 3/4″ x 1″ x 7″ board and added a piece of carpet tape to the top of the block. I used a speed square on both sides, finding the center of the 1″ block of wood on the edges, and brought the taped pieces to the drill press where I drilled 3/4″ holes with the 3/4″ forstner bit. I drilled down an inch and a half into the base.
To finish off this pushblock, I used (2) 3/4″ x 2 1/2″ dowels, added glue and hammered the dowels through the top and into the base. Of course, you can round the edges of the handle with a router or a sanding block to make it more comfortable to use.
Click image to see this step on youtube
Operation
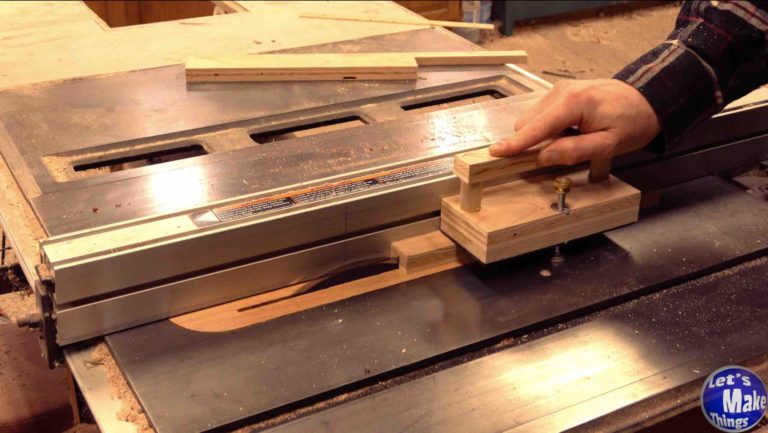
One thing you’ll have to remember when you use this push block is to set your blade to be just slightly higher than your stock. Because the Tracker Runner is an 1/8″ thick, raising the blade less than an 1/8″ will not damamge the wood but only cut into the padding. This means that you can always scrape the padding off and put a new padding on, giving the block years of life. A lot of sacrificial push blocks I’ve seen are chewed up after a few pushes through the table saw, so I hope this brings a lot of value to you.
Pushing the block with a full size stock isn’t any different than any other push block. But let’s say you have a thin piece of stock that you want to rip an 1/8″ off of. This will allow you to position the bolt so that the pushblock stays perfectly parallel to the table saw top.
I want to thank you all so much for checking out this webpage. This website is done out of a labor of love as I have dedicated it to help others that are new or looking to do newer, creative woodworking things. Unfortunately, there are a lot of expenses. If you’d like to add a few bucks to the tip jar or even sign up for patreon, it would help greatly to keep this website going.
If you’d like to support me through Patreon, you’ll get these benefits:
Weekly exclusive video
Early Access to both my Make Things and Let’s Make Things Channel
Get recognition at the end of each of my main channel videos for your contribution