
Simple Grippy Pads
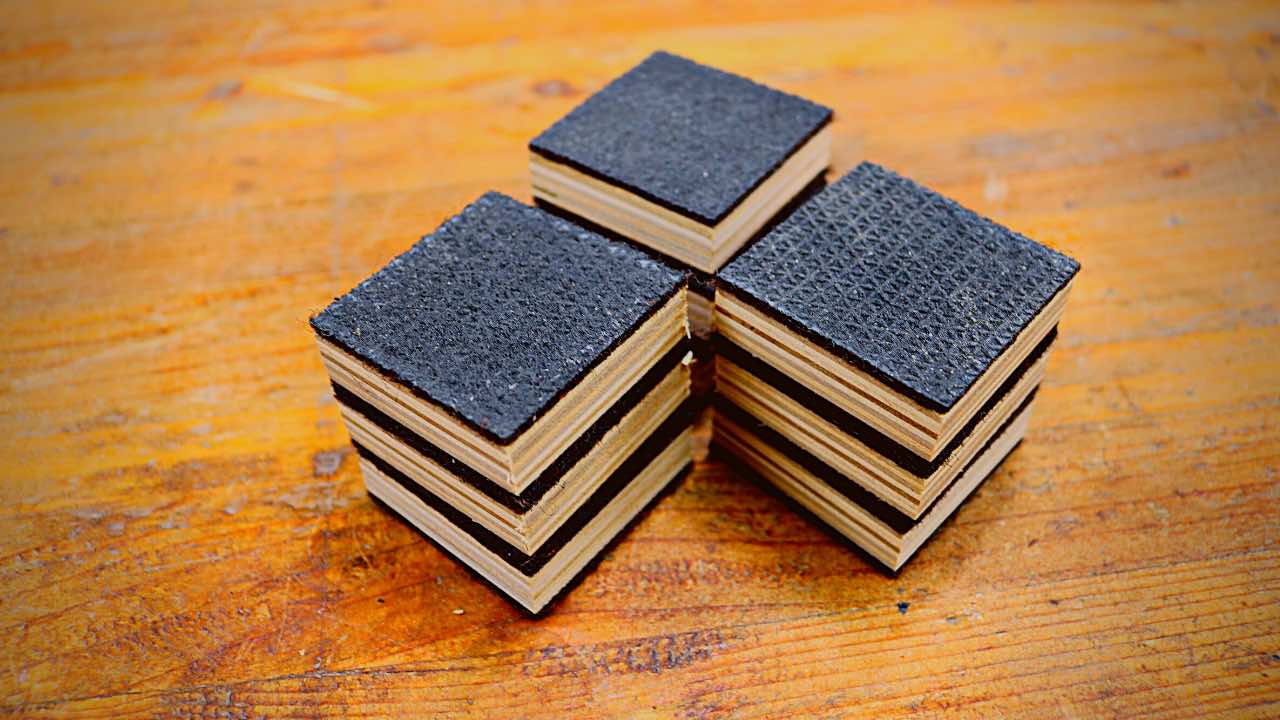
These powerful little guys will give you a grip when you need it. Use them between clamps to prevent movement, under projects when you use your sander and as risers!
We’ll be covering everything in this video, on this webpage.

Materials Needed
1/2″ plywood scraps
Tracker Runner (also try Menards where I found it to be $2 less per foot)
Caring For Your Grippy
Before we get started, learn a little bit about the “Tracker Runner” that I talk about. You’ll want to know this before you pick up your own “Tracker Runner” at the store.
EDITORS BIG NOTE:
Before you start, I need to confess something: I do not like the size of my 2 inch by 2 inch Simple Grippy Pads. I strongly suggest making them 3 inches by 3 inches. If you’re using these Simple Grippy Pads in conjunction with the Grippy Boards, than the 2 inch by 2 inch will work fine. In the instructions below as well as the video, I show how to make the 2 inch by 2 inch variety, so you’ll need to replace what I say with 3 inch blocks.

Step 1
First we’ll start off by cutting a couple strips of Tracker Runner that are 2 inches wide. Mine was 26 inches wide, so you potentially have the ability to make about 12 blocks from (2) 2 inch strips. One problem I ran into when I cut mine was that there were a lot of shredded fibers that were left behind. To fix that, I used a blow torch. You only need a little fire, so don’t go burning the rubber.
Note: Clicking the picture on the right shows this step in motion at youtube.
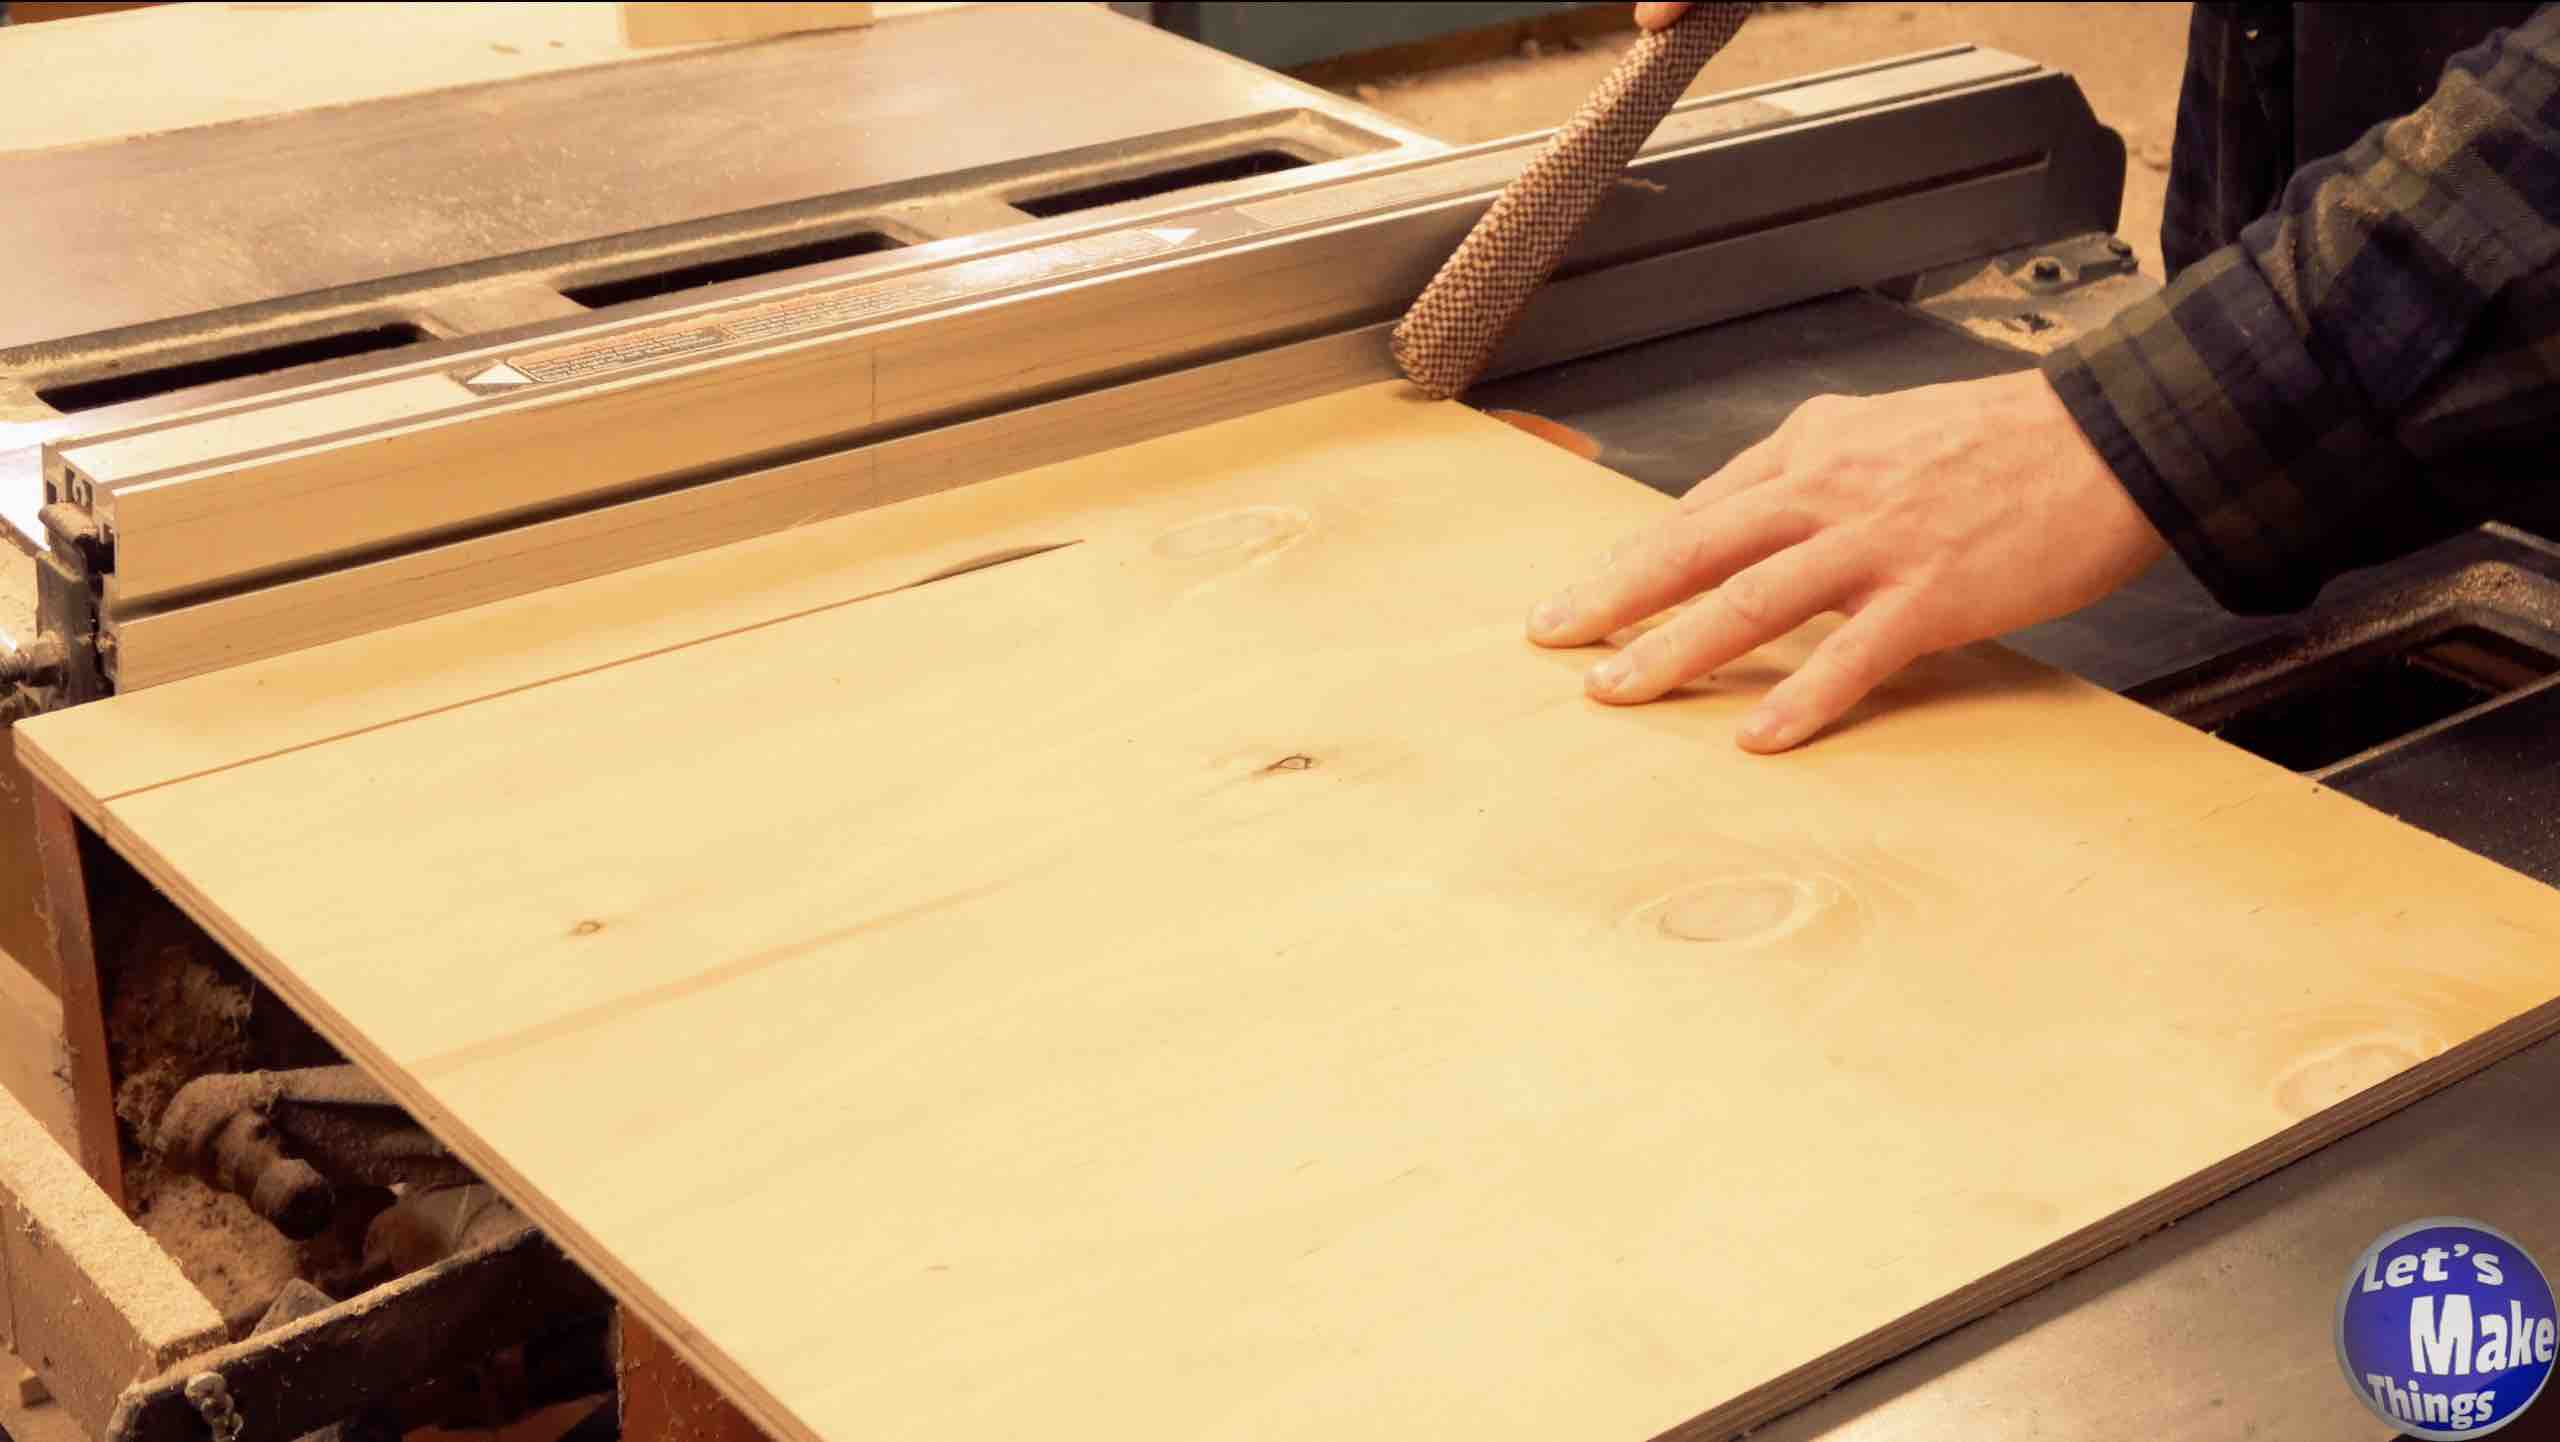
Step 2
This step is easy. Cut a 2 inch strip of 1/2 plywood. If you’re looking to make 12 of them, you’ll want about 25 inches as your length.
Note: Clicking the picture on the right shows this step in motion at youtube.
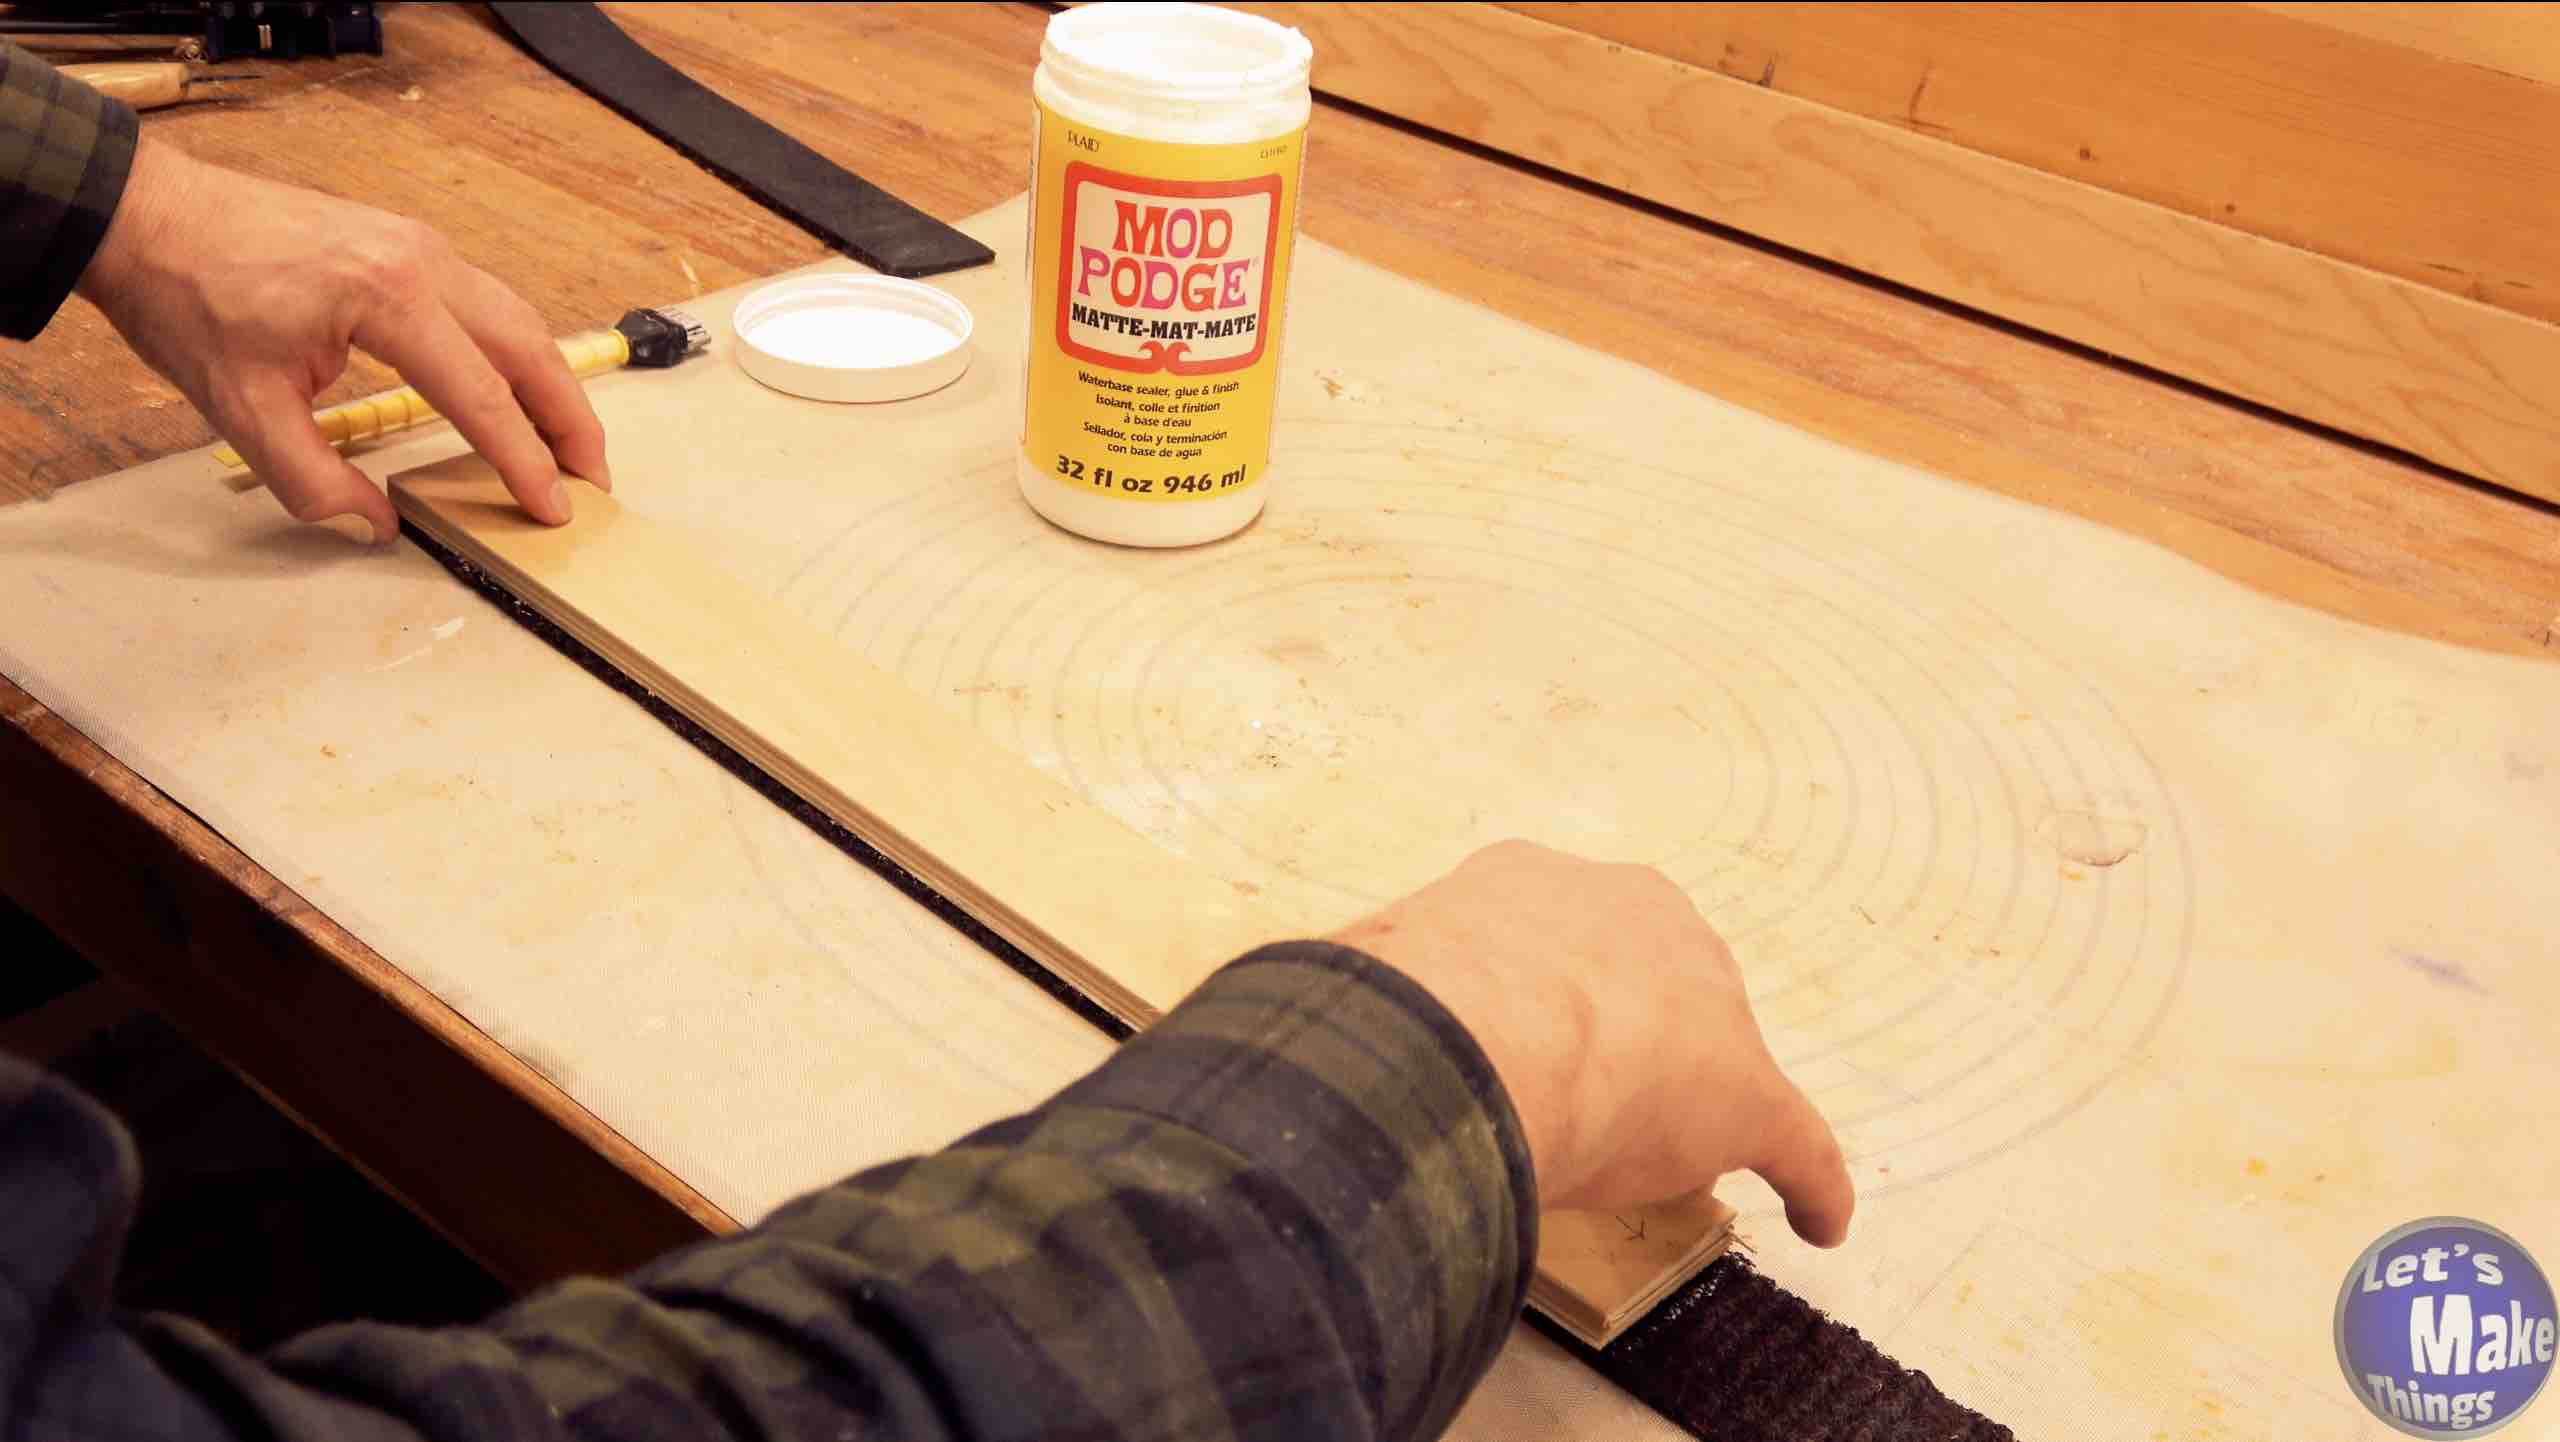
Step 3
Now we’ll use a little Mod Podge fabric glue. This stuff is fantastic! I tried a variety of glues (epoxy, wood glue, flex seal) to see what would stick best to both frabric and wood, and this won hands down. Make sure you put a good layer on as the fabric side will soak it up. Speaking of fabric side, be doubly sure that you place the fabric side against the glue, and not the rubber. You’ll need to do a top and bottom piece.
Note: Clicking the picture on the right shows this step in motion at youtube.

Step 4
Add clamps. But make sure you put a spare block above the top 2 inch section of the tracker runner. You need a good clamping pressure so that it is evenly pressed along the 2″ strip of wood.
Note: Clicking the picture on the right shows this step in motion at youtube.
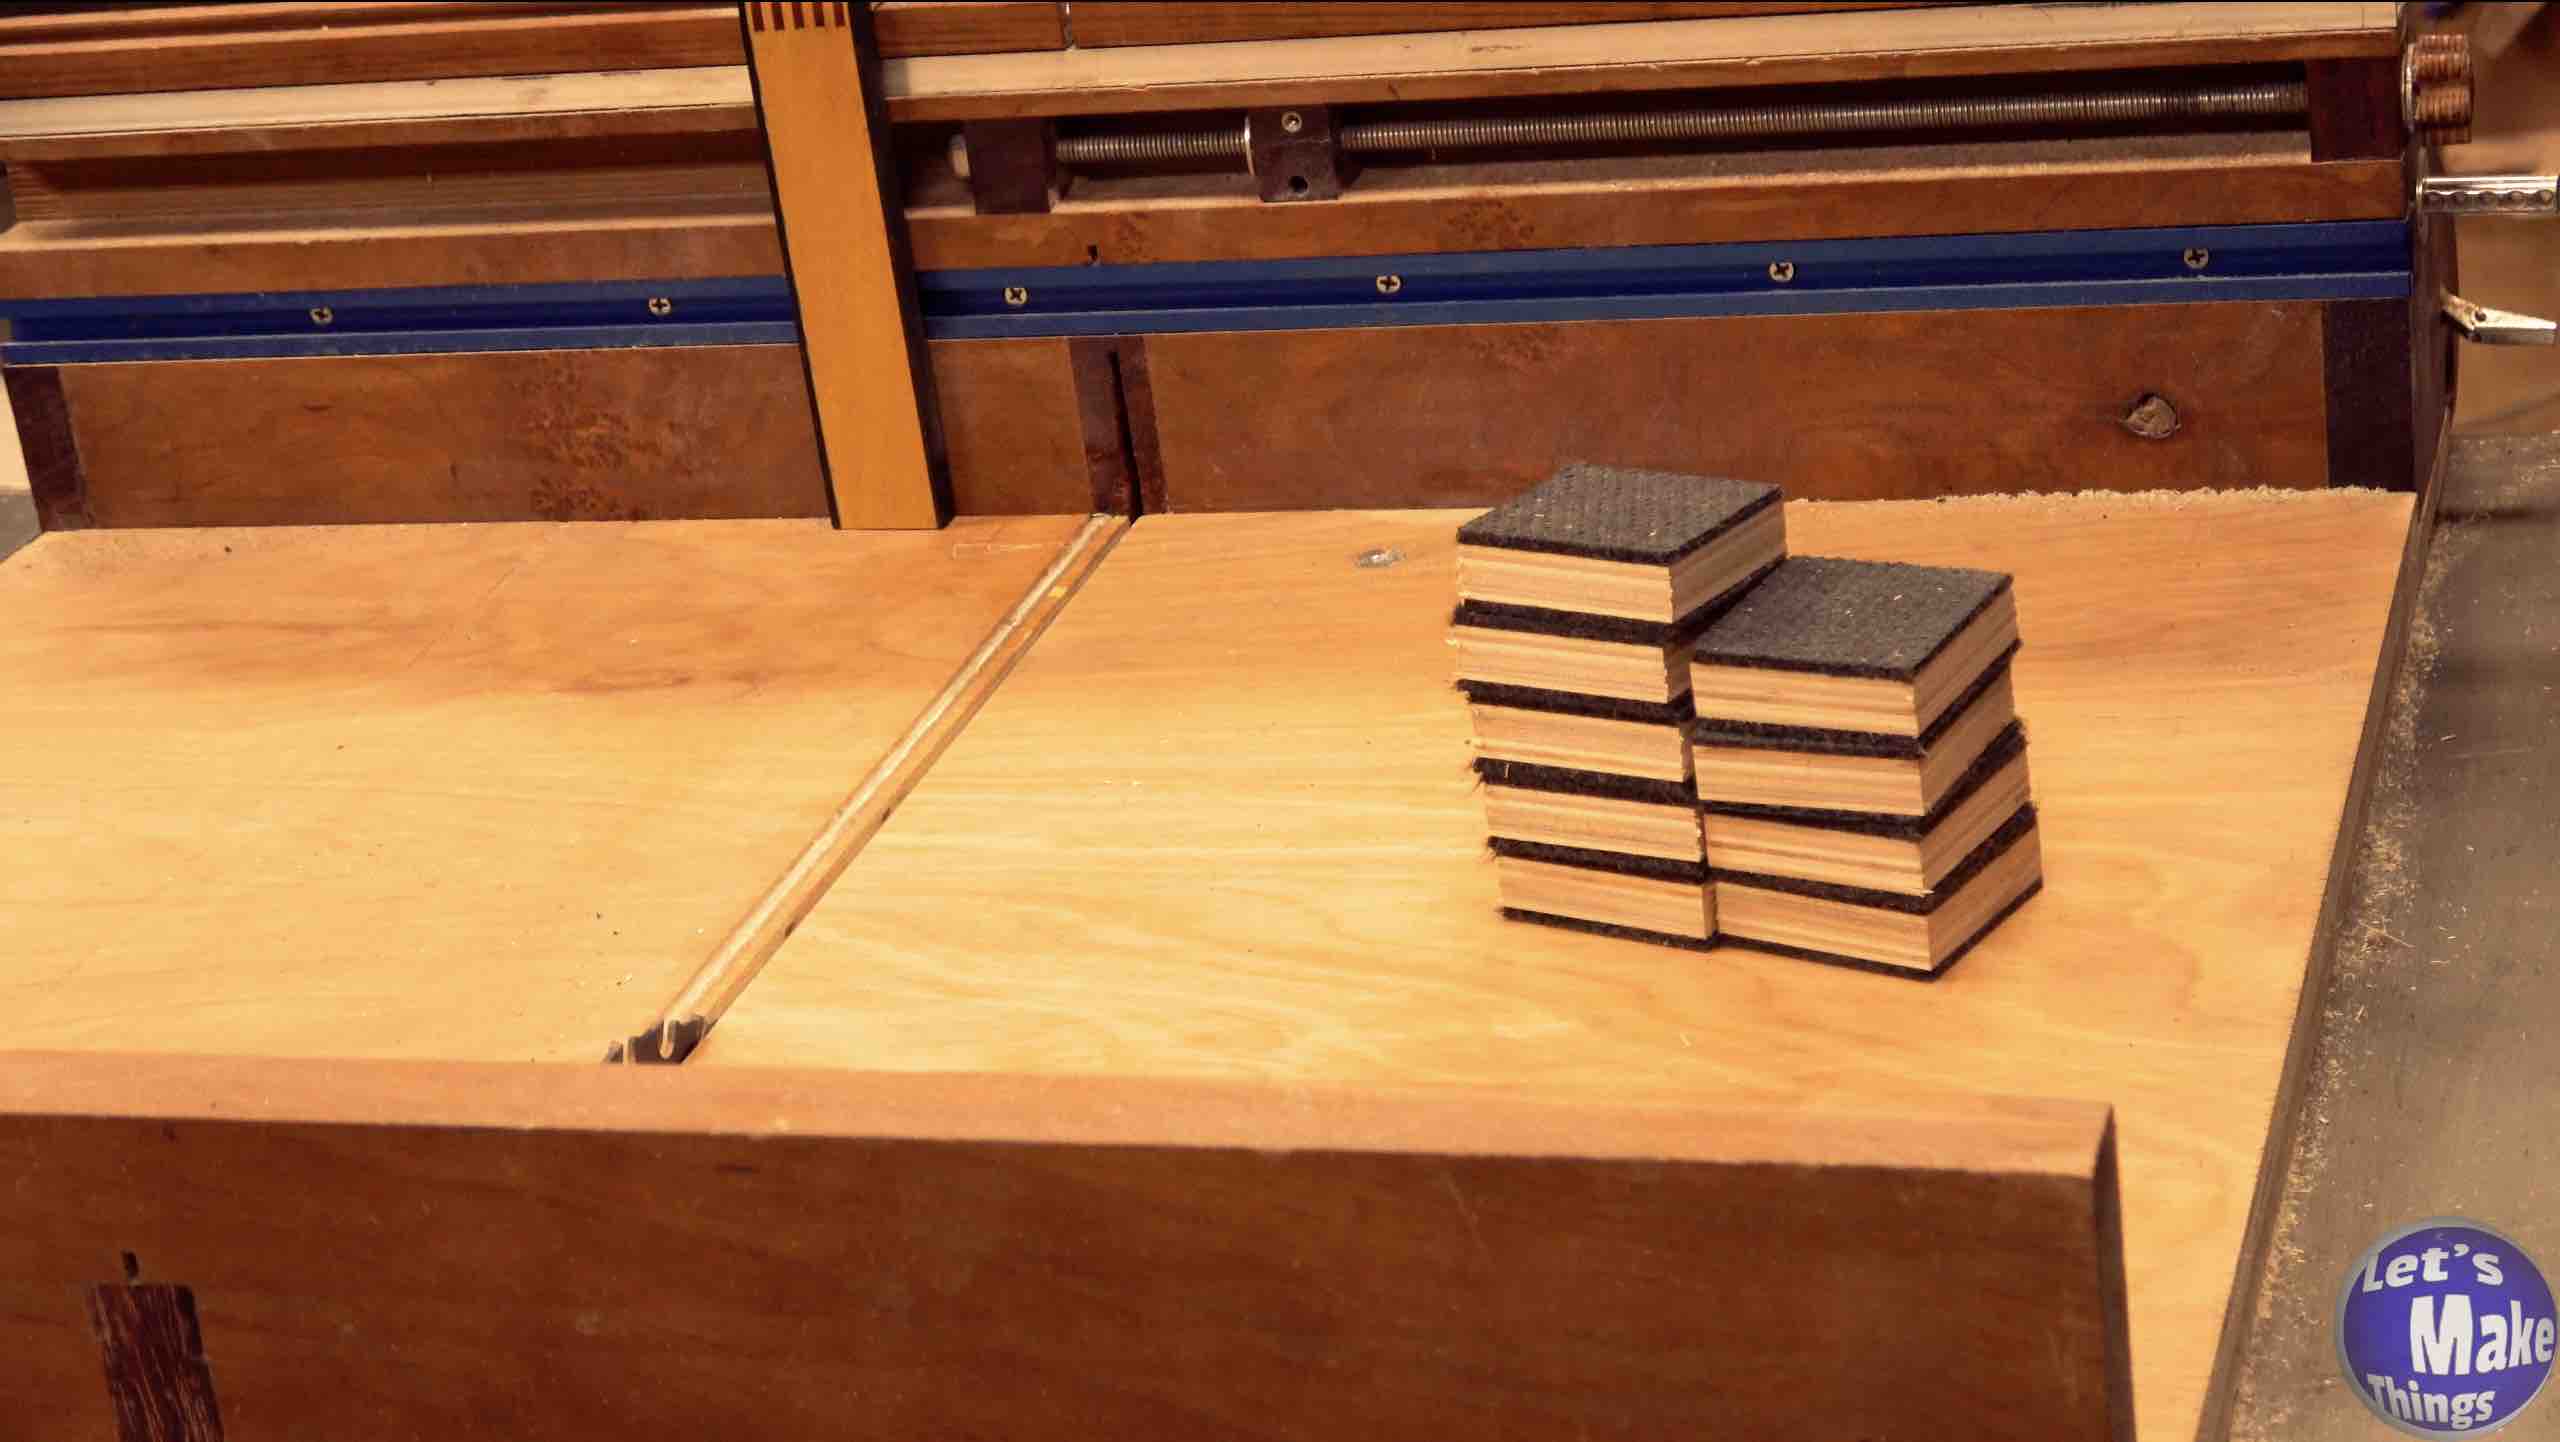
Step 5
Now we’ll use a table saw sled (you could use a bandsaw or a miter saw alternatively) and we’ll cut these into 2 inch sections. When I did this originally, I cut all my blocks into 2 inch sections before adding 2 inch tracker runner backing…what a mess it was. This way worked the best and gave me nice clean edges when I was done.
Note: Clicking the picture on the right shows this step in motion at youtube.

Tip Jar
If you enjoyed these free plans and have a few bucks sitting around, why not help us keep the website going and feed the tip jar? Completely optional!