
Grippy Chocks
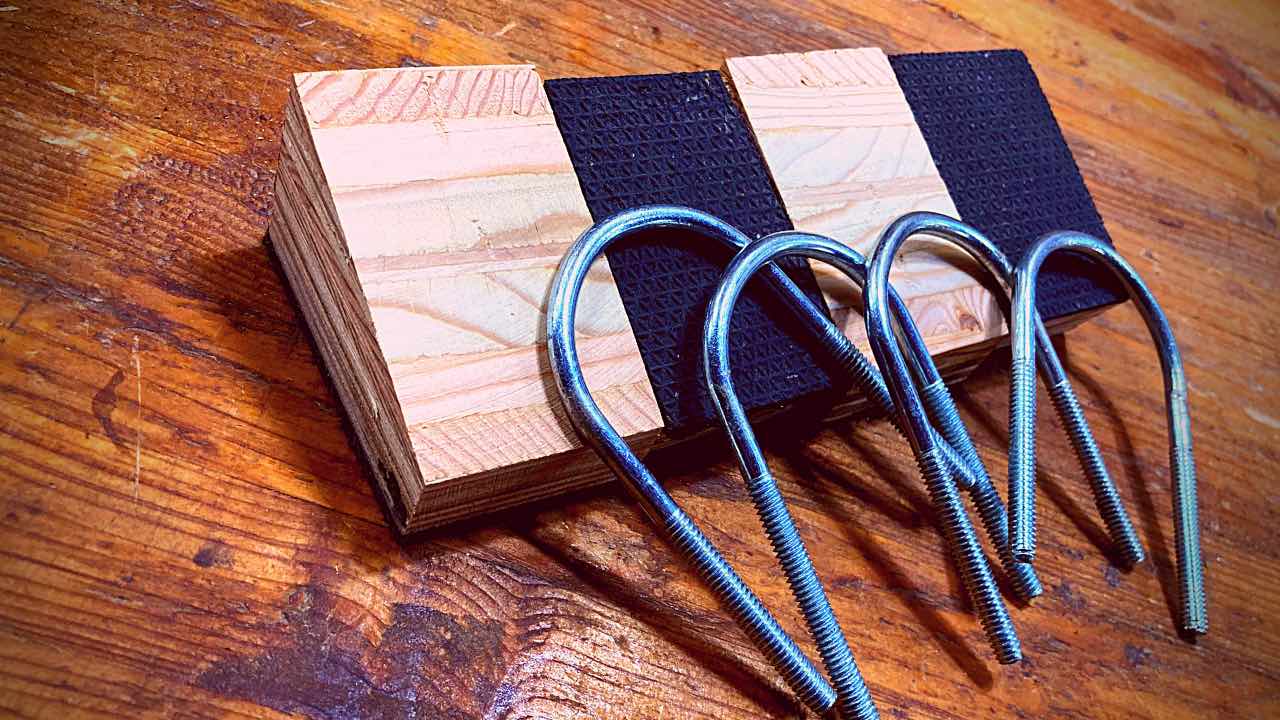
Grippy Chocks help lock your work to the Grippy Boards. Think of these little buggars as mini clamps to hold your work down!
We’ll be covering everything in this video, on this webpage.
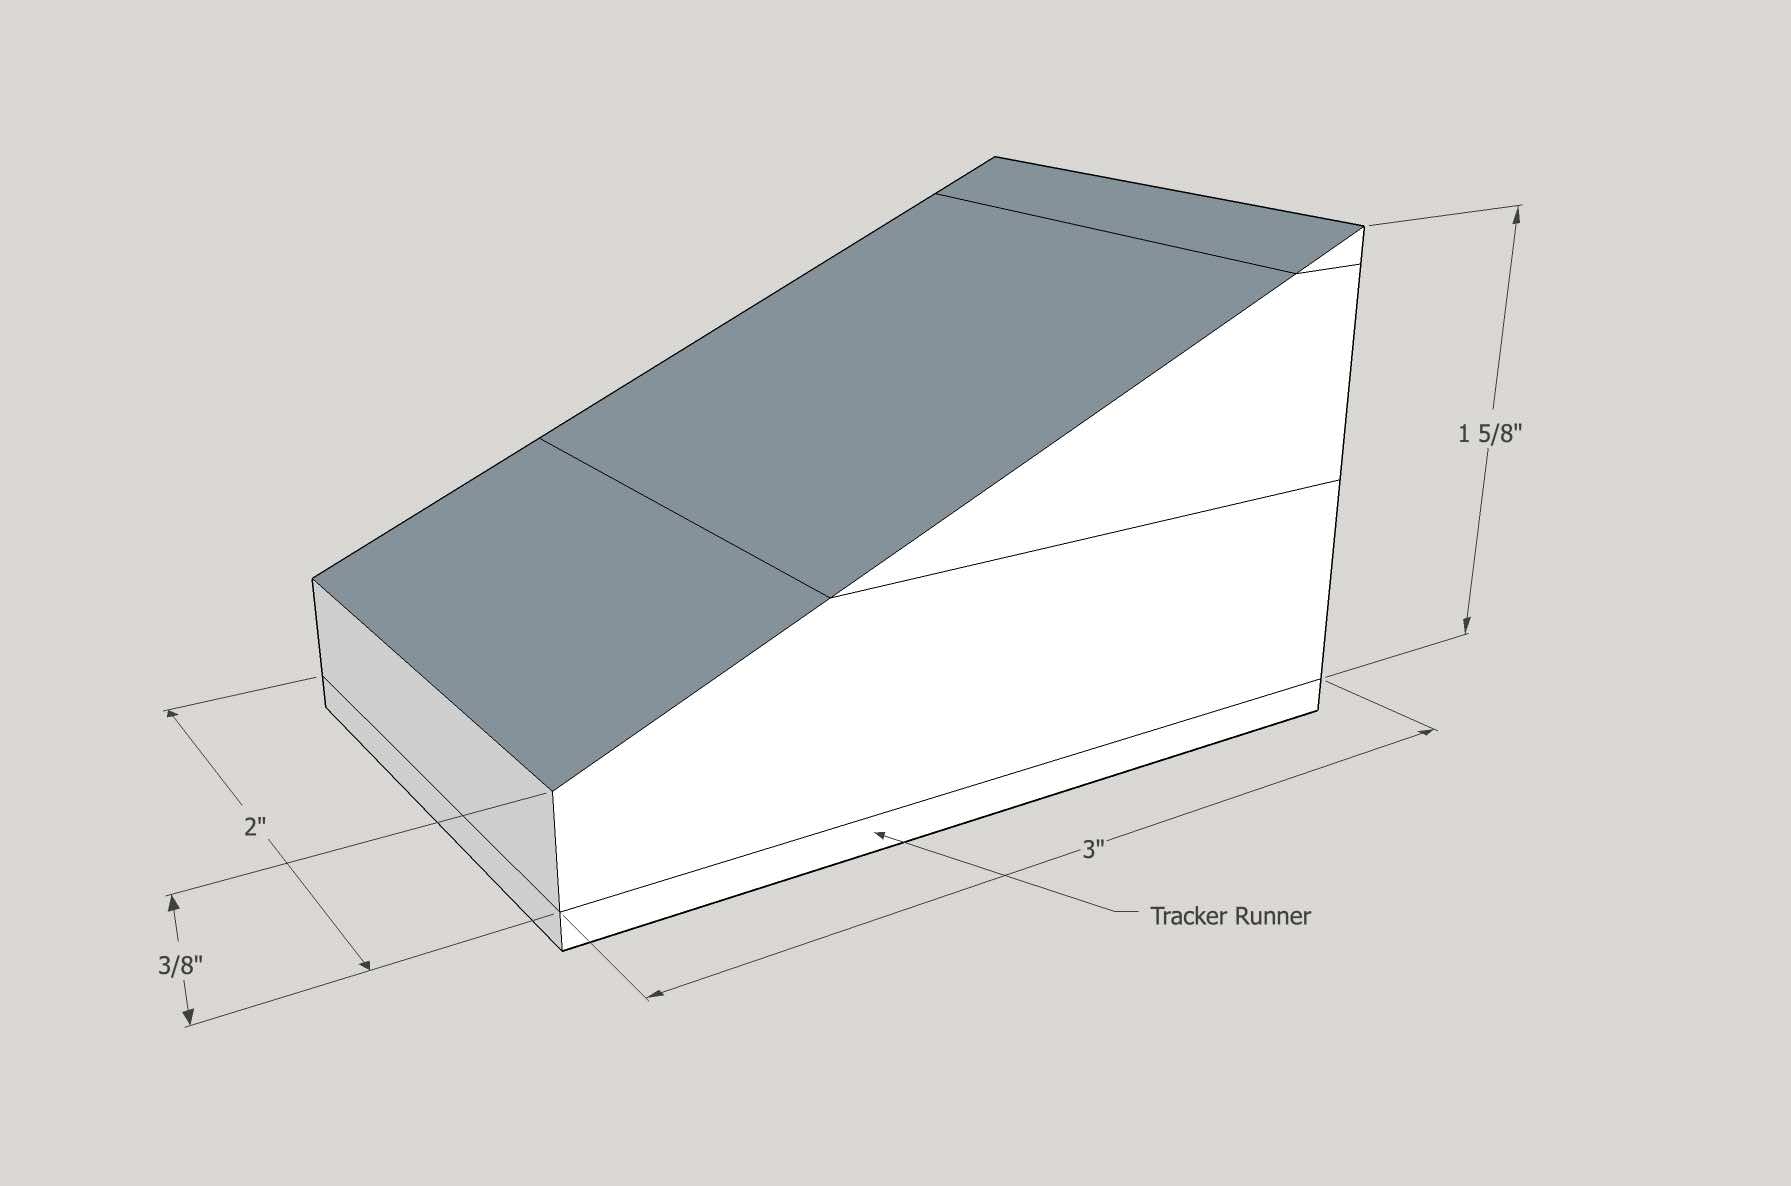
Dimensions
Though this is a pretty simple design, I know some people like to see the dimensions. I’ve made dimensions here.
Materials Needed to make 4:
(4) 1/4″ x 2 1/16″ x 3 7/16″ U-Bolt (#310)
(8) 3/4″ x 2″ x 3″ plywood scraps
(4) 1/2″ x 2″ x 3″ plywood scraps
(4) 2 1/2″ x 3 1/2″ Tracker Runner
Salt (to taste)
Note:
This project is intended to go with the Grippy Boards. If you’re interested in making that project, click on the picture to the right or go to the top and click on the “Grippy Boards” tab.
Caring For Your Grippy
Before we get started, learn a little bit about the “Tracker Runner” that I talk about. You’ll want to know this before you pick up your own “Tracker Runner” at the store.
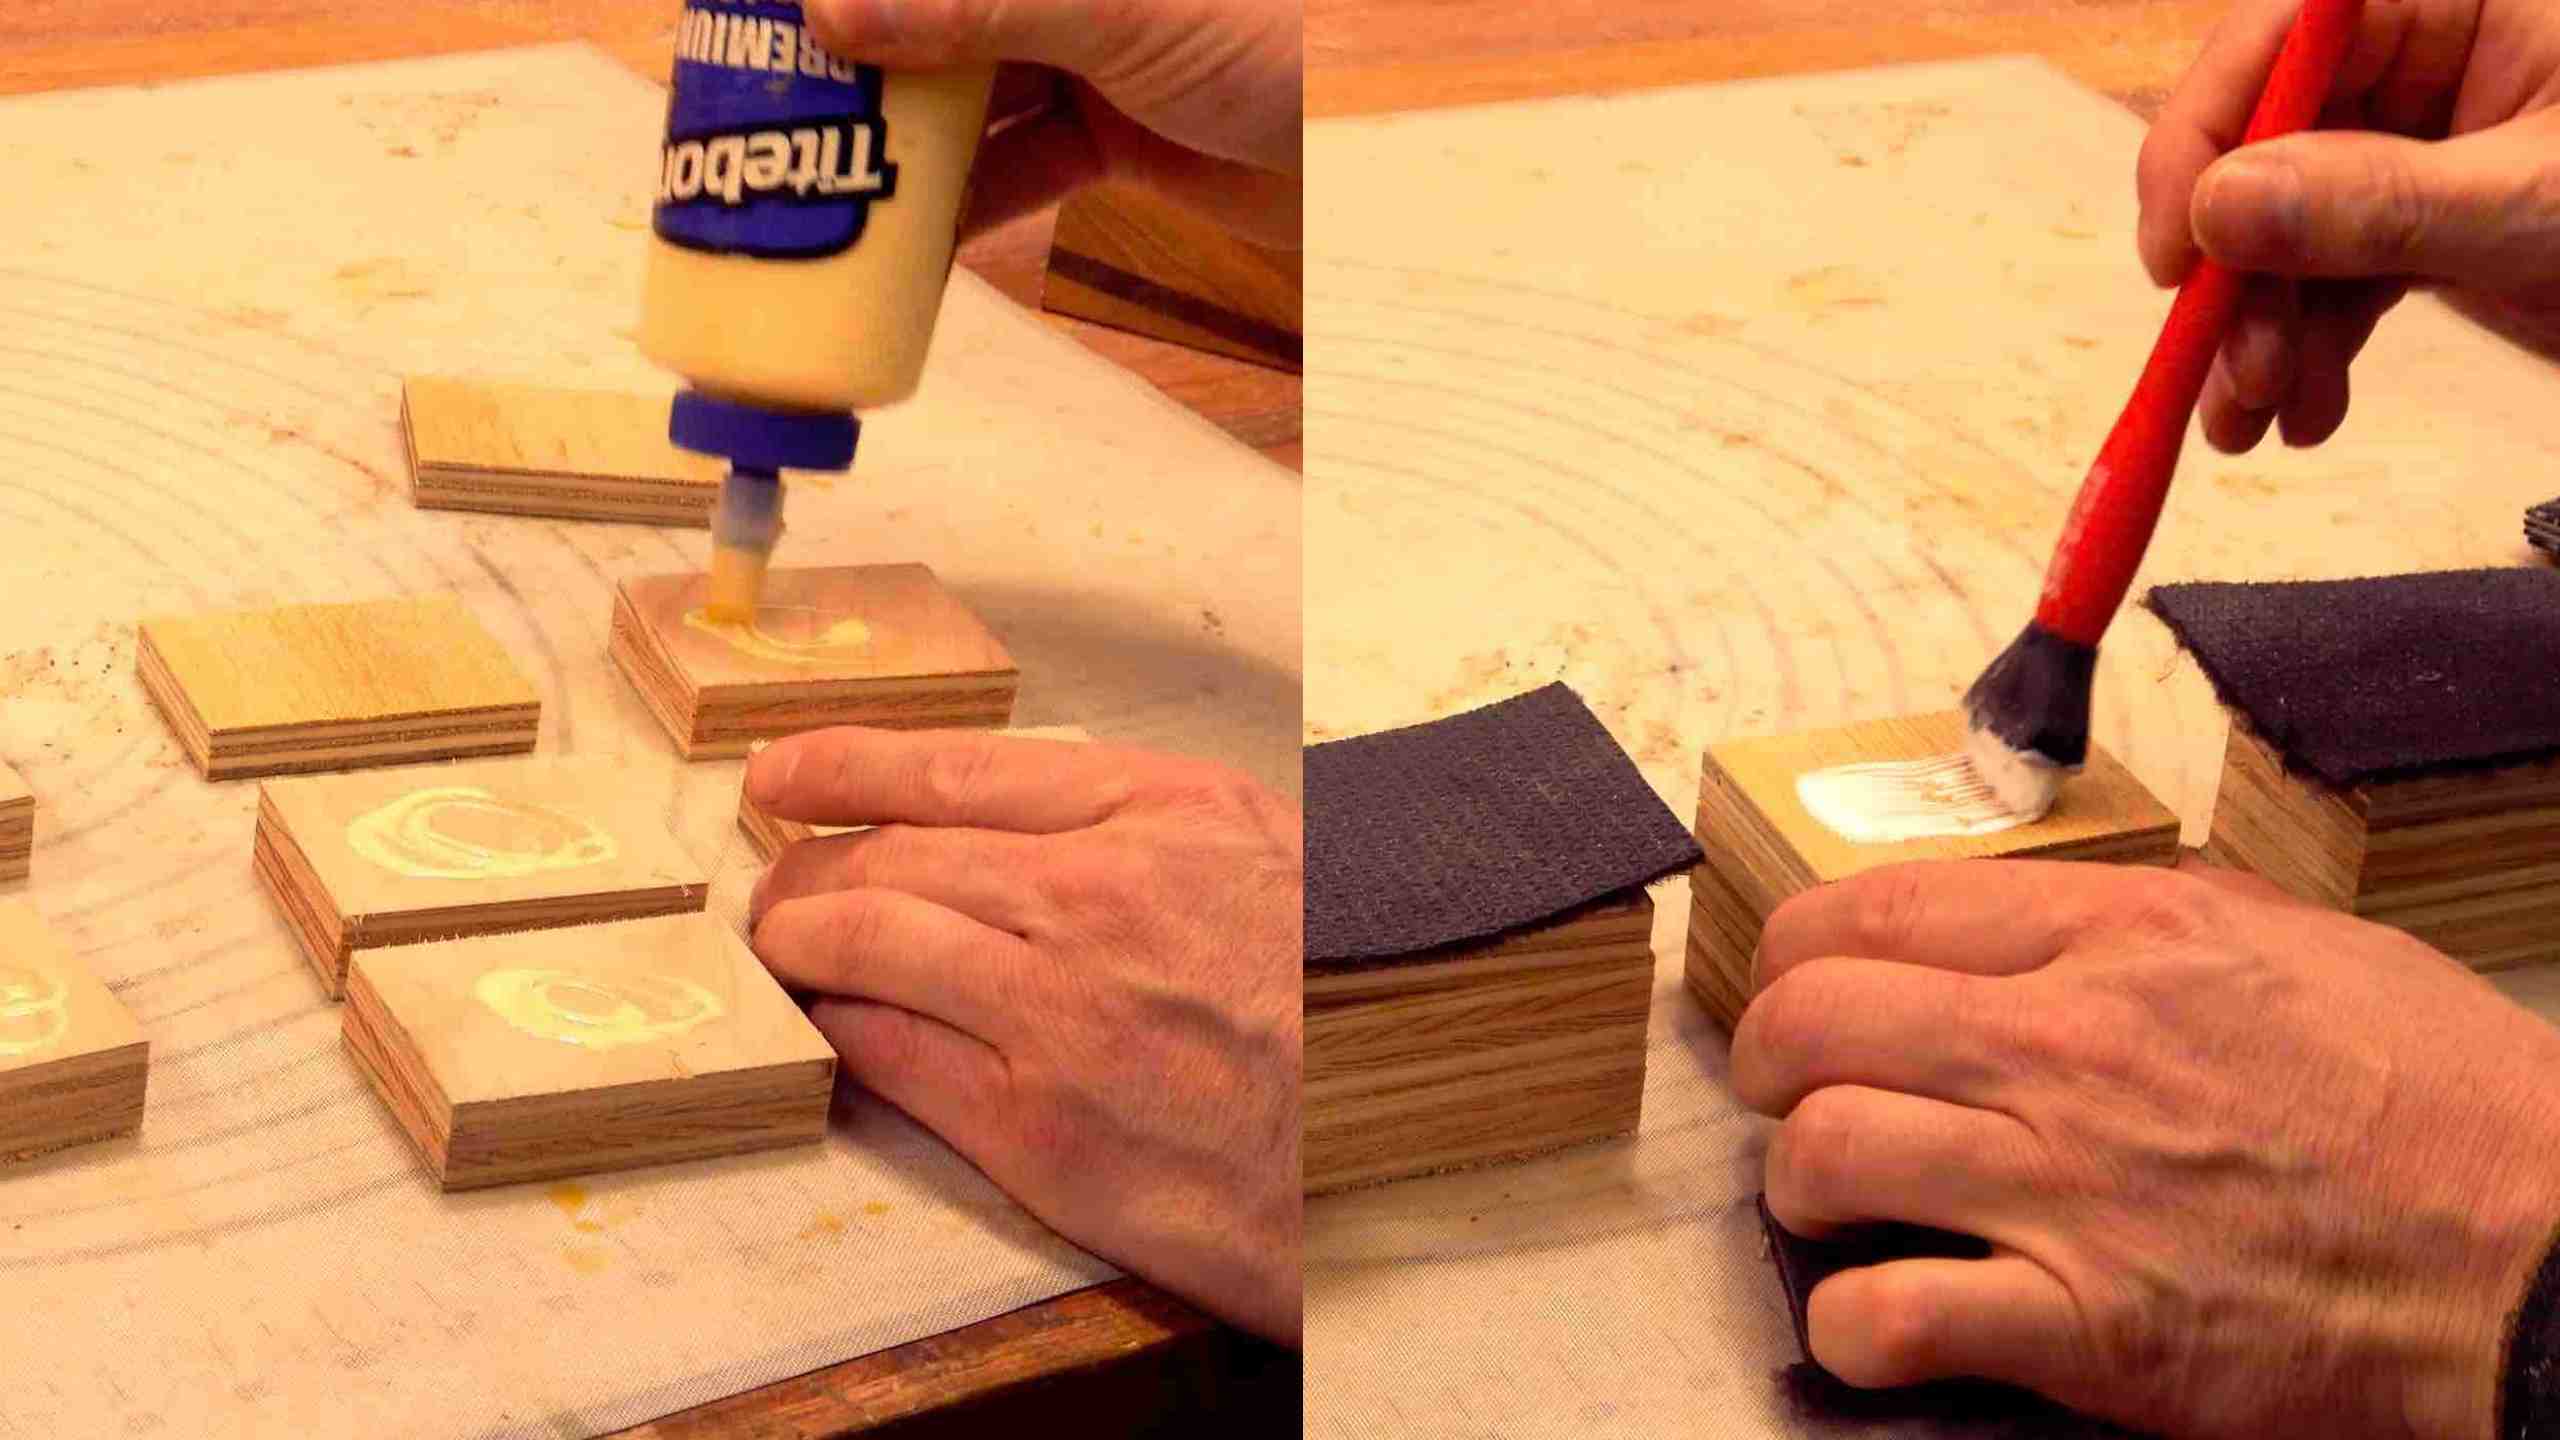
Step 1
In this step, we’ll do all of the gluing. Your material should already be cut and ready to go. After buttering both 3/4 inch plywood pieces, I added a few grains of salt to each surface. I know this is a controversial idea, but I have found that it keeps my wood from sliding around as they’re clamped. I don’t always use salt, but usually do for smaller blocks of wood as they tend to want to slip around more.
After all have been freshly glued, we’ll turn to the tops and add a layer of Mod Podge glue. With the (4) 2 1/2″ x 3 1/2″ pieces of Tracker Runner, we’ll stick them on the top.
Note: Clicking the picture on the right shows this step in motion at youtube.

Step 2
With the 4 layers glued, we’ll add a handful of clamps and squish our neapolitan sandwiches to our work benches. Give these guys about 4-8 hours to dry before moving on to the next step.
Note: Clicking the picture on the right shows this step in motion at youtube.

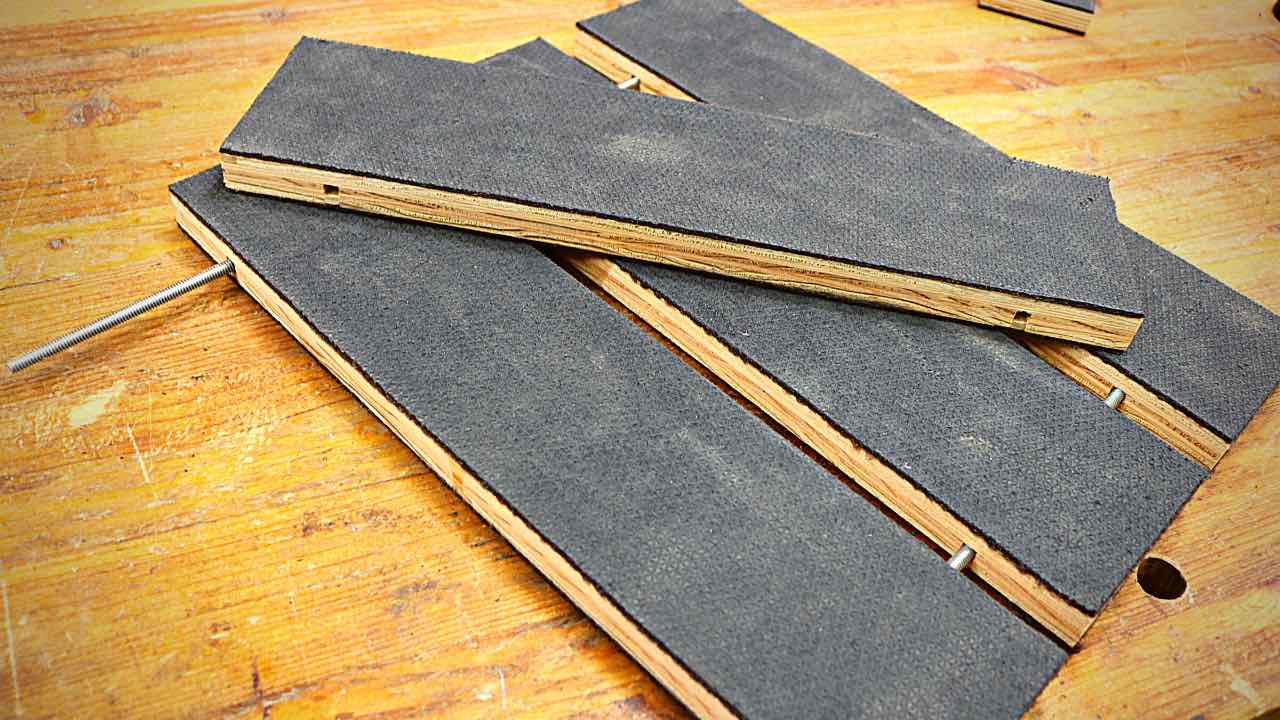
Step 3
Since we did overlap the Tracker Runner, we’ll cut the extra off. I used my belt sander, you could use your bandsaw, a table saw sled or just a knife.
It’s time to draw a diagonal line to the sides of these now dried blocks. Measuring, from the bottom of the Tracker Runner, we’ll go up 7/8 of an inch on one side and 1 3/4 of an inch on the other (this is, of course, on the 3 inch side of our block). Then we’ll draw a line. With our line drawn, we’ll cut it on the bandsaw.
Note: Clicking the picture on the right shows this step in motion at youtube.

Usage
Think of these little guys like they’re tire chocks, except, instead of keeping cars from moving, they’ll keep the wood stock from moving. While I don’t think these are absolutely necessary, I know most people would like to have a little more peace of mind when they start up their equipment (like routers or circular saws).
Note: Clicking the picture on the right shows how to use these “Grippy Chocks” at youtube.

Tip Jar
If you enjoyed these free plans and have a few bucks sitting around, why not help us keep the website going and feed the tip jar? Completely optional!